|
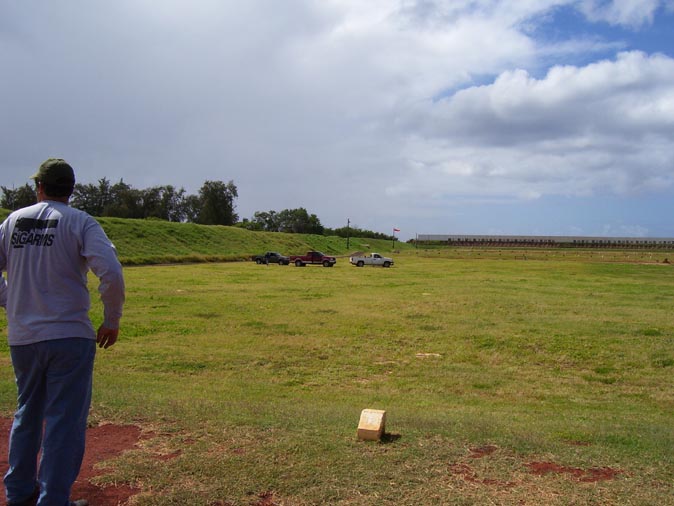
Training is THE priority
For those who wish to carry a defensive sidearm or employ any firearms for defense,
you MUST train regularly AND maintain the highest standard of firearms proficiency!
Jumps to course reports and pictures:
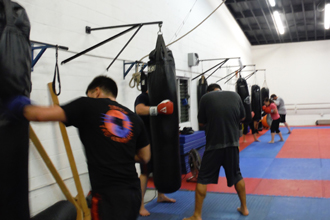
Smith TKD: Kickboxing
Advanced Rifle Gunfighting
Submachine Gun Gunfighting
Four Day Combat Rifle
Combat Pistol Instructor
Combat Rifle Instructor
Defending and Fighting in Structures
Kalashnikov Rifle Gunfighting
Advanced Kalashnikov Gunfighting
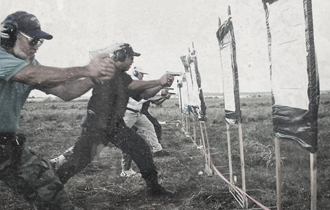
Force-On-Force Gunfighting
Extreme Close Range Gunfighting
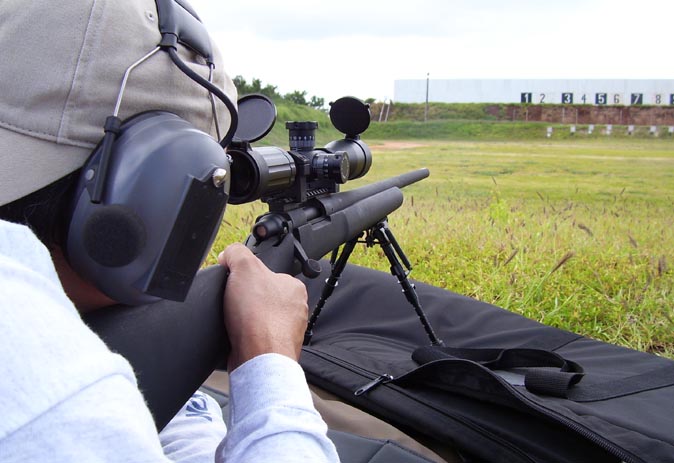
Guerrilla Sniper 1
Guerrilla Sniper 2
Precision Rifle Course I
Precision Rifle Course II
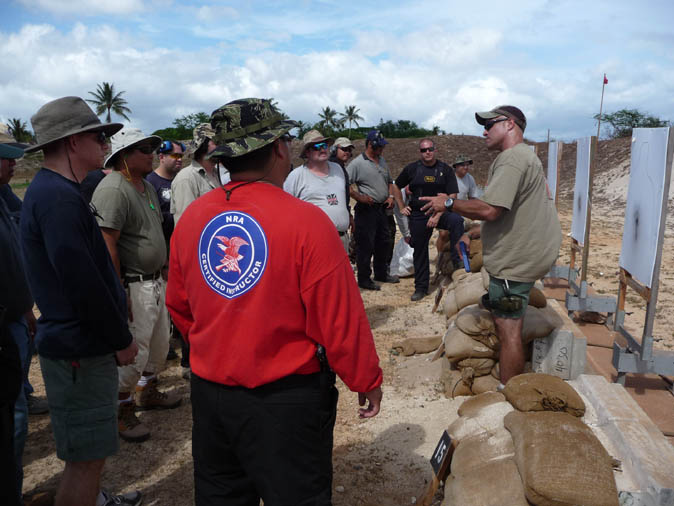
MIssion Bravo Basic Handgun Class Saturday May 6
$150 cash: Sign up now! SmithTKD (808) 247 3114 M-F 3:30-6:30pm
More information : MissionBravo.com
Review and build up vital skills with your defensive handgun!
Want to get your first handgun? Take this course and get the HPD
handgun permit process done before their prerequisites change!!
Proposed change date is July 1, 2023 : don't procrastinate or you may
not be able to go thru handgun acquisition for many months while
they delay procedures and requirements an unknown span of time!
You'll need: Pistol; 250rds, holster, minimum 3 mags, mag pouches
eye & ear protection, lunch, water, hat, shoes, long pants (no shorts)
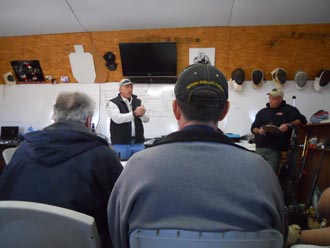
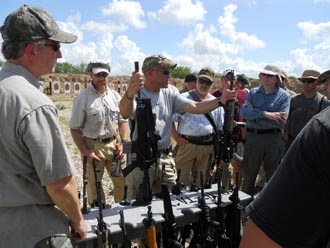
Mission Bravo Handgun class w/ Master Smith of Smith Taekwondo Kaneohe
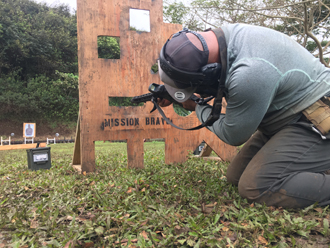
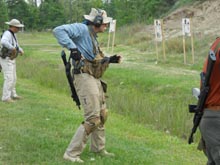
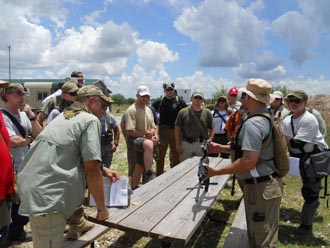
Mission Bravo Carbine class w/ Master Smith of Smith Taekwondo Kaneohe
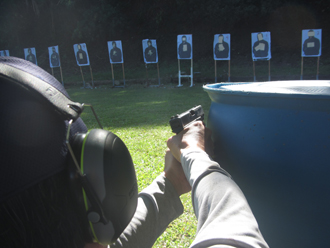
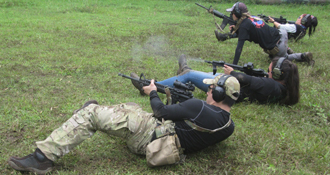
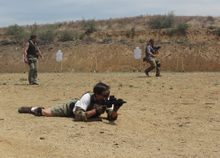
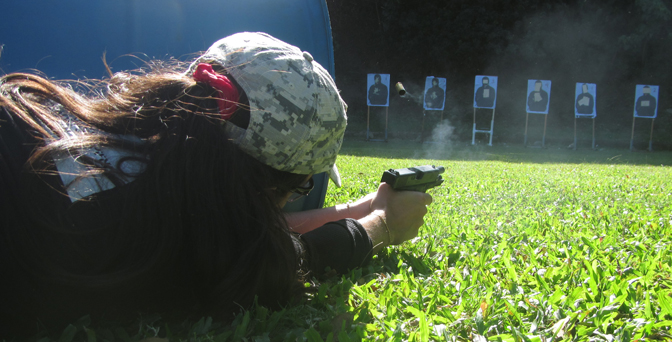
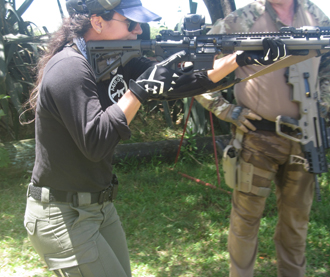
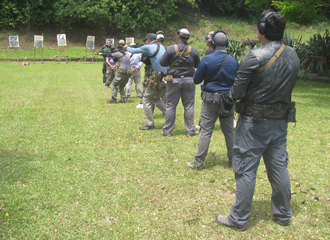
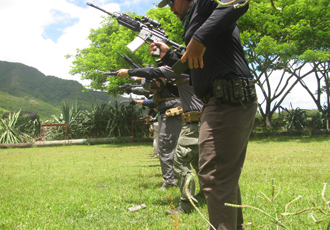
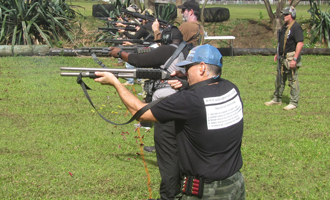
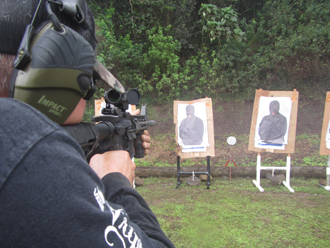
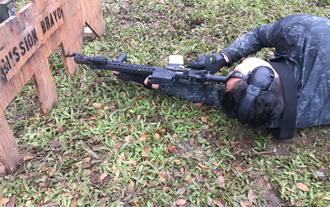
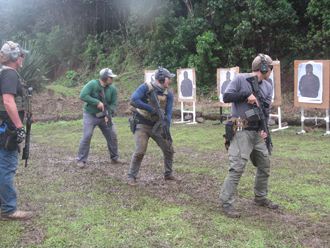
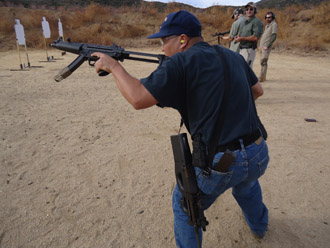
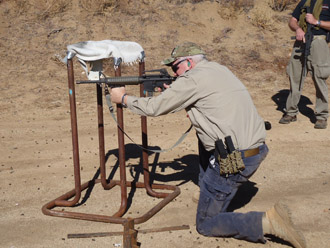
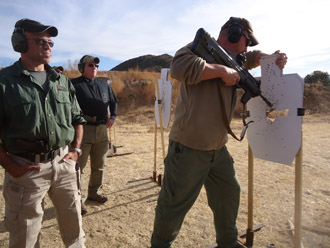
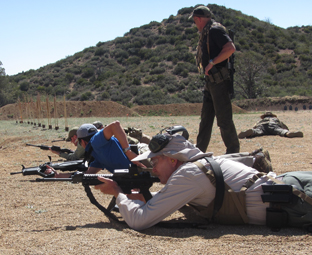
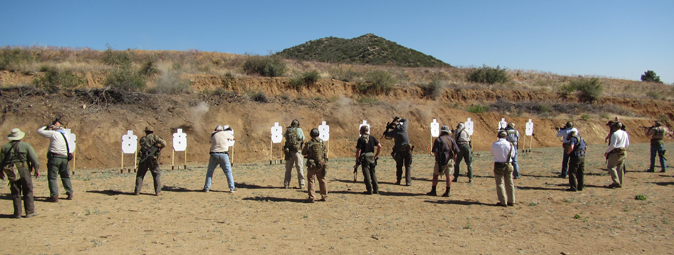
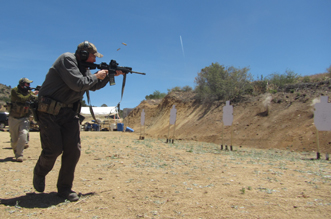
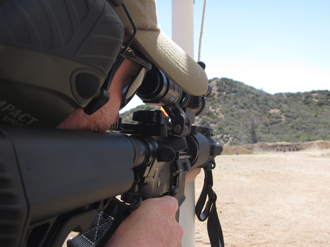
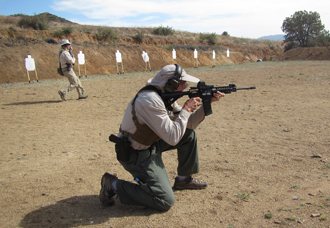
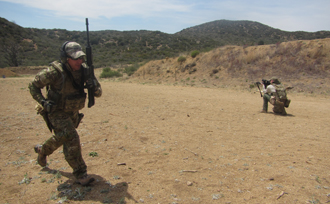
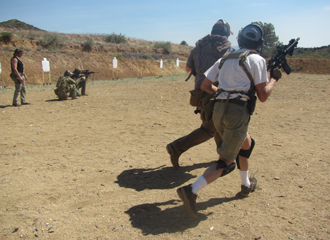
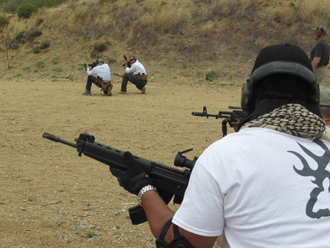
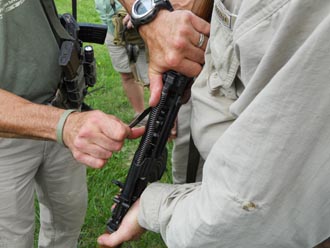
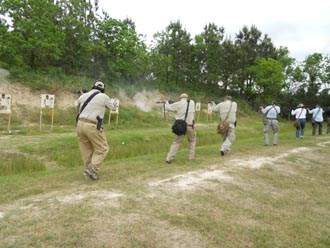
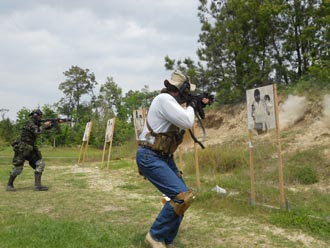
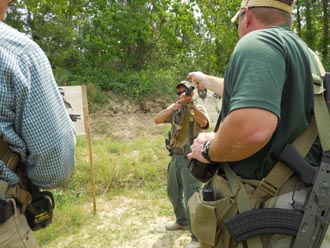
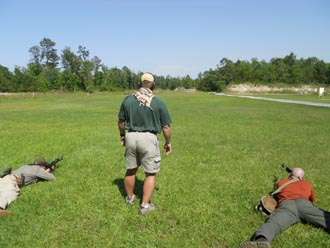
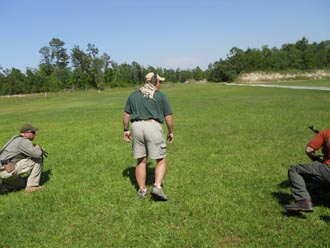
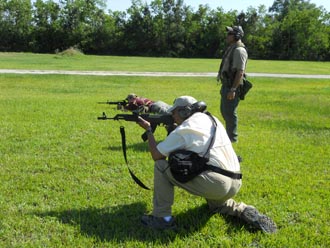
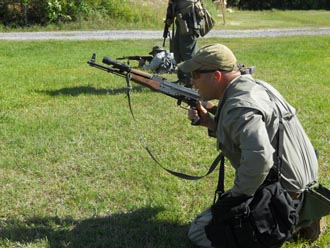
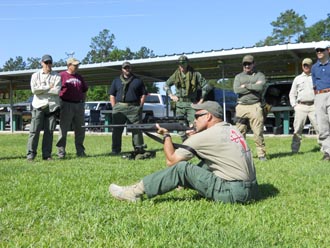
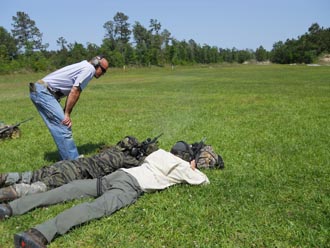
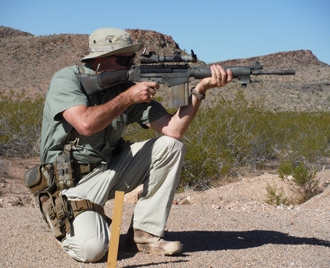
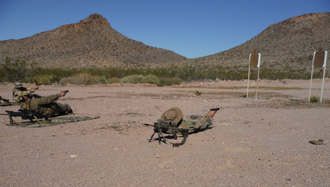
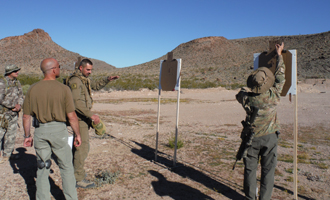
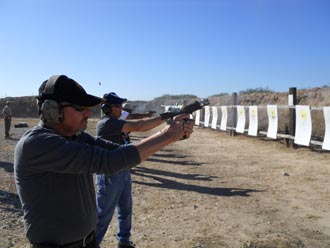
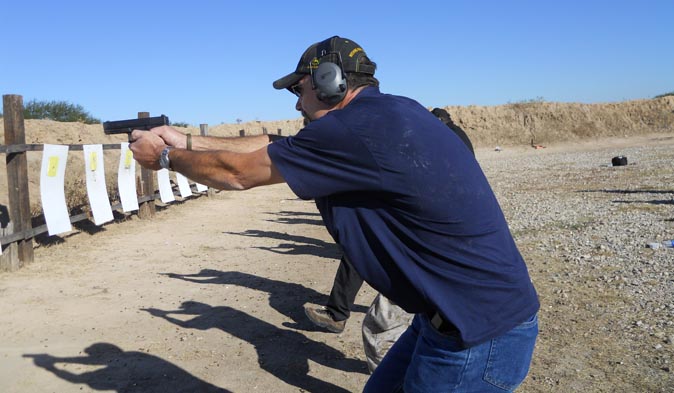
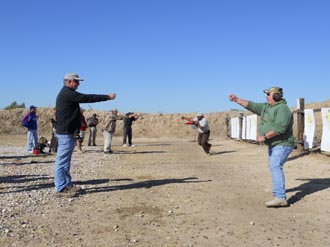
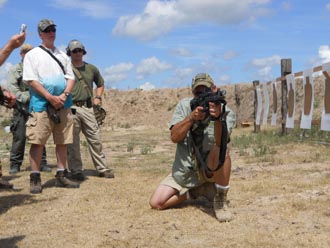
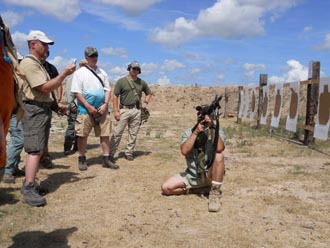
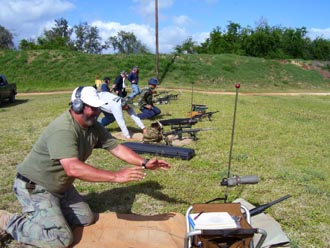
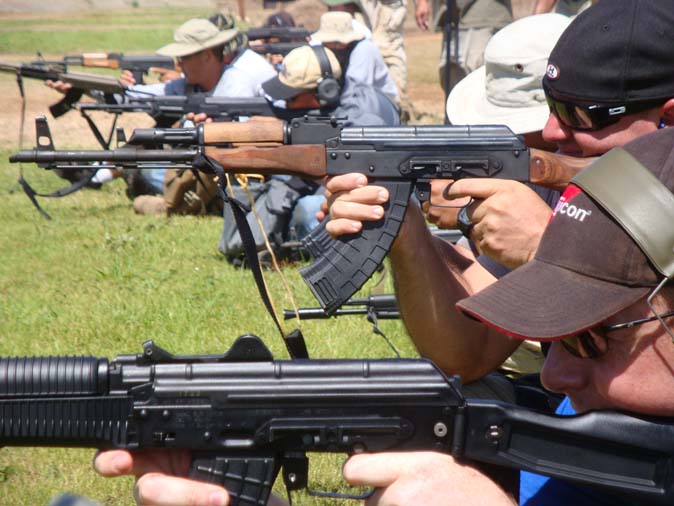
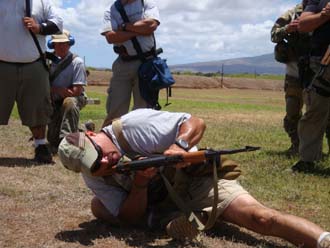
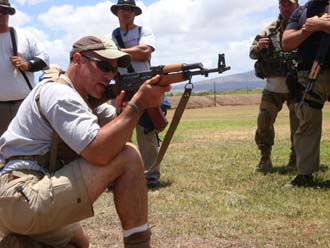
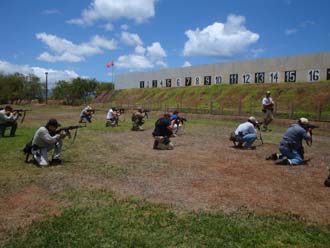
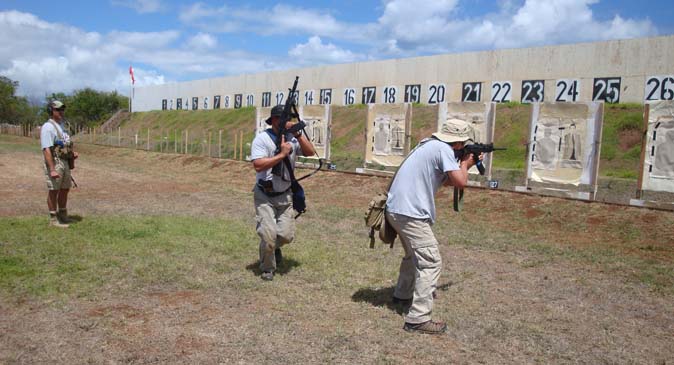
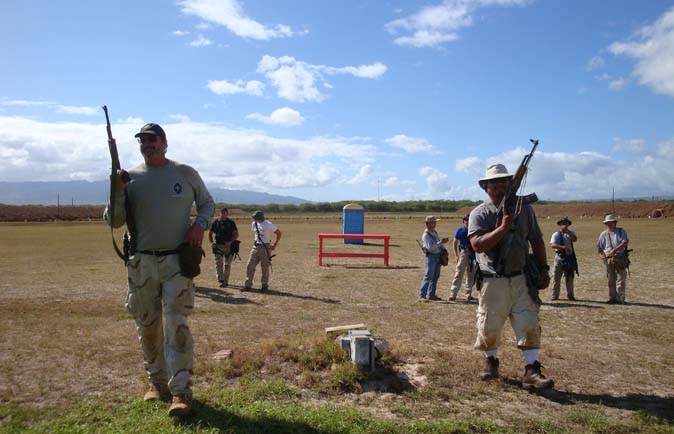
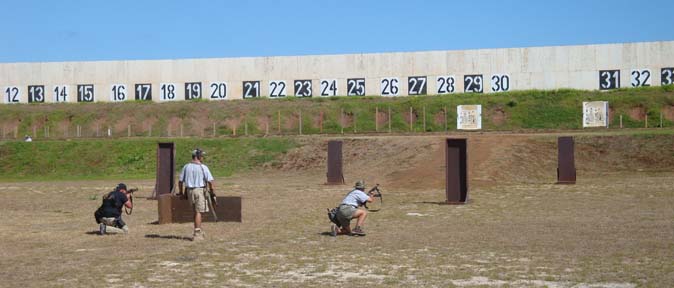
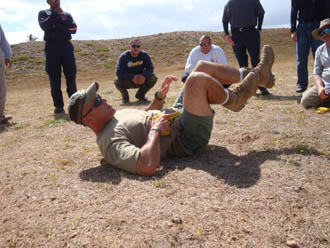
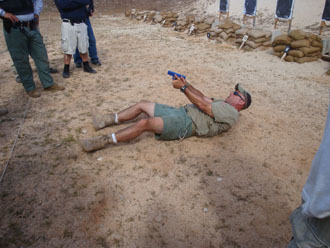
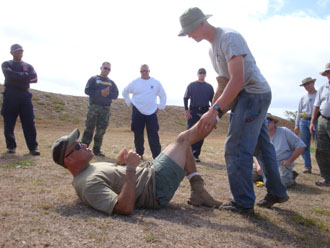
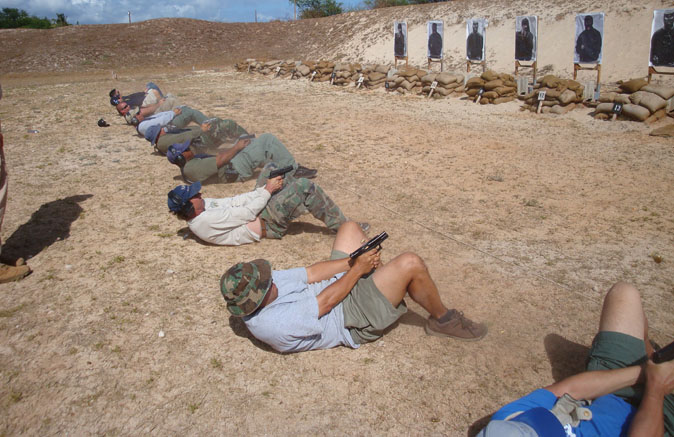
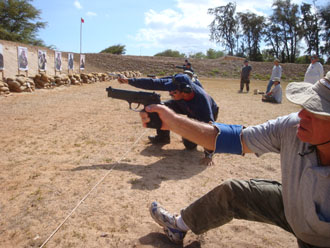
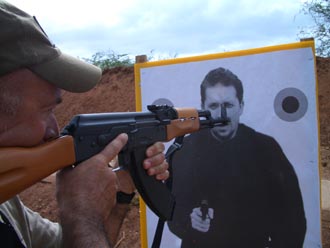
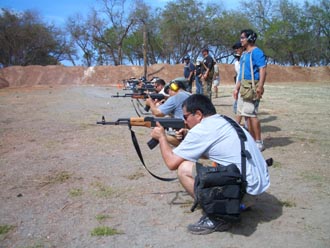
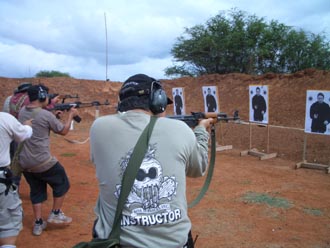
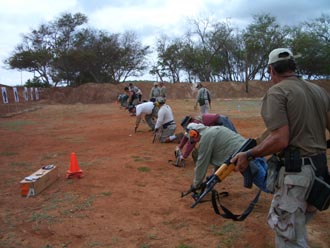
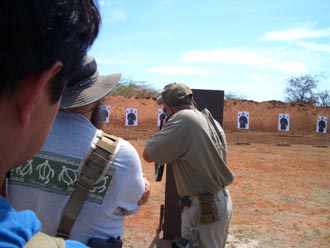
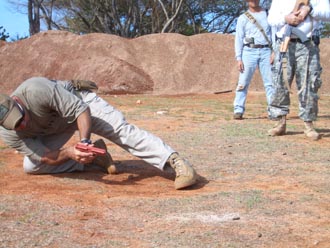
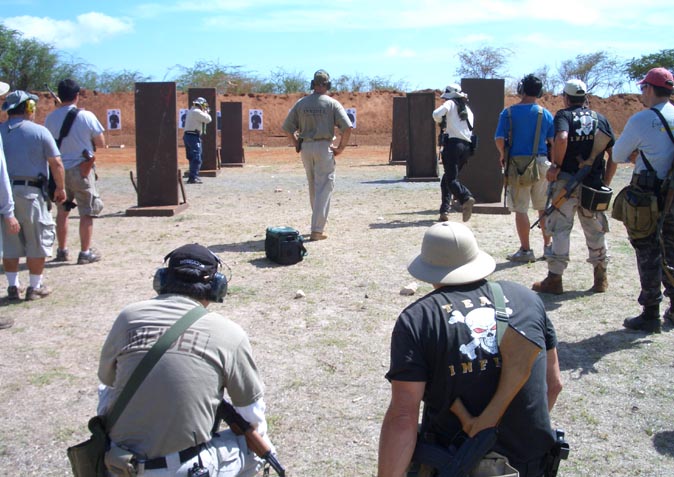
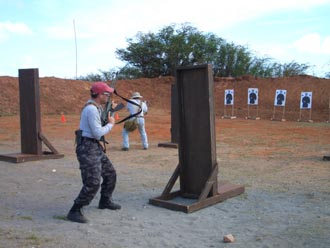
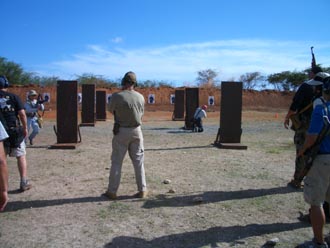
Challenging and different body positioning with |
target engagement for effective usage of cover |
 |
 |
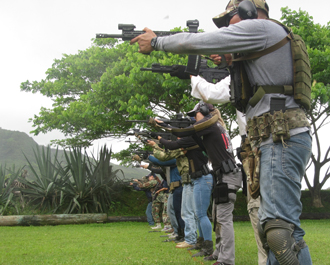
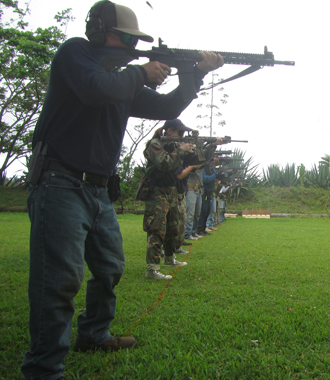
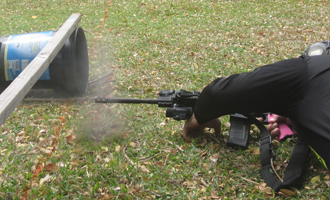
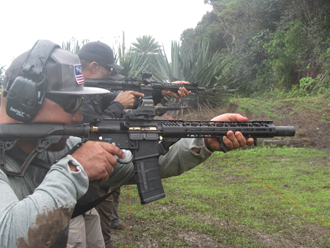
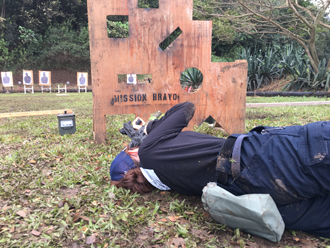
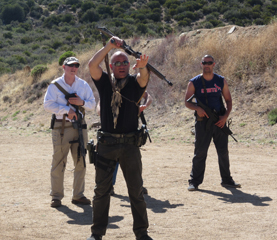
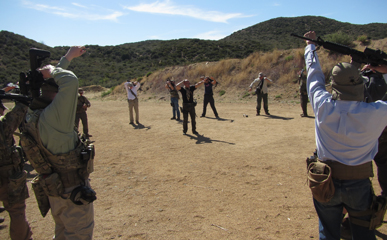
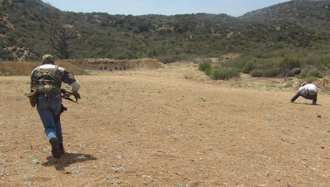
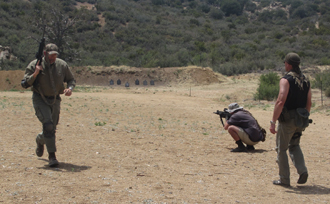
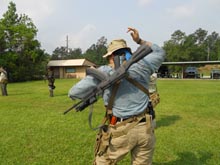
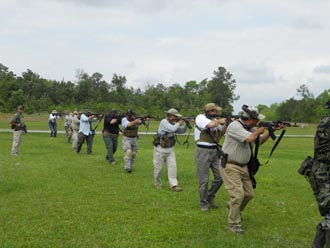
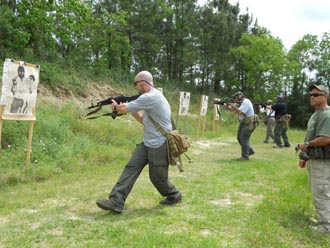
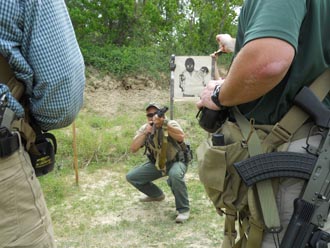
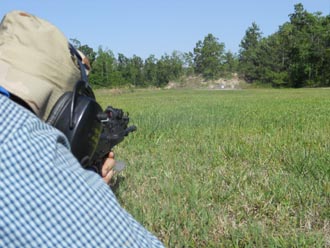
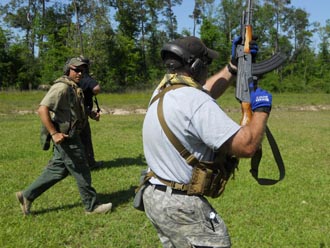
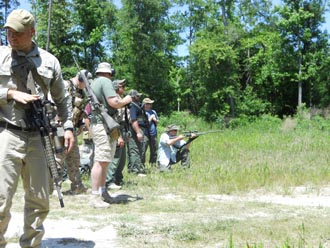
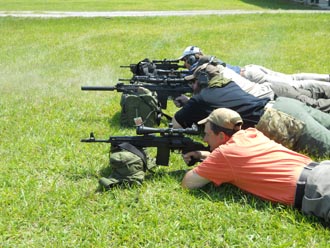
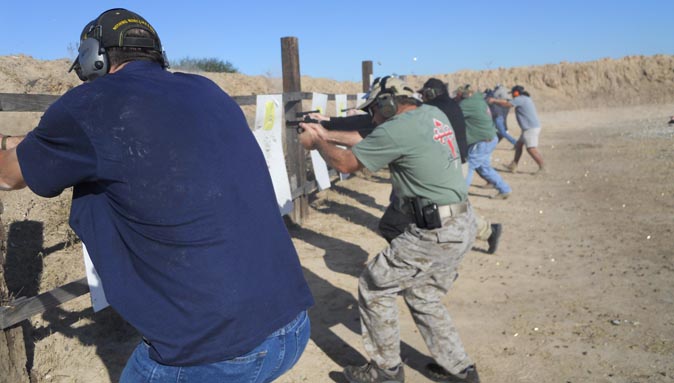
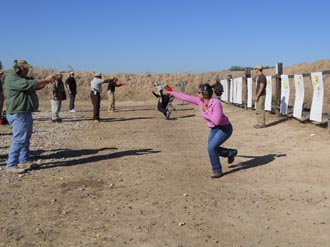
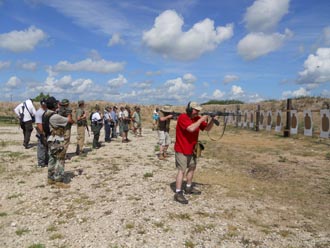
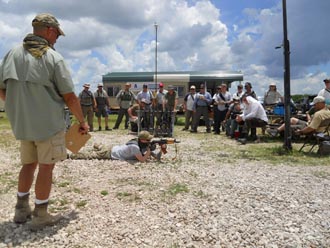
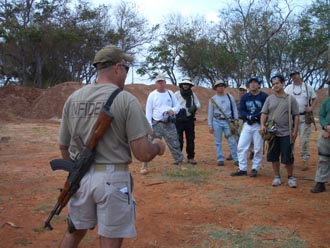
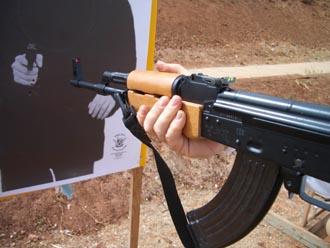
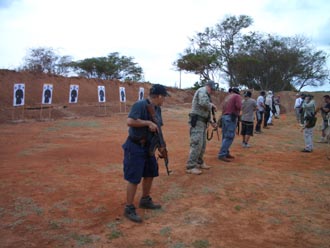
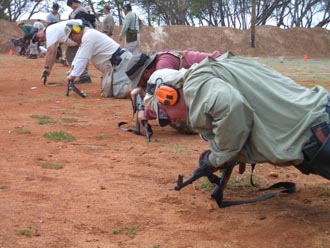
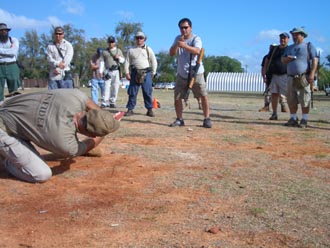
Serpentine movement: rifles empty, bolts ajar, |
moving among lineup using muzzle discipline |
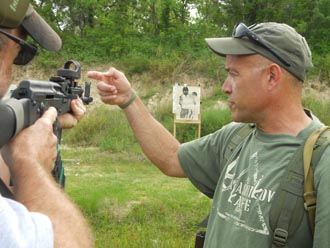
Drill incorporates low ready directed muzzle - |
or pointed in to engage utilizing combat glide... |
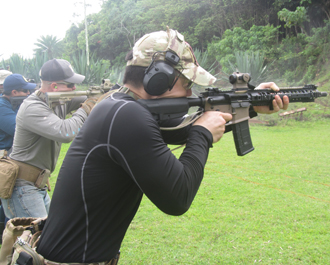
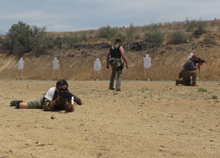
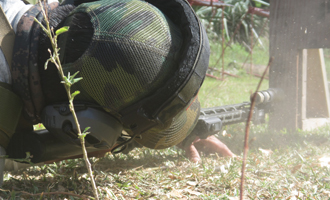
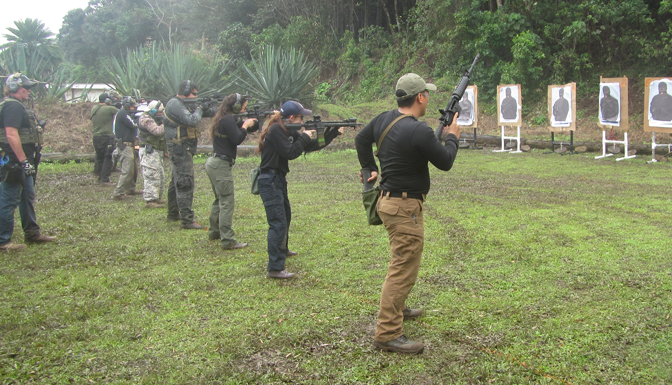
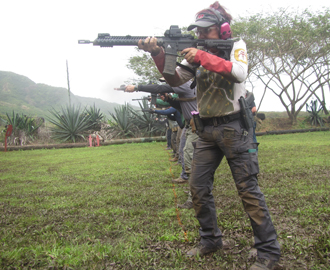
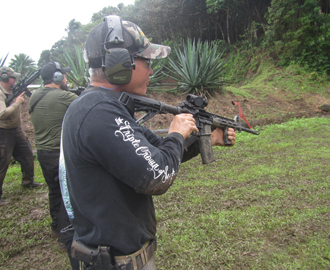
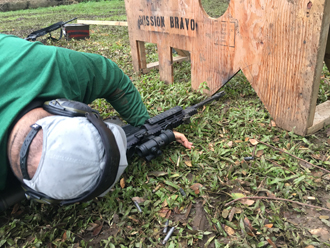
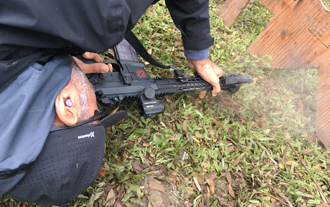
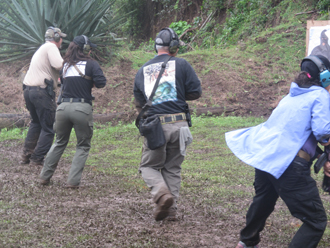
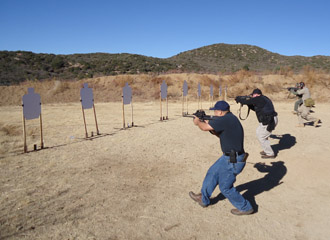
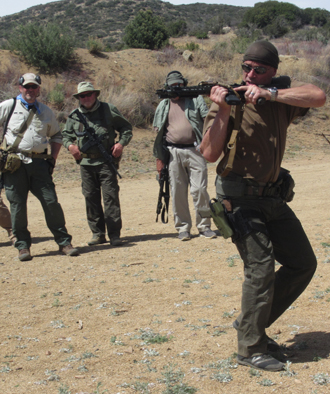
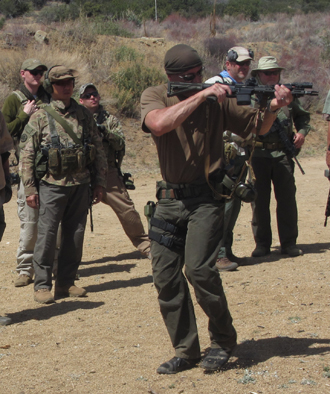
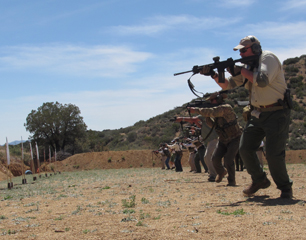
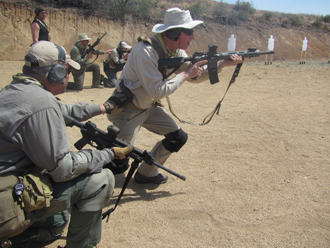
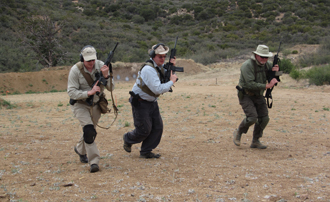
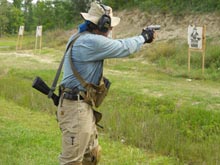
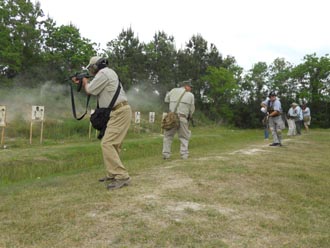
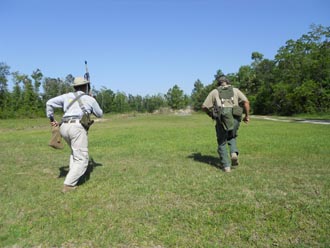
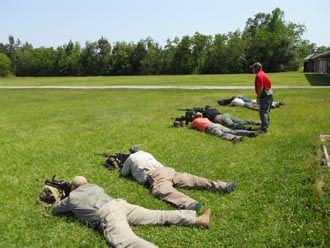
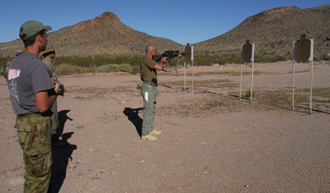
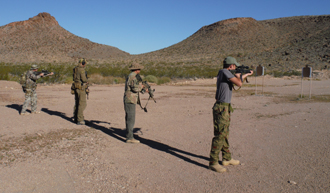
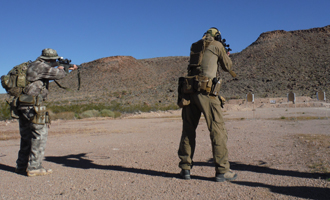
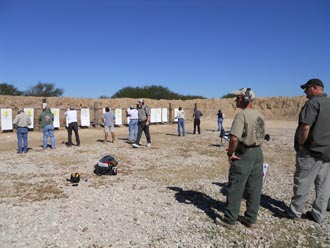
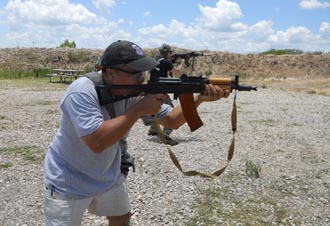
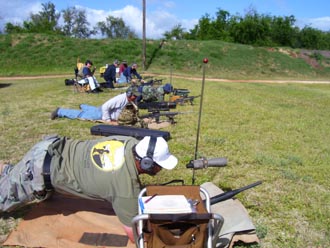
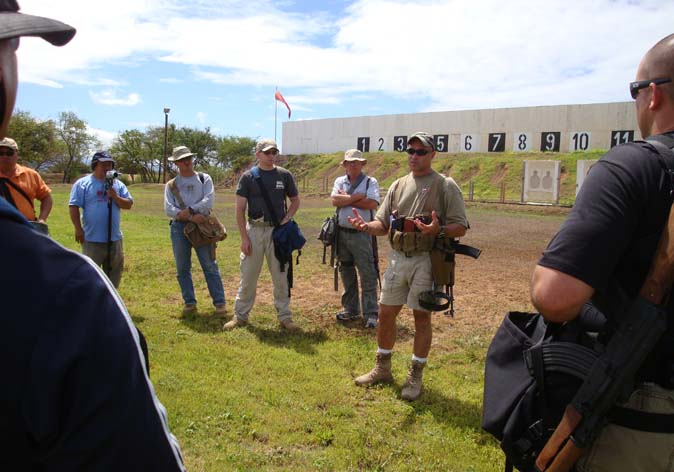
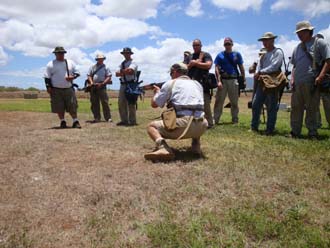
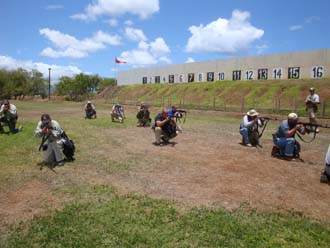
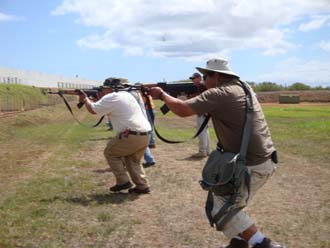
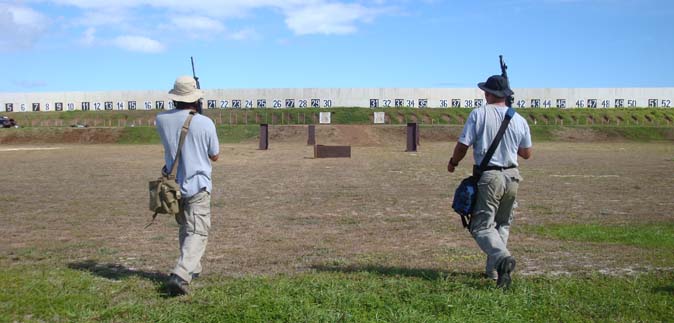
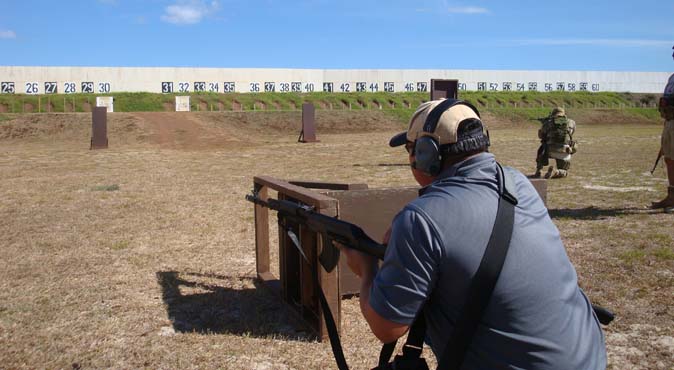
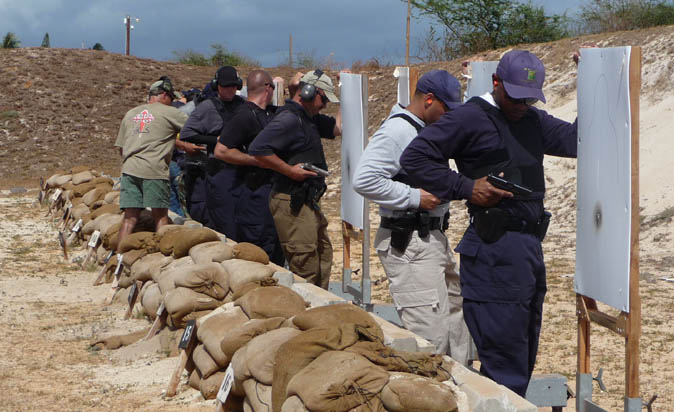
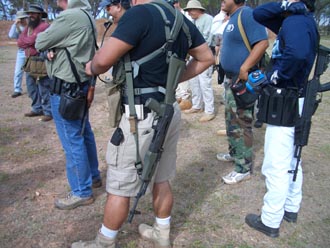
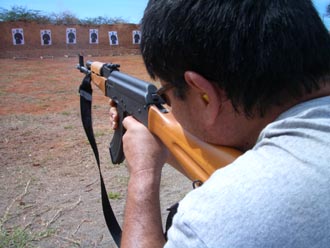
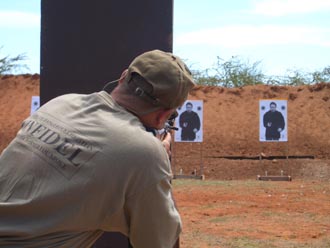
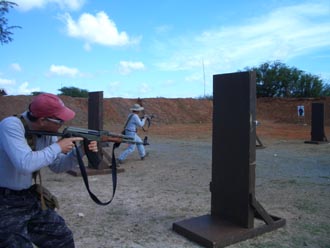
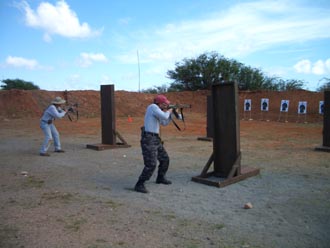
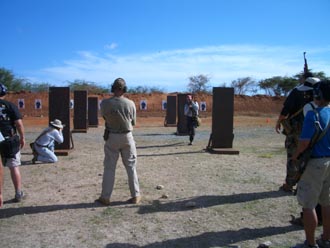
Mission Bravo Carbine class w/ Master Smith of Smith Taekwondo Kaneohe
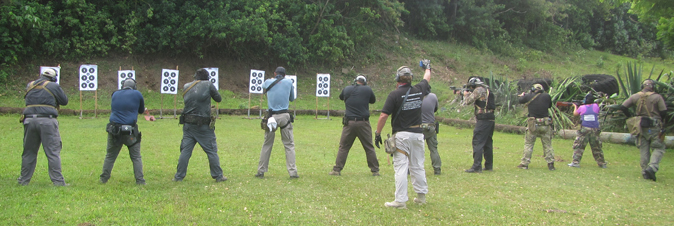
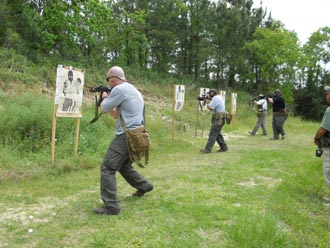
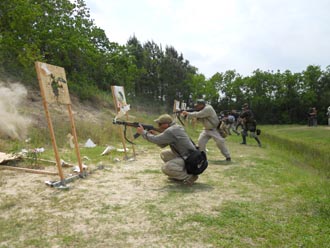
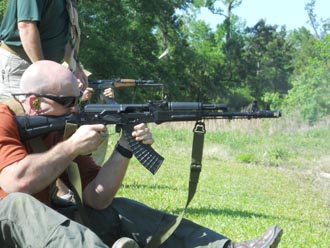
Serpentine movement: rifles empty, bolts ajar, maneuvering within lineup utilizing muzzle discipline
 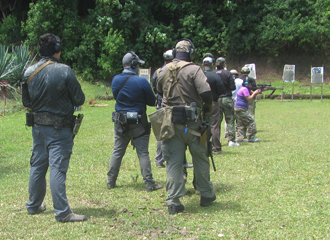
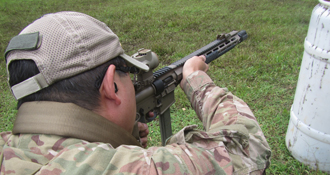
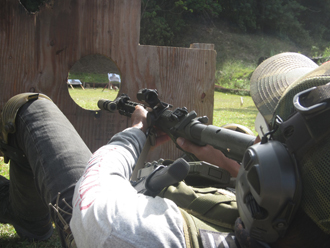
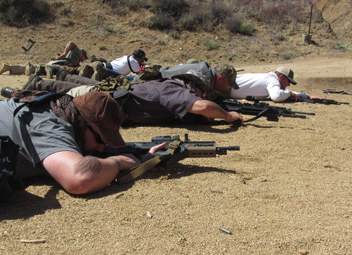
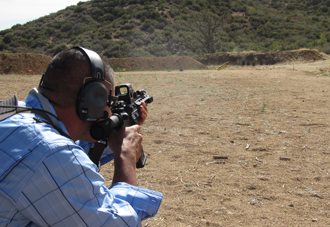
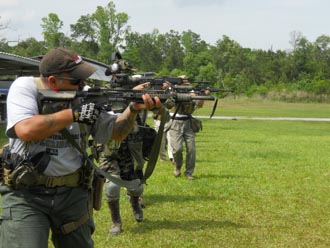
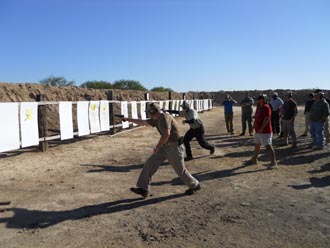
Tactical reload drills locking in a new mag while retaining a partially expended mag
 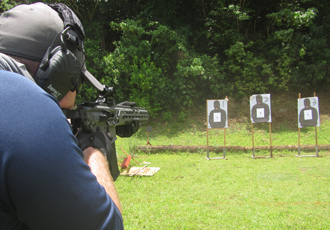
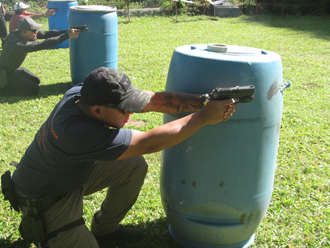
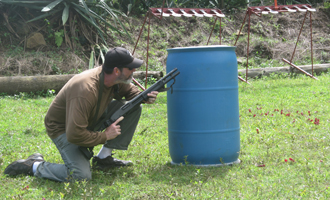
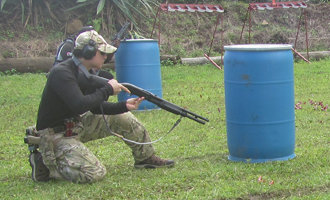
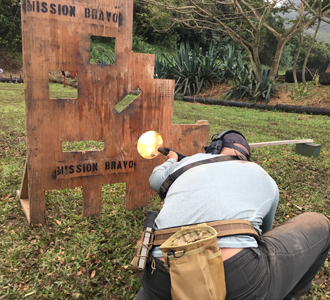
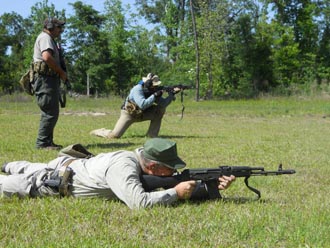
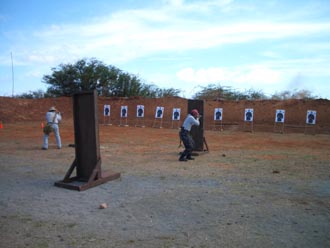
Barricade drills with challenging requirements of firing opening alignment and bullet path clearance
 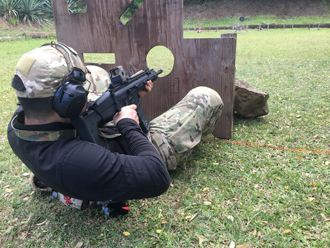
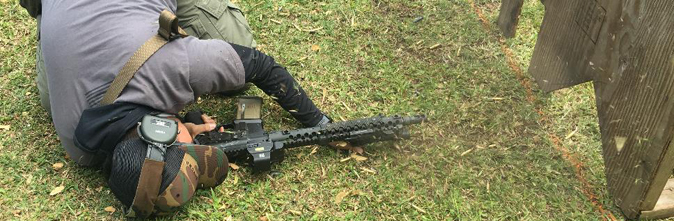
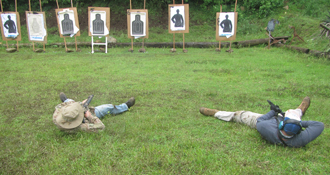
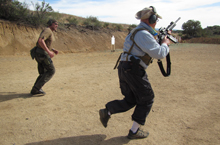
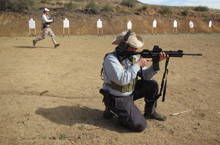
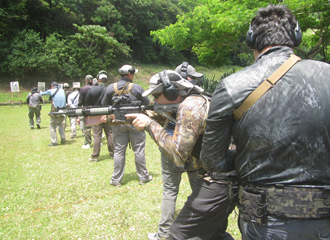
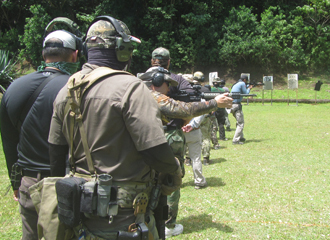
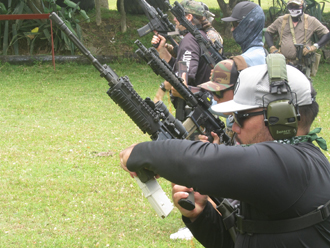
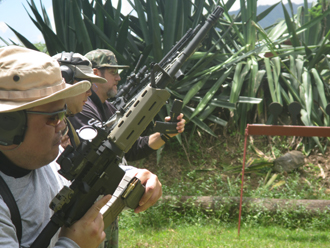
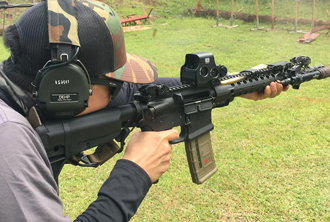
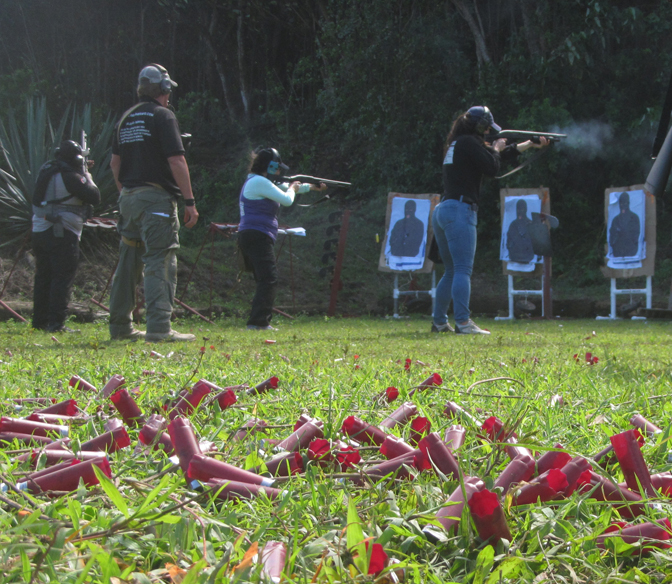
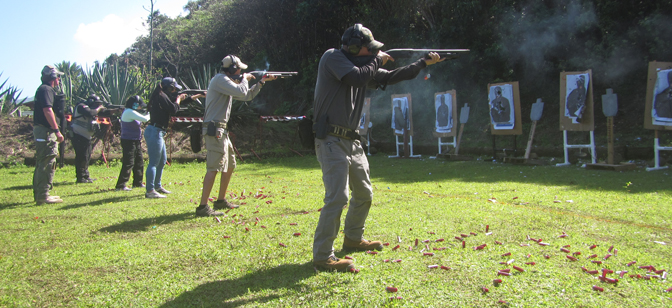
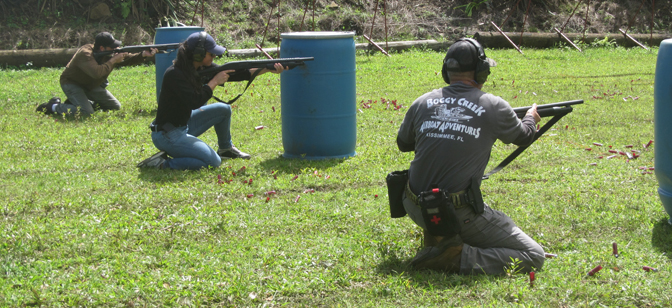
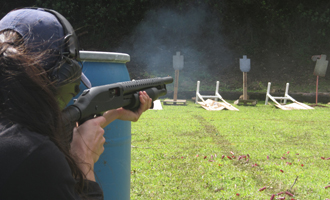
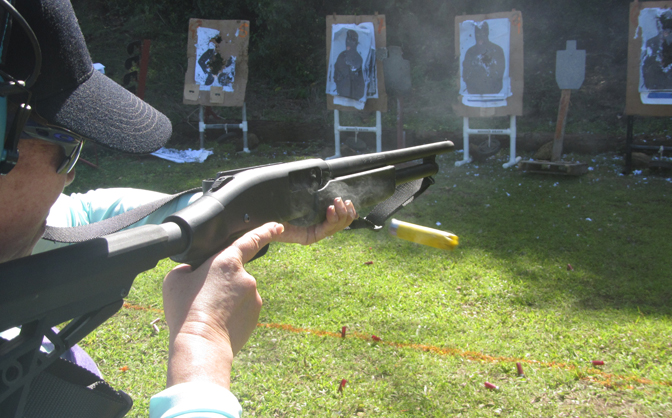
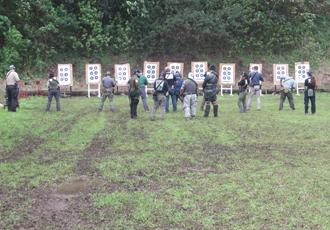
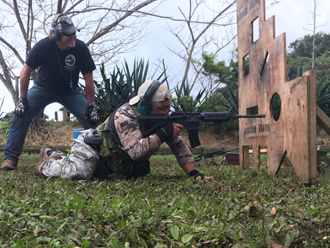
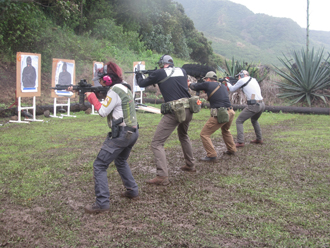
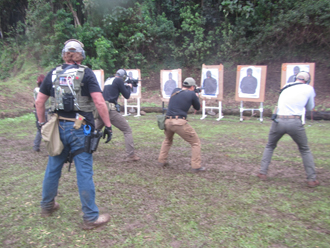
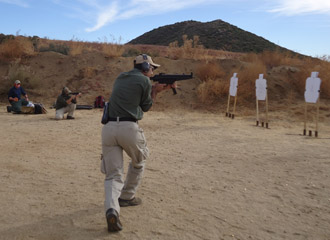
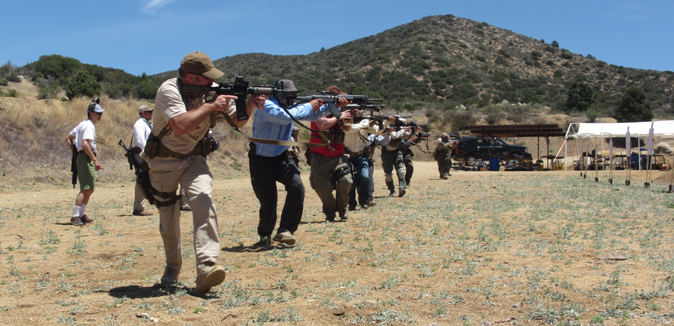
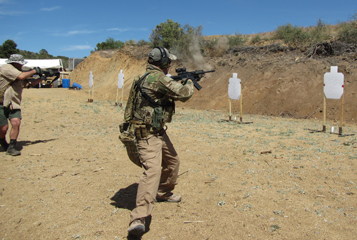
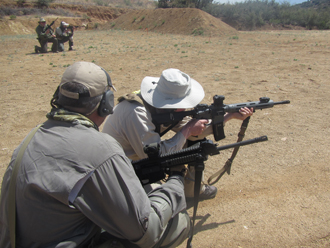
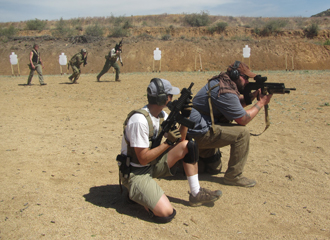
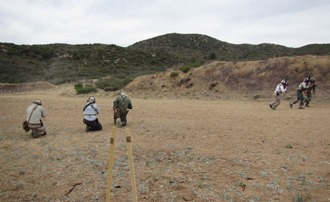
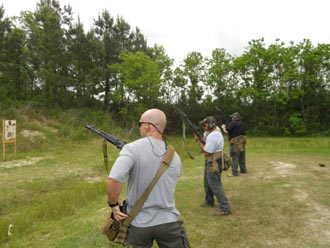
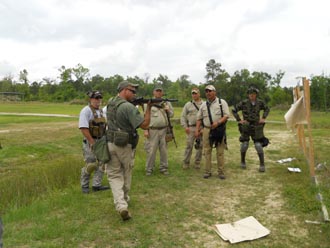
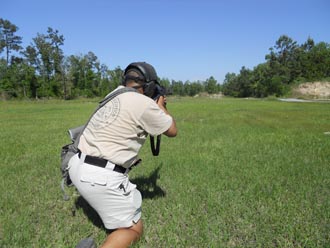
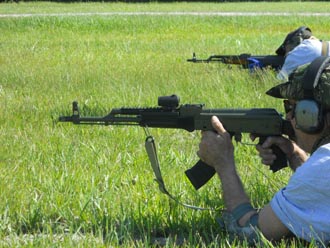
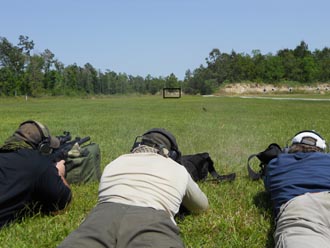
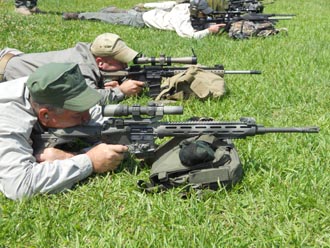
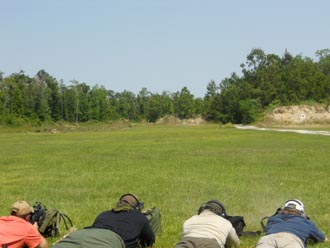
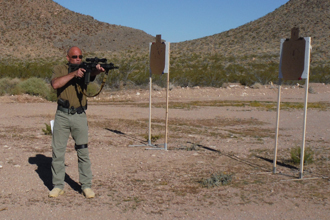
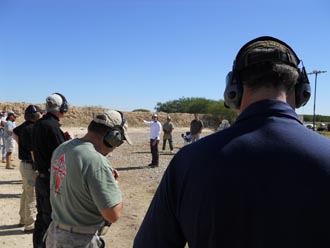
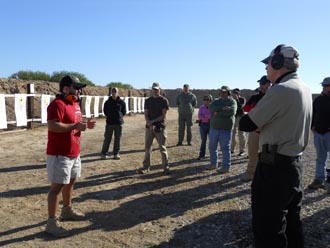
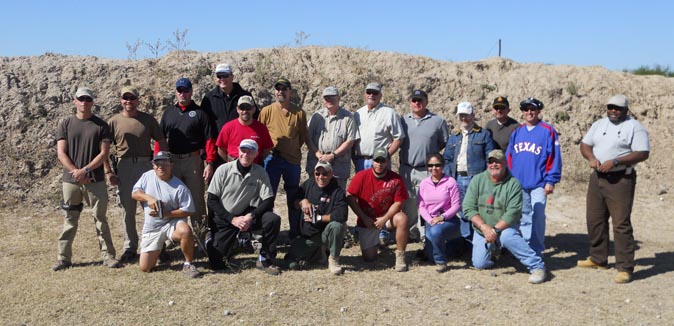
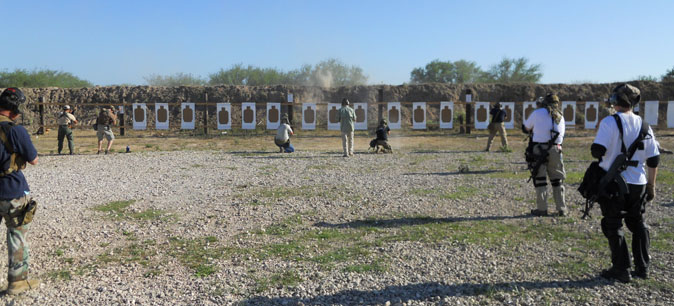
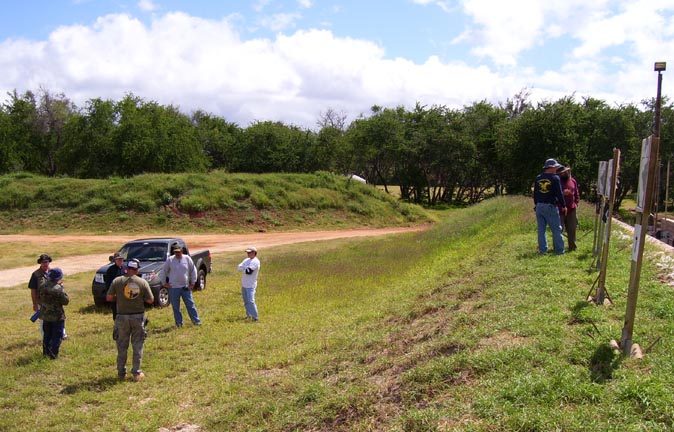
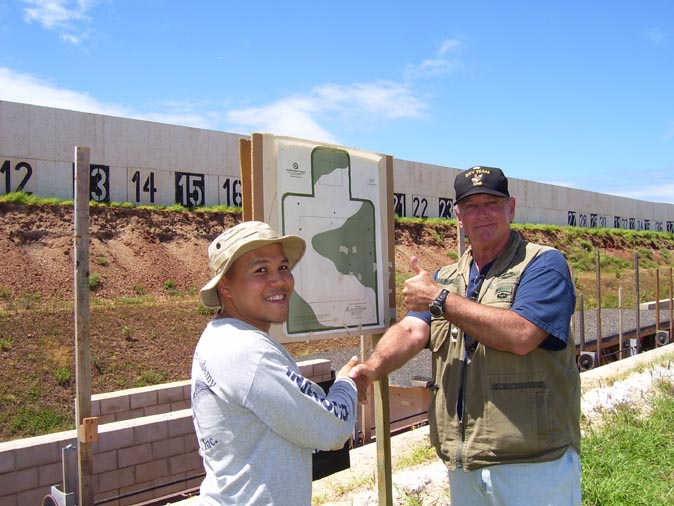
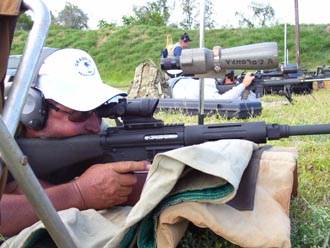
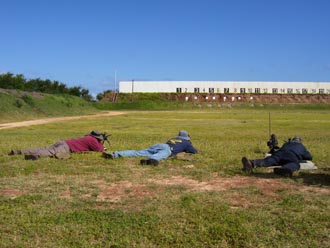
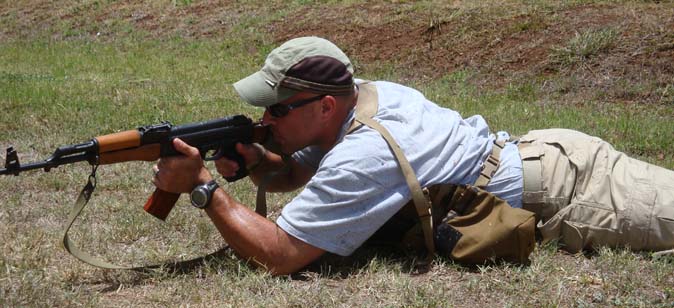
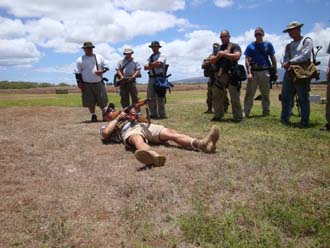
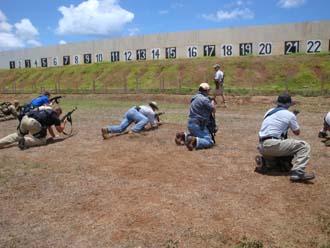
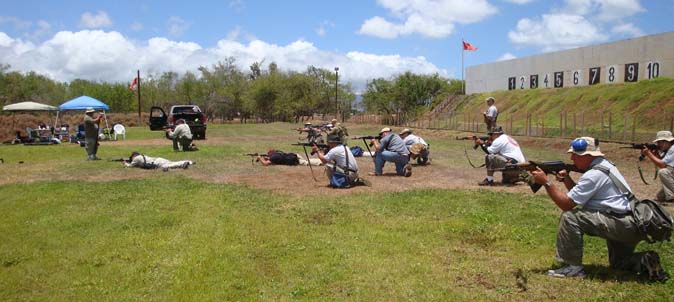
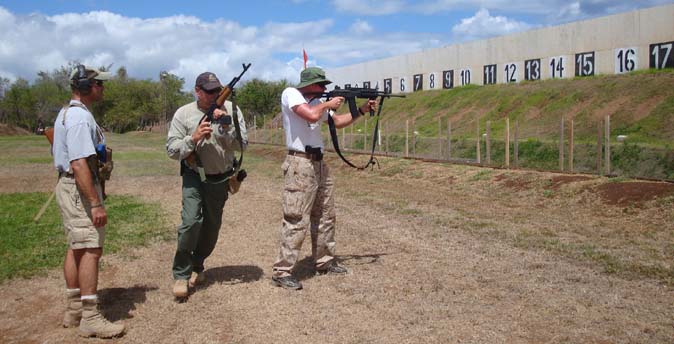
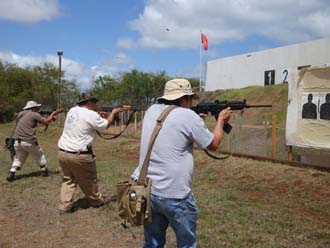
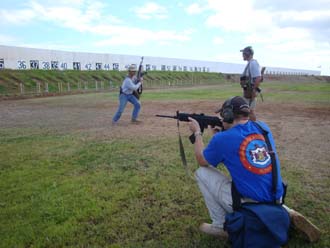
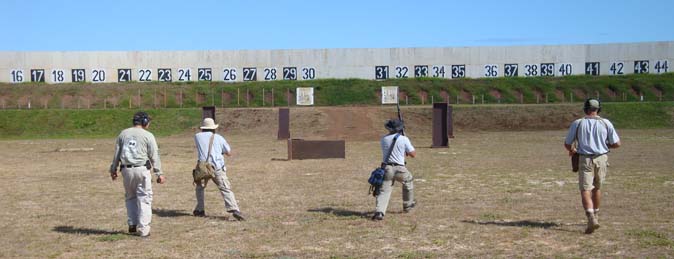
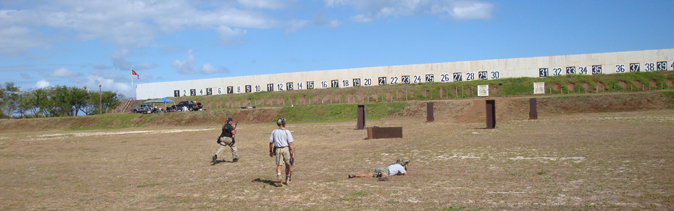
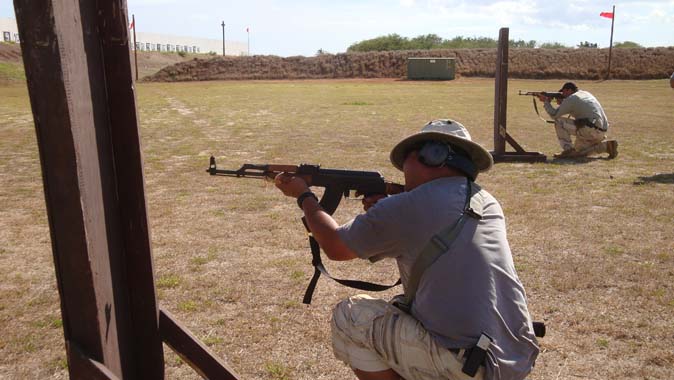
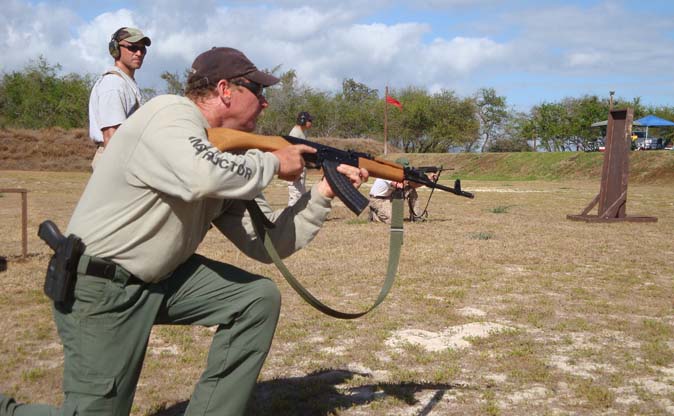
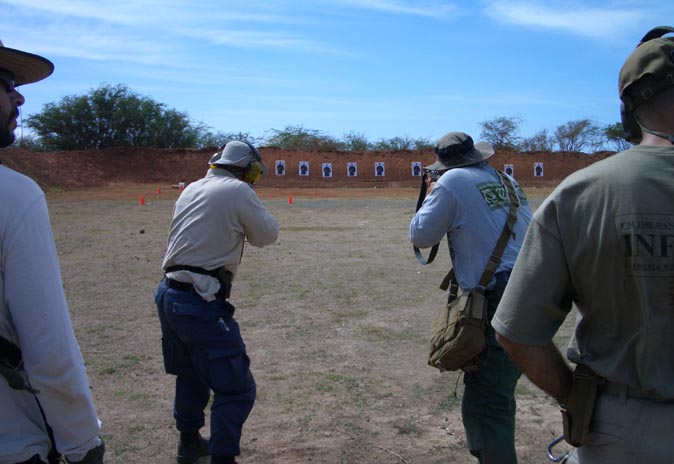
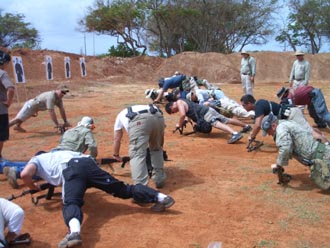
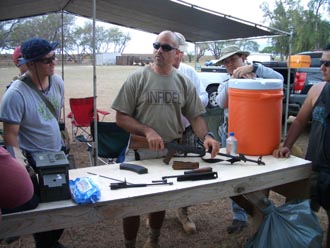
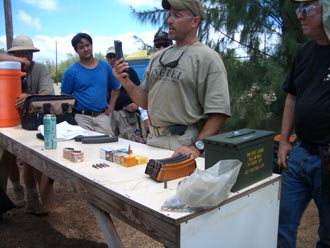
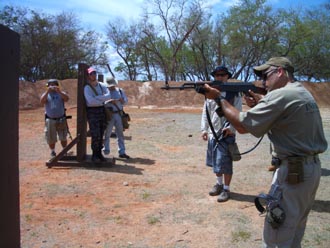
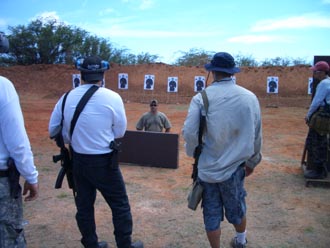
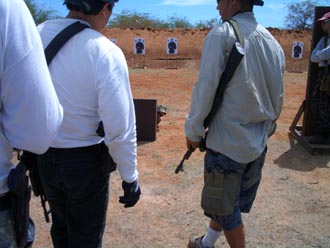
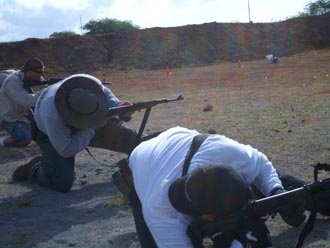
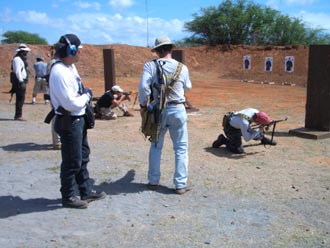
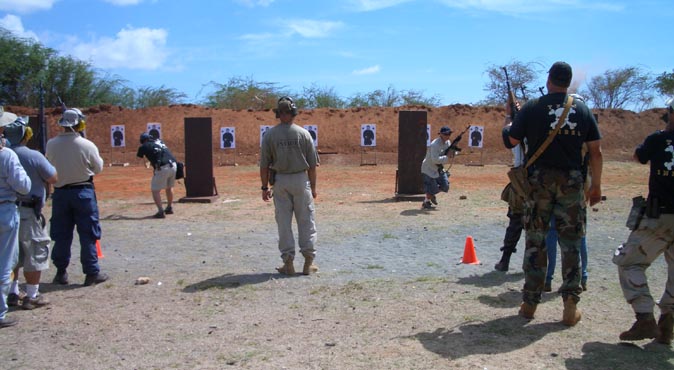
Mission Bravo Shotgun class w/ Master Smith of Smith Taekwondo Kaneohe
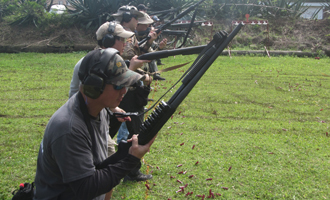 
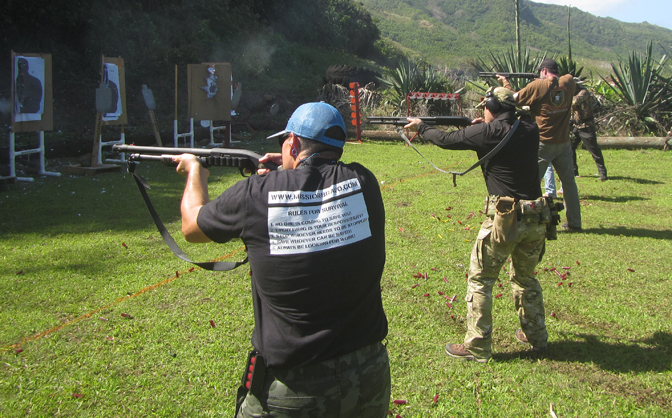
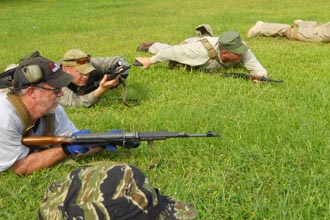
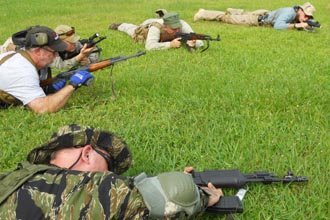
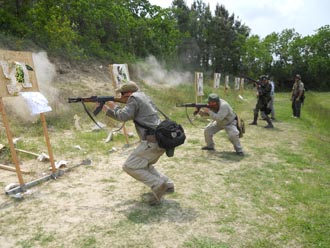
Mission Bravo Carbine class w/ Master Smith of Smith Taekwondo Kaneohe
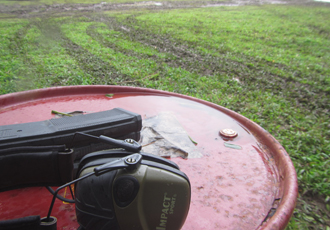
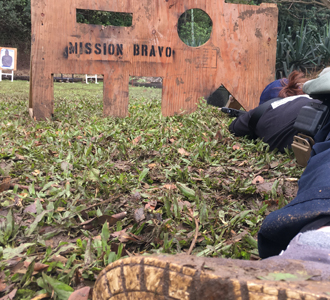
Serious fun and yes, rain and mud. Can't beat that for memorable training and camaraderie!
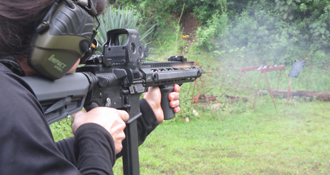
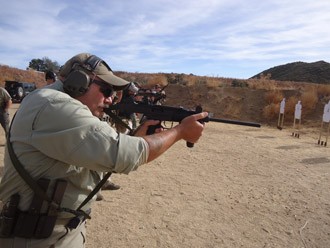
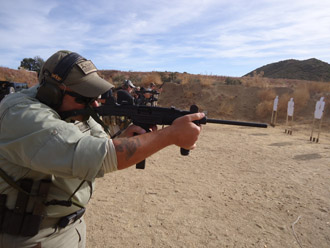
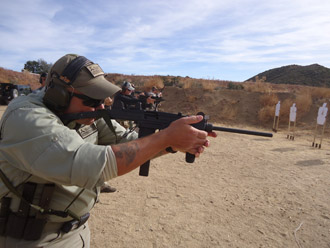
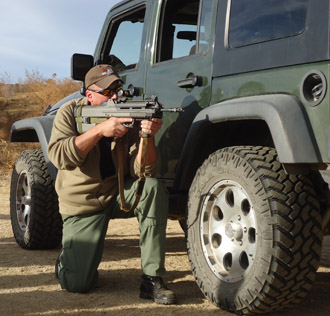
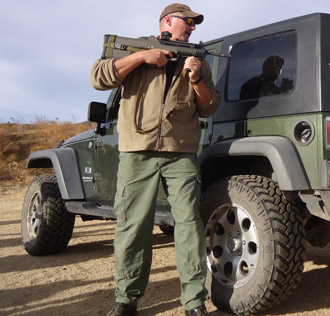
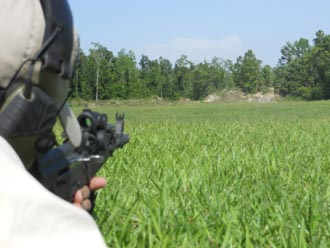
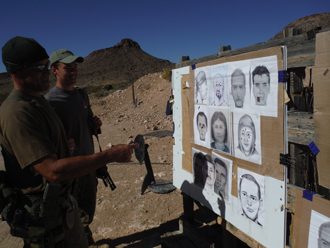
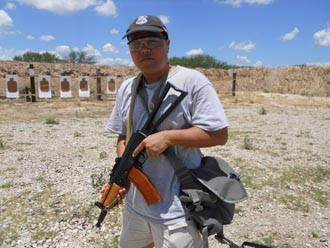
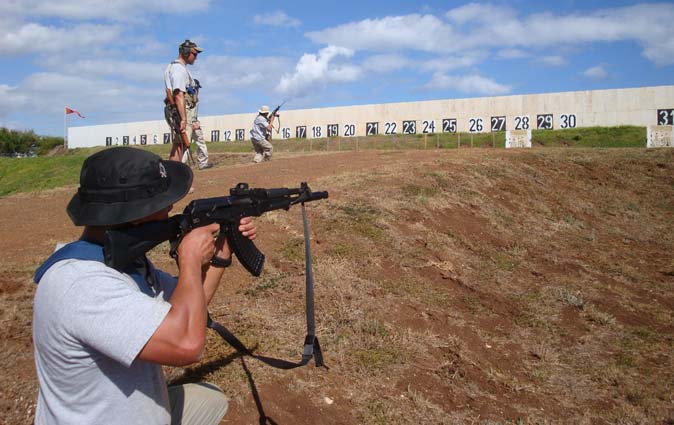
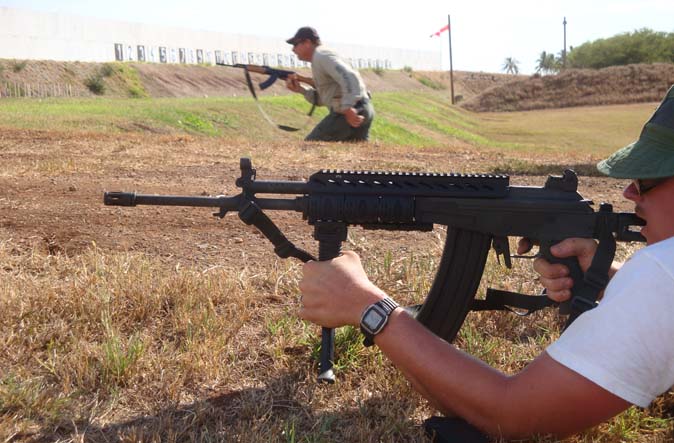
Submachine Gun Gunfighting
by Gabe Suarez of Suarez International
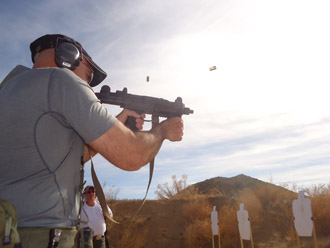 
Full auto Submachine Guns, Short Barrelled Rifles, Pistol Caliber Carbines, Rifle Caliber Carbines -
the complete mixture of guns with further applications over defensive handguns - were at this course.
In a nutshell: Subguns in pistol calibers and pistol caliber Short Barrelled Rifles/16" barrel carbines
have applications that go beyond common handguns but cannot surpass capability of rifle calibers.
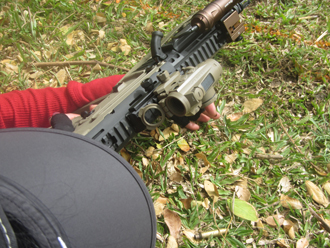
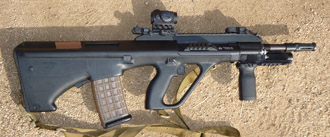
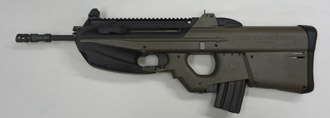
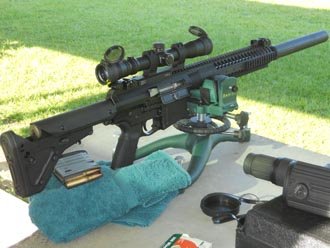
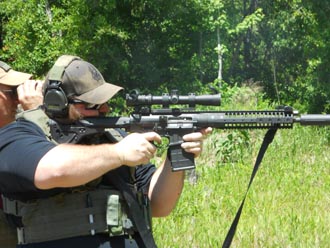
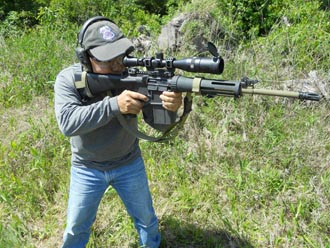
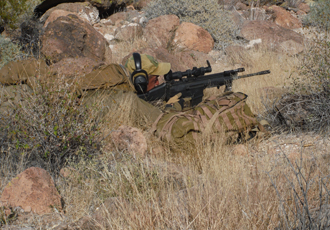
As a report precursor statement / to 'cut to the chase'; 5.56 caliber bullpup rifles (especially the FS2000)
just may be the best answer to overlap advantages of subguns/SBRs and surpass their limitations!
[Title 1 (standard 16" or longer barrel) semiauto carbines bypasses all the Title II or III paperwork
and are not accompanied by $200 transfer taxes or extremely high costs like SBRs and full autos.]
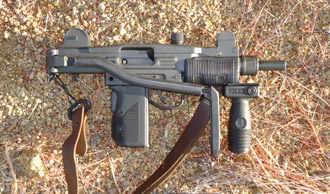 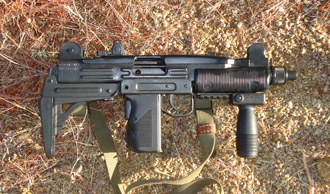
^ Mini Uzi ^ Uzi SBR
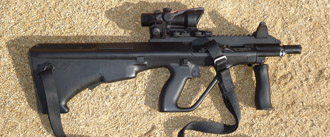 
^ Steyr AUG 14" SBR ^ Steyr AUG carbine
 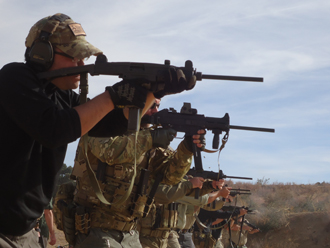
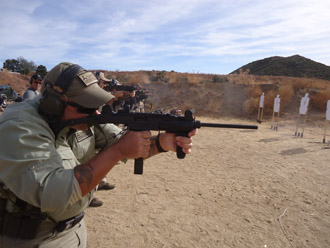
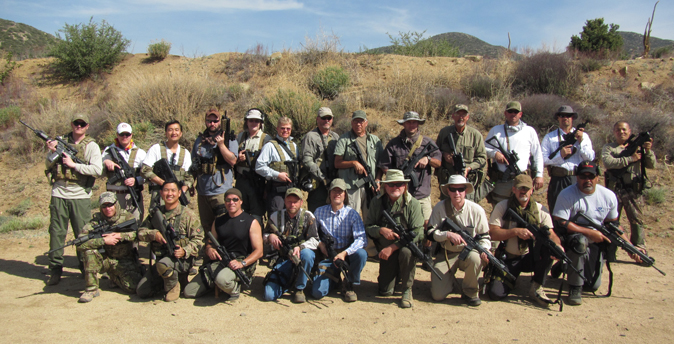
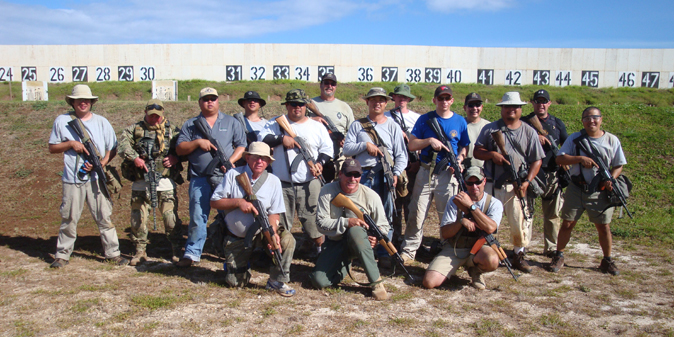
Wonderful array of fighting guns among truly capable individuals, committed and serious enough
to be at a Suarez International course, unlike too many gun owners who think they know it all.
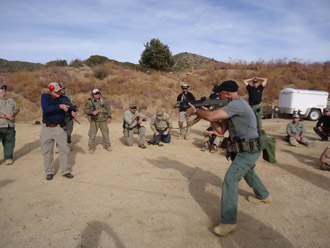 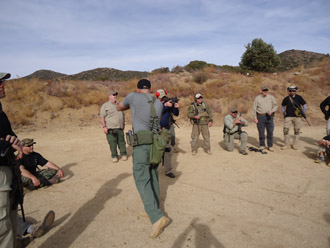
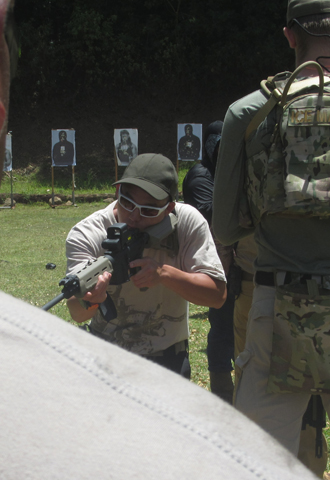
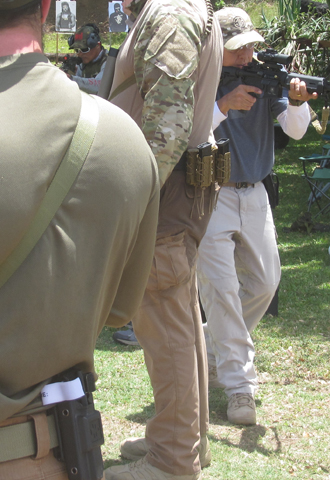
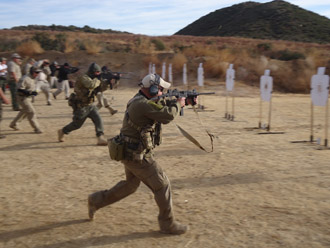
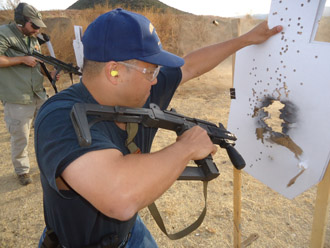
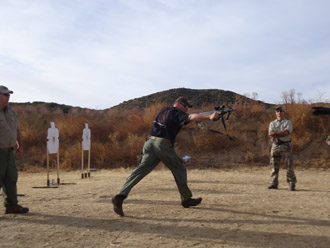
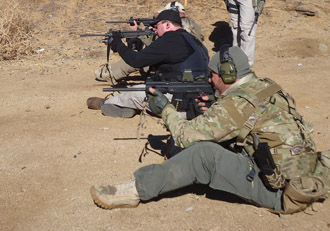
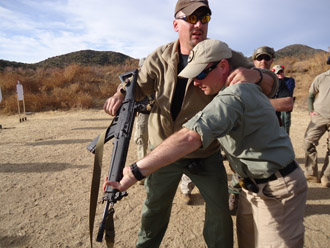
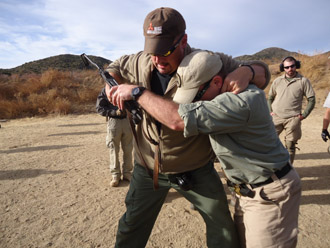
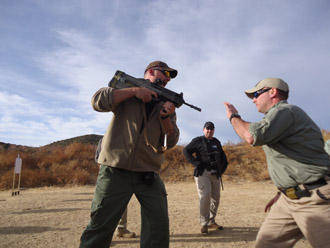
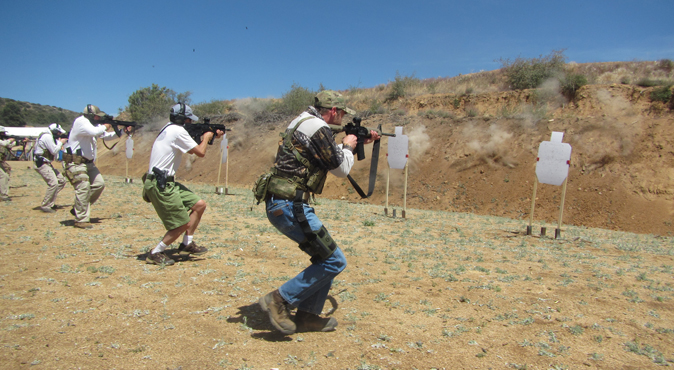
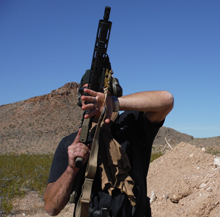
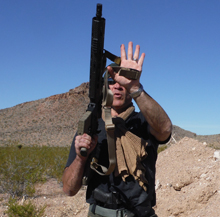
Serious training (that majority of schools and practitioners do not conduct) includes explode off X drills.
Too many do not understand how crucial these movements and force-on-force are for thorough training.
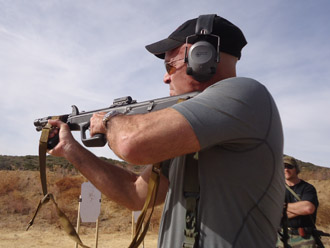
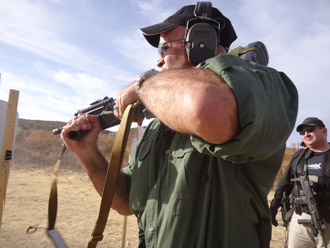
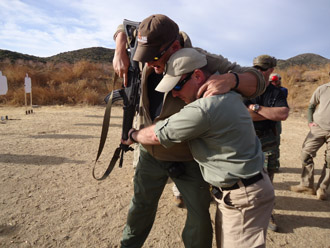
Shoulder transfers upon explosive bursts off the X need to be learned and rehearsed frequently.
^ above: Left shoulder firing ^ Stock moved to right shoulder
Picture sequence on a shoulder transfer with an Uzi carbine. Vertical grips help in transfer indexing and
on short barrelled guns - are extremely crucial in helping prevent fingers wandering in front of muzzle.
^ Move strong hand to support front end of carbine ^ Establish new strong hand, switch support hand
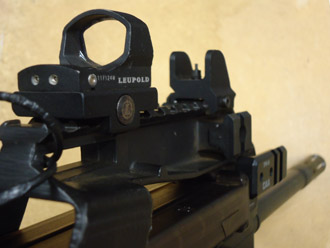 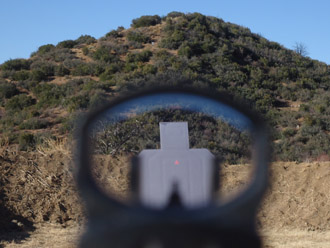
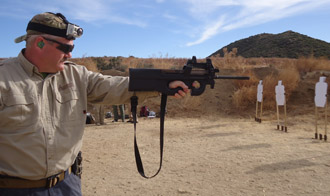 
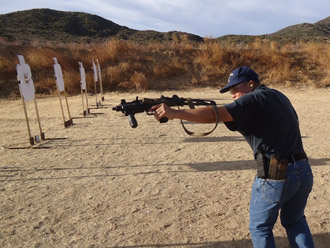
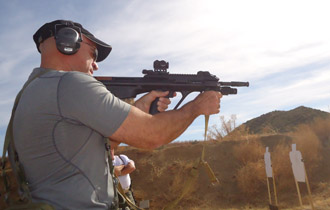
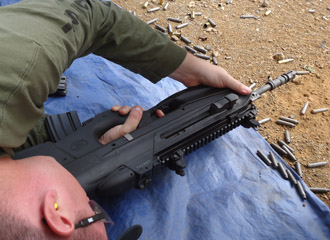
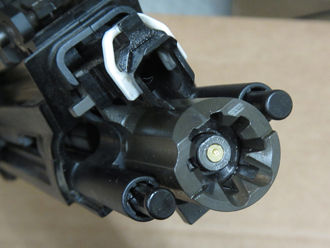
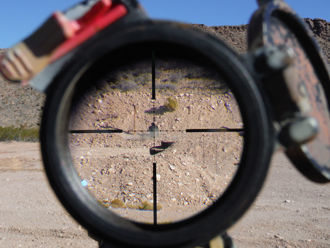
FN P90 and Leupold Delta Point was worked thoroughly during the course.
As it all-too-often turns out, the rifle ran flawlessly. This electronic dot did not.
There were portions of Day 2 where the triangle reticle just didn't light up - then did so toward end of day.
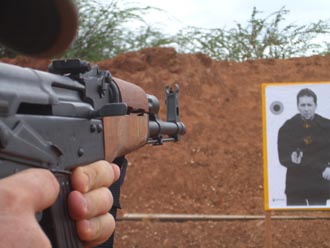
Close range situations under 10 yards turned out ok using front sight from one of my FS2000s and using
Delta Point's window as rear aperture. Wish FN worked out some robust iron sights for these long ago.
Folding sight sets for AR flattops too high, as are Troy Micro Sight sets (that would be otherwise correct
for several raised-rail piston ARs and also happen to work very well in height for FS2000's cheekweld).
Trijicon RMR-equipped carbines truly had advantages as well - any dot optic made successful hits easier.
Rugged Miniature Reflex does cost more than Leupold's Delta Point - but it is stronger and more reliable.
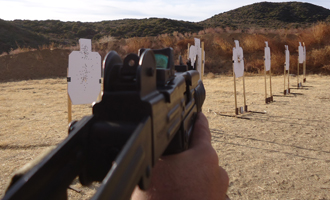
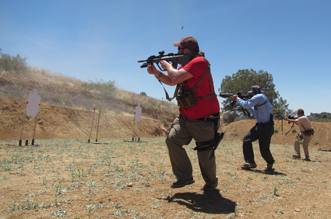
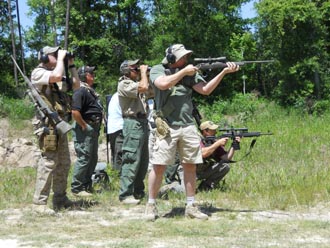
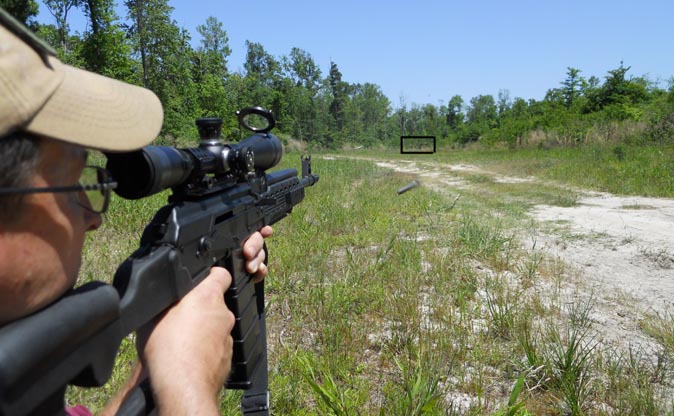
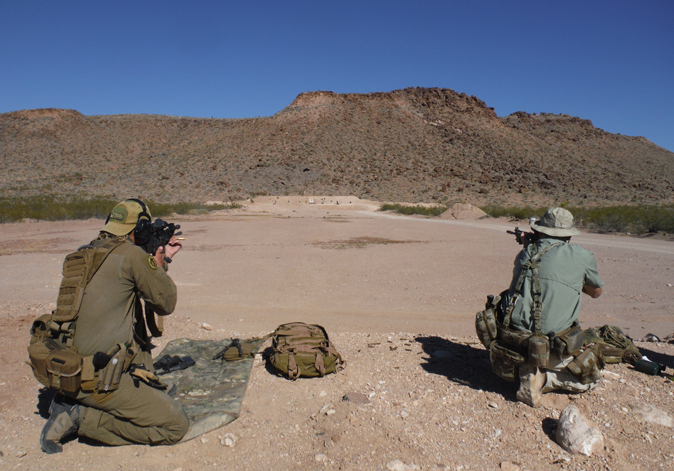
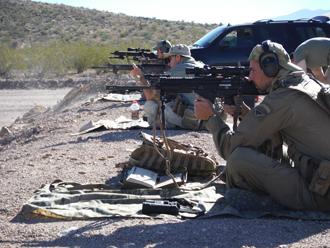
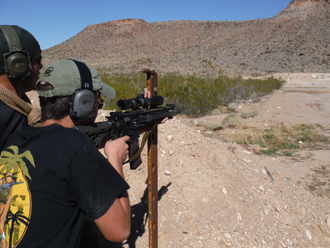
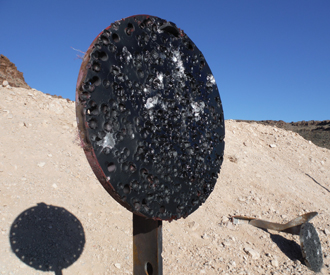
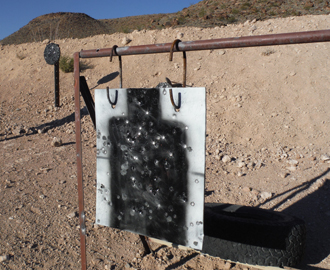
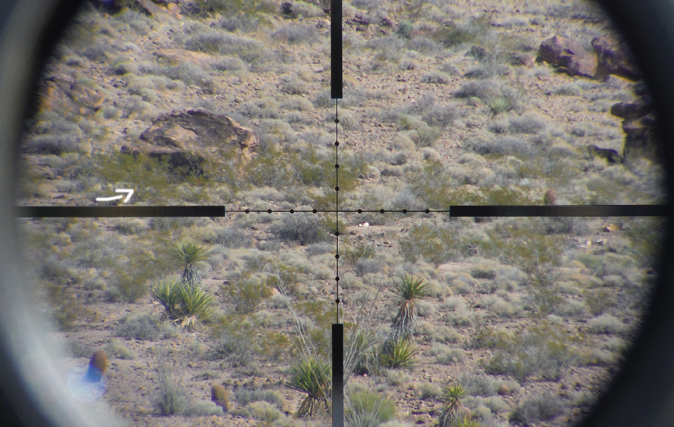
Distance shooting was a pivotal part of the course - 200 yard steel target on left of the Delta Point triangle
Abilities and limitations recognized with various firearms, their calibers and sight indexing requirements.
It is a fact that pistol caliber carbines/subguns require more considerations for distance shooting like this.
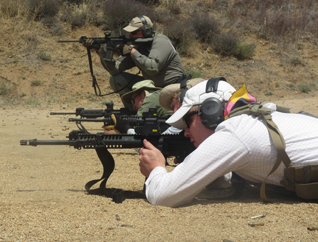
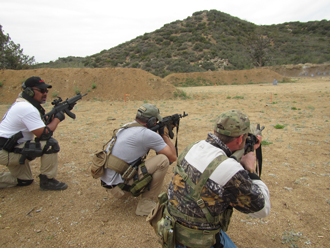
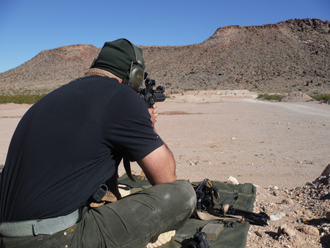
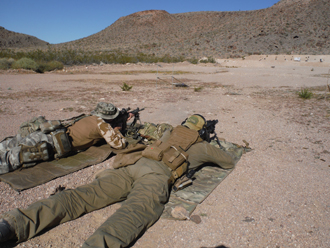
Different supported firing positions utilized at 80 yard steel targets. Ambidextrous ability encouraged.
 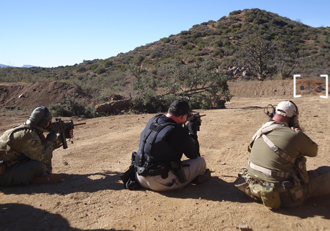
Trio of shooters on three steel targets - resounding impacts on steel targets make hits rewarding.
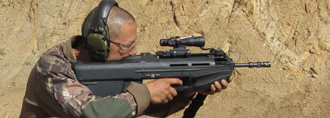
^ Section of beige tape reminds firer where NOT to place cheekweld on the Steyr AUG rifle
if running the traditional bullpup from left shoulder for shooting circumstances or emergencies.
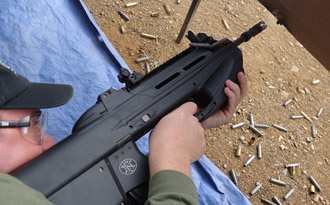
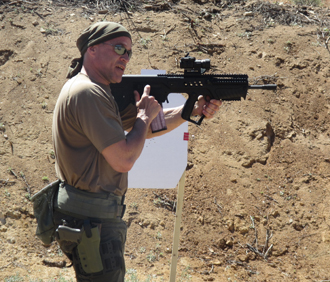
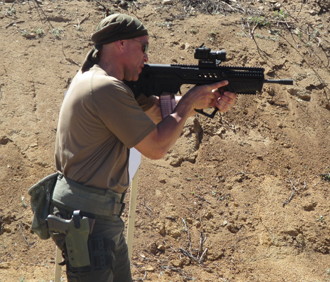
A major advantage of FS2000 over the AUG: spent cases eject forward with the FS2000.
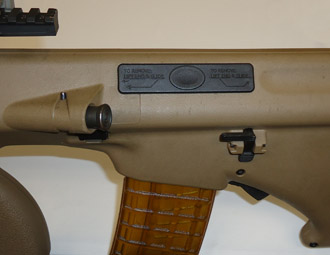 
Steyr AUG type bullpups most commonly found with right-side ejection port - a true face hazard
if one were to quickly and traditionally shoulder transfer from right cheekweld to left cheekweld...
The FS2000 firer never has to be concerned about switching bolt/barrel/ejection port covers
as the fired brass travels forward and out a front-of-rifle ejection port instead of side of rifle.
FS2000 users will never have to worry about hasty right or left shoulder firing - from any position.
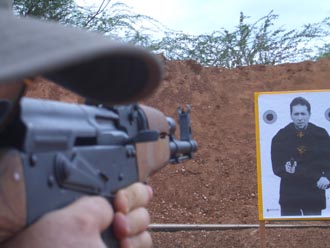
^ Steyr AUG ^ FN FS2000
Above: ejected case path will be directly under chin Above and Below: ejected case path is near muzzle
 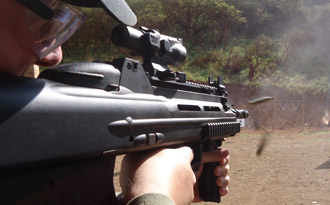
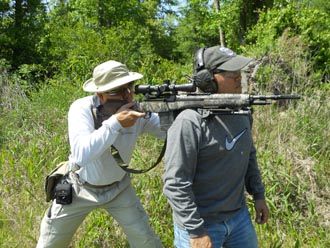
Side prone firing: another advantage of FS2000 ejection port location. Because ejection is through a
forward-launching track, there is no chance of cases bouncing back into the action to cause stoppages.
 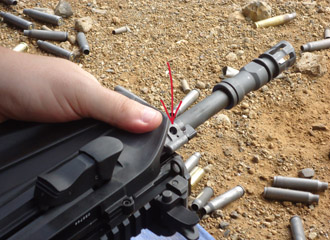
[Note for these and similar rifles' support hand indexing during firing: avoid covering their gas ports!]
Any typical longgun creates difficulties on retention during close-quarters fighting.
Subguns and bullpup design rifles equal much greater control.
Major advantage of FS2000: rifle retention far easier with bullpups versus common military style rifles.
Close retention firing drills add to the revelations on possible superiority of some longgun choices.
Subguns and pistol caliber carbines fill a few niches quite well, yet bullpup longguns in rifle calibers trump
pistol calibers in nearly every aspect of cartridge capability considering power and distance requirements.
Since 2011, FS2000s have been largely unavailable with price fluctuations from reasonable to sky high.
The FS2000 is worth getting especially if it can be found again around $2,500. Definitely a consideration
if one already has a complement of ARs, AKs, and perhaps a few other proven military semiauto rifles.
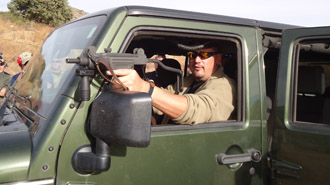 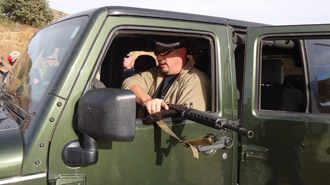
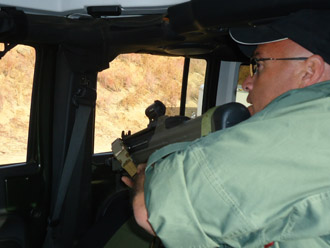
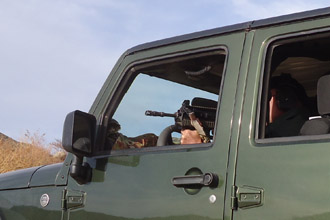
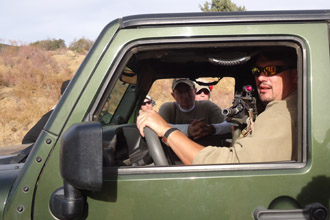
Maneuvering and directing fire from within vehicles are far easier with subguns than conventional rifles.
Maneuvering conventional rifles (even if equipped with folding stocks) inside vehicles is a tough situation.
Bullpups are much easier to manage. Another advantage of FS2000: controlled ejection of spent cases.
There will be no launching of hot casings into companions, yourself, or deflection everywhere in vehicle.
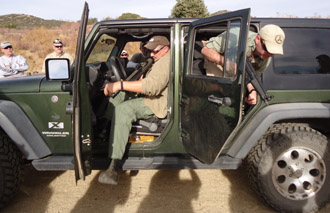 
Maneuvering and dismounting from vehicles are much easier with subguns and bullpup rifles.
However, a subgun's compactness from a folded or retracted stock -an advantage from within the vehicle-
is not a complete advantage because aimed fire upon vehicle egress now requires deployment of the stock.
With a bullpup rifle design, buttstock is always there, ready for close-retention or shouldered aimed firing.
With FS2000 forward track ejection design, there is no concern at all on firing side or obstacle proximity.
Recurring point to note: pistol calibers of otherwise proven subguns just don't have distance plus energy ability that conventional rifle calibers have. That's the ultimate advantage of bullpup rifles in 5.56, epitomized by the FS2000. When opportunity presents itself, become familiar with all types of firearms.
Four Day Combat Rifle
by Gabe Suarez of Suarez International
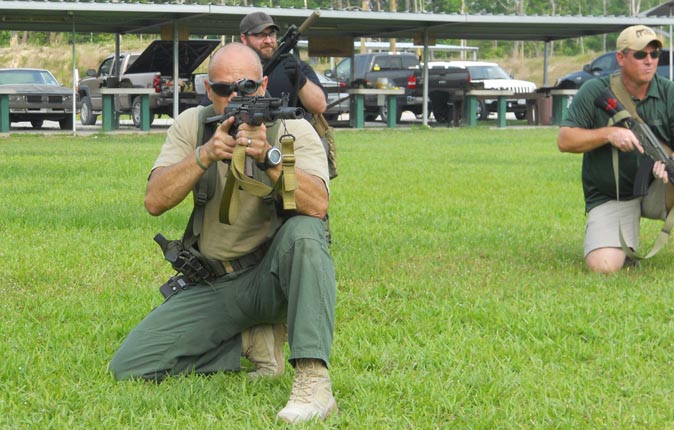
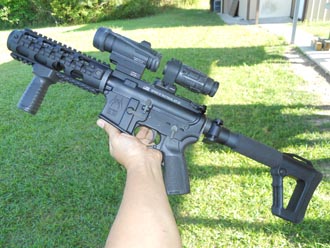
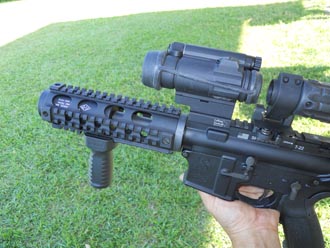
Whether conventional rifle, bullpup or pistol format AR - all platforms were witnessed to be effective
in this thorough four day class. This class had content of many in the Suarez lineup, and two days of
team movements including vehicle operations revealed huge advantages for bullpups and AR pistols.
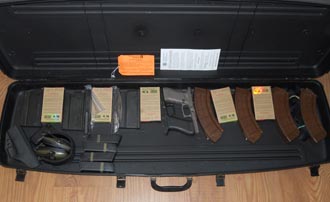
Flying over to the course
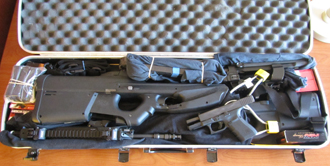 
Not a big deal at all: Pack efficiently and quite a bit can be securely contained in one hard case.
It isn't required to use cable locks but I choose to separate assemblies and emphasize unloaded.
Quantities of ammo would be obtained at destination; part of planning ahead like hotel and car.
Standards review
Expected and vital course material included manipulation (loading, reloading, positioning)
of firearm from both left and right sides - especially if needing to stay low to ground.
These easy reps can and should be conducted dry by individuals on a monthly basis.
Rifle transitions to sidearm in the most simple, non-glamorous method. This gets rifle clearly out of the way
and under control - not requiring to be clutched to body, dangling or crashing into self and items nearby
if needing to run a distance or even going to the ground for the only available defensive/offensive position.
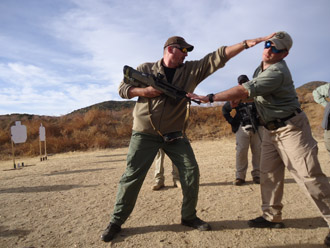
Shoulder transfers next... which leads to all-important movement in any direction necessary to get off the X.
Move! Get off the X!
Simple fact of rifle gunfighting: everyone needs to be comfortable with shoulder transfers and
subsequent direction changes and inevitable requirement to manipulate rifle from either side.
Perfect cheekweld and shoulder pocket is not necessary during such brisk crucial movement.

Exploding off the X - mandatory required ability just to begin in serious effectiveness with chosen tool...
Dry practice both sides forward, lateral, rear angles - then live with extremely motivating salvos of gunfire!
How many really, honestly train like this? Spend the money and time, perspire, work oneself and gun!
Static position shooting with overly frequent checking/replacing of targets is just shooting - not training.
Bullpup rifle users can alter cheekweld index slightly and tilt rifle centerline inboard to have ejected cases
bypass face during shoulder transfer/movement off X. Get accustomed to ejected cases and 'distractions'.
Crucial fact on explosive lateral movement: moving off the X fast requires varying tilt, finding grasp of rifle
to increase speed & control - all while working the trigger and sighting over the newly oriented top of rifle.
If one insists on getting flash sight picture or psycologically needs to see their red dot on every movement,
we will be too slow. Opponent may already be firing! And another reality - electronics & glass can fail.
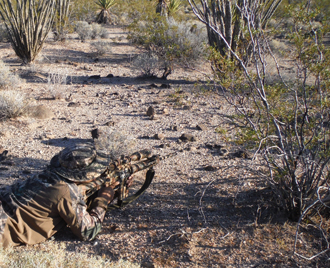
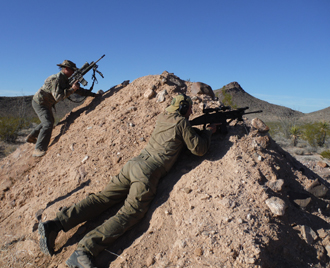
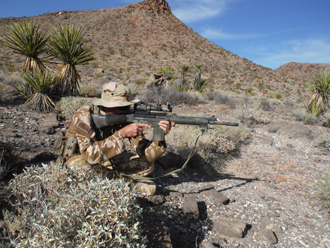
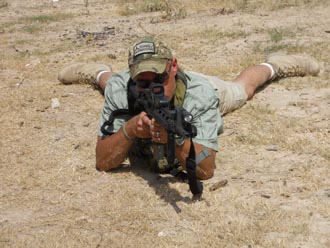
Hidden and obscured targets
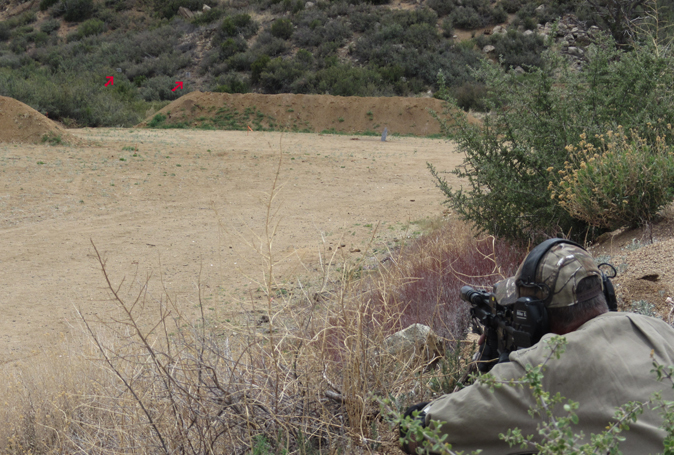
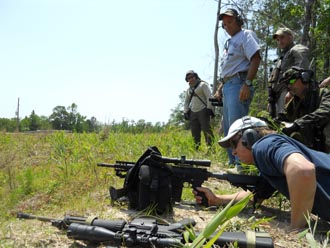
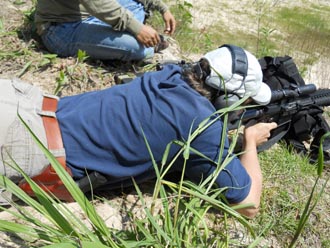
Locating small targets and scoring hits from improvised positions proved to be great challenges.
Many went prone on sloped/uneven ground, even stabilizing firing positions up against boulders.
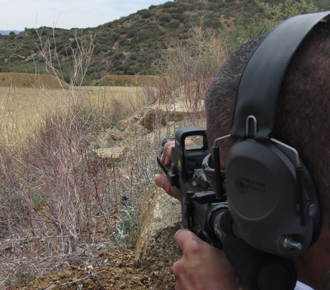 
Regardless of tool - AR pistol format or rifle, everything was very capable of hitting obscured steel.
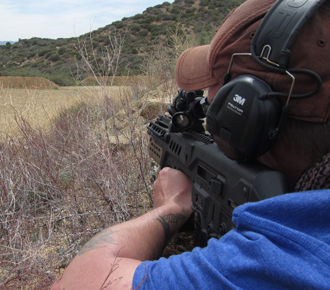
Advanced skill building
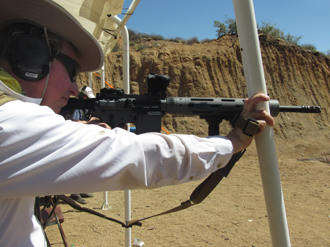 
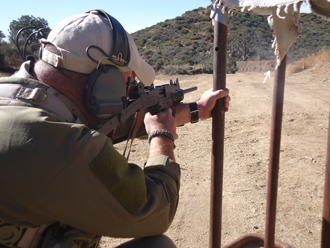
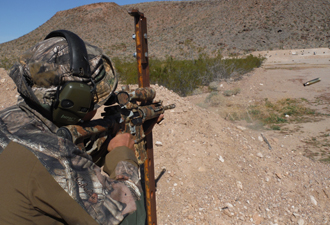
Vertical improvised support position in the field - proved to be solid firing position utilizing sling.
(more pictures of this application in Guerrilla Sniper 2 course report)
Coordinated firing - with a goal for each shooter's one decisive shot to be fired simultaneously so
the entire team's hits result in successful neutralizing of multiple targets - and sound as one report.

A team leader or separate coordinator would give the command and count for the simultaneous shot.
More application and the optimized rifles would be found in the Guerrilla Sniper course.
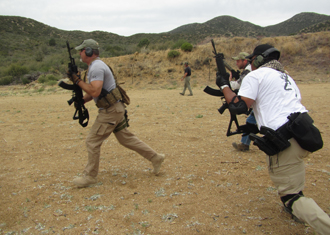
Multiple guns - pairs and team movements
Working in pairs, maneuvers were rehearsed dry to get better positioning and spacing.
Going live reminded everyone about the 'fog of war'. Amidst gunfire and bullets hammering the targets,
simple expectations of keeping control in distance and communication with each other proved tough.
While it was easier to coordinate brisk movement forward or to the rear between a pair of shooters,
more experiences were in store for everyone. A huge advantage with more shooters: there's greater
effective volume of projectiles on target - but that requires solid communication between everyone.
Bolting ahead may be ok for singular or pair element. Not so good when more guns have joined the team.
Simple yet crucial rules are trigger finger and muzzle discipline along with visual / audible communication.
Working in pairs: Ideally one of a pair be a team leader and one of the other pair be assistant team leader.

Team leaders would 'drive' and guide the pair's shooter, confirming next intentions clearly to other pair.
All involved must stay in control, be aware of each other's zone of fire and be attentive to communication.
Formations in team movements were also employed. Forward attack and rearward egress directions
were rehearsed dry and then run live with different teams, leading up the inclusion of vehicle situations.
Appreciable volume of fire could be sent to targets when working with 5, 6, 7, 8 or more as a unit.
Reloading and covering for each other was possible as more guns ensured continuous firing downrange.
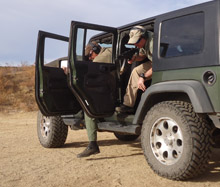
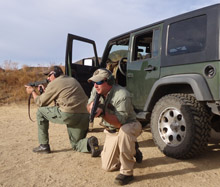
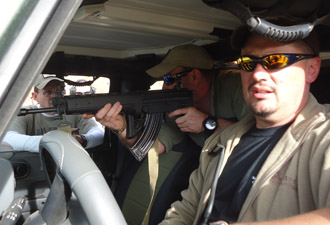
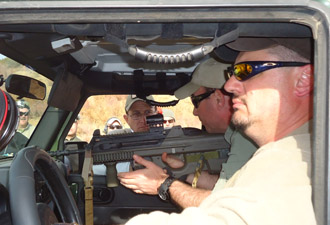
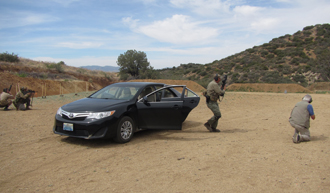
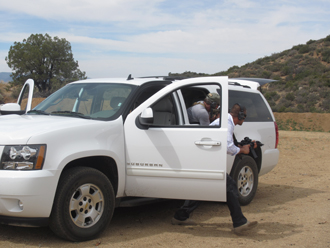
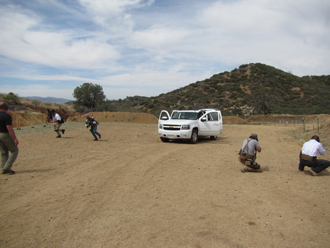
Vehicle work

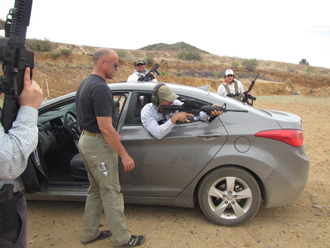 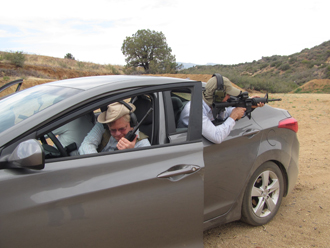
Rehearsing techniques and working out variables is crucial in confines of vehicles and upon brisk exit.
[as seen above, it is not necessary in situations like these to have a shoulder pocket index to hit targets
from otherwise difficult or forced shooting positions, such as the cramped rear seat of a compact car]
Short barrelled rifles (AR15 above) and bullpup design rifles (Tavor above) had distinct advantages.
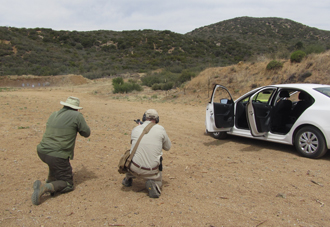 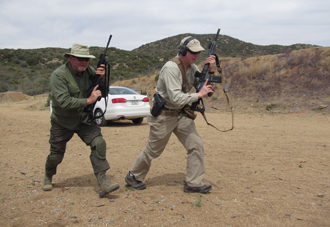
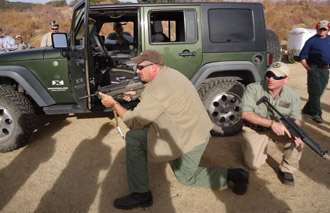
Upon dismount of vehicle, individuals or pairs need to get distance from this large bullet magnet,
communicate and cover for other team's egress. Staying right next to vehicle is not a good idea.
 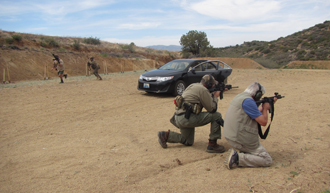
Forward and rear facing situations were encountered and drilled with lots of adrenalin and ammunition.
Mag dumps were not the effective answer; regulated and purposeful expenditure was effective enough.
'Talking guns' or controlled alternating shots from each team member worked very well and absolutely
required some exciting round count, in case one thought the drills went into frugal ammo conservation.
 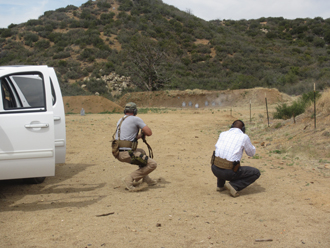
Each element ran a controlled distance while covering fire was sent to targets by other element.
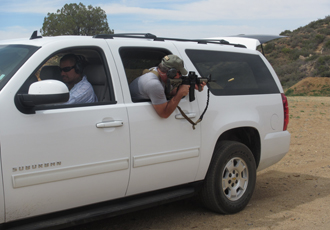
[cheekweld index application with AR pistol seen above extremely effective like earlier pictures
where no shoulder pocket index was possible by shooters leaning out and firing from windows]
Lessons learned
Steyr AUG, IWI Tavor, FN FS2000 (above) were present and proved the advantages of bullpups.
As usual, I continued the steel-cased ammo testing with the FS2000 I brought to this Four Day course -
and true to 'Murphy's Law'... in the last two hours of Day 4, the "most undesirable stuck case" occured.
This particular FS2000 brought to the course had about 2,000 rounds of Wolf and Tula run through it
previously and was indeed clean before Day 1. It was not cleaned after Day 2 or even Day 3... hmm.
I did have thoughts to brush chamber on night of Day 2 - but didn't - wanting to see how far it can go.
Almost 700 steel-cased .223 and 100 brass .223 were fired, all that time in the desert heat and fine dust,
then the undesirable hopelessly stuck case happened. Sure, I simply switched over to my PS90 afterward.
(Chamber cooled, flooded oil around case - stuck case did not come out of FS2000 until hours later.)
 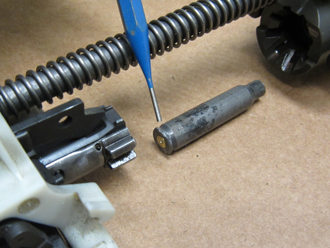
The extractor did what it was supposed to do; attempt to extract case by rim on firing and manually after.
(only AK variants should be expected to cycle steel-cased ammo because of their inherent design.)
This was another good yet painful extended test (how many do I need to do?) with obvious outcome.
As seen before on many other rifles' similar situations - the rim just rips off. Also on Day 4, a LWRC
AR-15 had a stuck case occurence - alas, it can happen, but I got that one cleared swiftly with a rod.
The crucial and age-old lesson here is: Do not nickel-and-dime yourself or your rifle; whether it be
a basic $1,000 or excess of $2,000 Tier One rifle. We all agree (right?) it is a given that we would
load ready magazines with worthy ammunition; do that all the time. Successful results depend on it.
Other than wisely using quality ammunition, firearms and equipment - these contribute to success:
Be in excellent physical condition - and consider excellent while being weighed down with gear.
Conduct quick cleaning of guns at end of every training day; excess malfunctions are not needed.
Hydrate constantly (ideally with water), eat right and get a good rest during courses or otherwise.
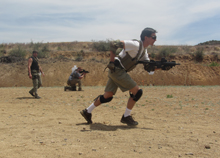
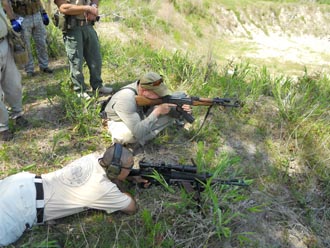
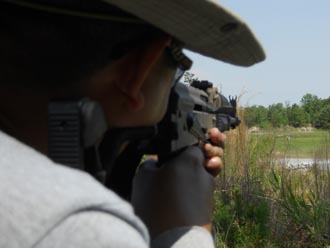
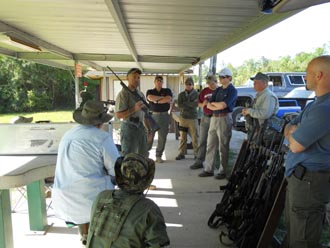
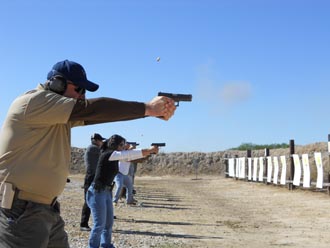
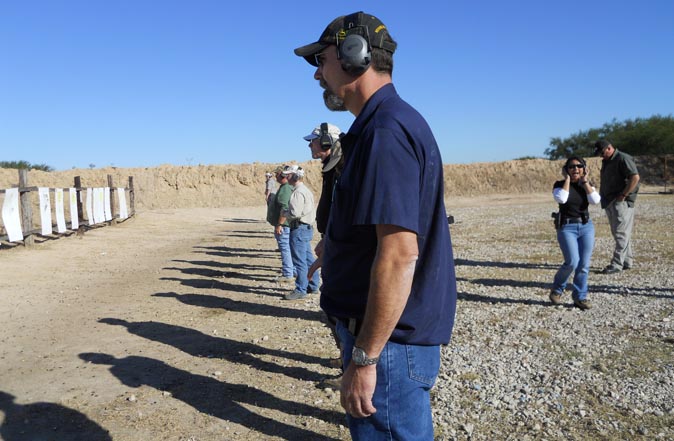
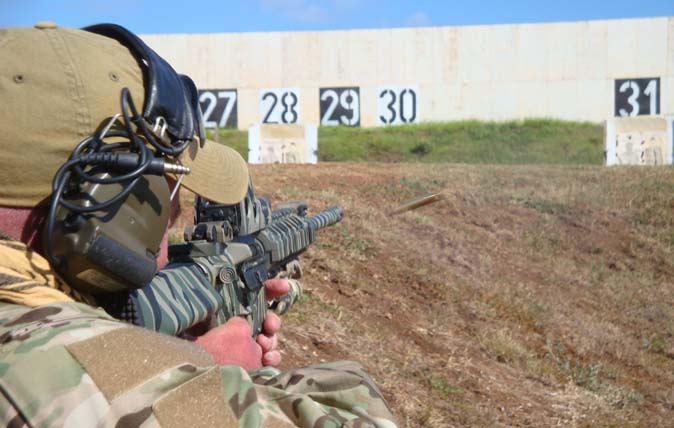
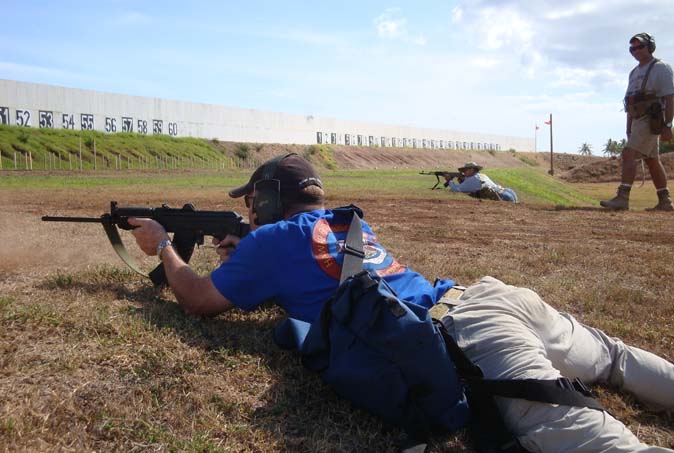
Advanced Rifle Gunfighting
by Gabe Suarez of Suarez International
Advanced Rifle Gunfighting - any military semiauto magazine-fed rifle can be put into service.
No surprise; AK and AR-15 variants were most prevalent. Have a sidearm, support gear minimal.
Any rifle caliber could work, though best choices in this category are .223/5.56, 5.45x39, 7.62x39.
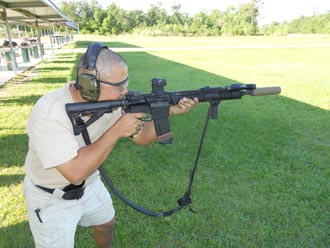 
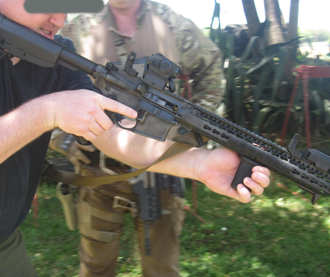
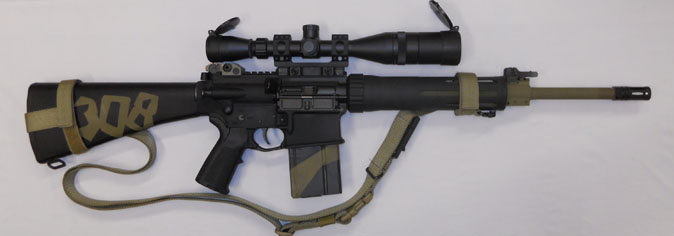
Courtesy pics from one of the class attendees; suppressed rifles utilized for this and another class.
(L) Larue 5.56 with Aimpoint T1 and Surefire mounted at ideal 1oclock has Knight's Mfg suppressor.
It is actually extremely heavy up front due to the short efficient can's weight. (R) An LWRC in .308
with Advanced Armament Corporation suppressor. It had to be sighted-in and checked at various
suppressor index positions for optimum consistency in preparation for a Guerrilla Sniper course.
This Short Barrelled Rifle was a dedicated .22 LR by Spike's Tactical with a Gemtech suppressor.
Heavy with large Aimpoint M4 and magnifier, imagine how light and handy it would be with compact
Trijicon 1.5x ACOG or other optics such as a Trijicon RMR, Leupold Delta Point or Aimpoint H1/T1.
Sound suppressed / SBRs exciting and always an attraction for sure - but on to the course report.
Transitions to handguns are quick and simple. One must consider possibilites to take off in a run
or get elsewhere and then deal with rifle (reload/clear malfunction) when threats no longer exist.
The ability to stay low to the ground and skills to reload or work the rifle - both sides - is often forgotten.
Adjusting AK's safety lever is straightforward and simple, as is understanding sight-to-bore disparity.
Dry drills to build fluidity in movement is important. Conducting live fire drills can then be smoother.
Picking up speed in movement yet maintaining the balance of hits versus misses is crucial.
It is also understood that multiple shots are the norm, very effective with hits from these rifles.
At this course level, it is a given that all must be comfortable with after-action 360 degree scanning
and reloading without looking down at pouches, mag bags, etc. Ambidextrous ability also required.
Exploding off the X to get off line of attack is often omitted in many training courses.
Most never see the reasons why until attending these and Suarez force-on-force courses.
Transfers from right-to-left shoulder and back is often not practiced; it needs to be second nature.
Attacking or egressing in the 11, 1, 3, 5, 7, 9 o'clock directions from a threat at 12 o'clock front...
Rifles will be in canted or side flat positions which help immensely in accelerating movement off X.
Dealing with predicaments like narrow hallways or where there is limited side movement possible
is a revelation when one must work with positioning and elevation changes in reference to threat.
A solution to narrow area predicaments is usage of incortata and pasata soto (fencing) concepts.
Shoulder transfers and fast downward/upward lunges while firing rifle is unexpected and devastating.
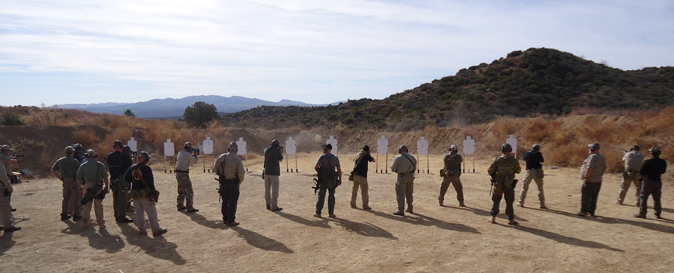
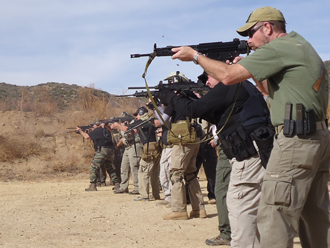
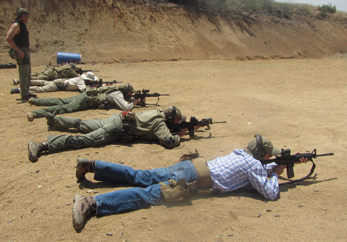
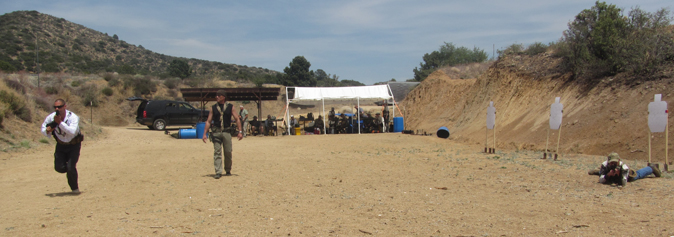
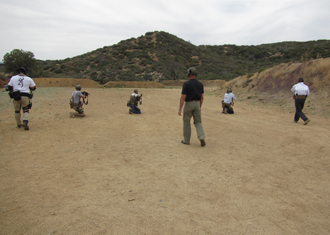
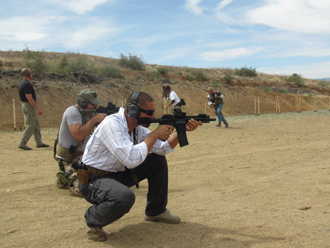
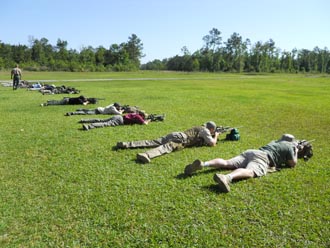
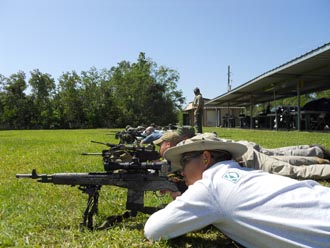
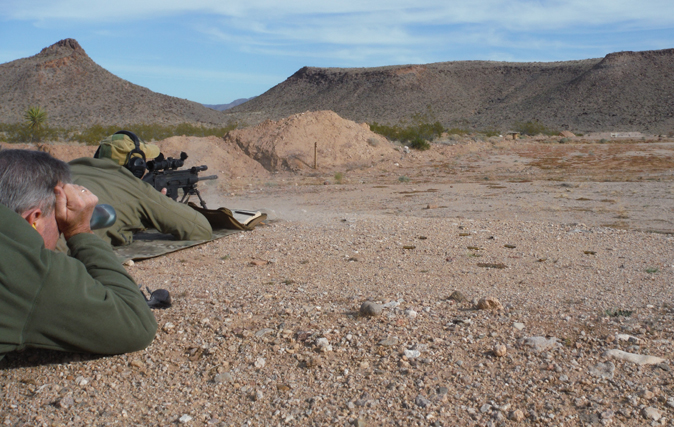
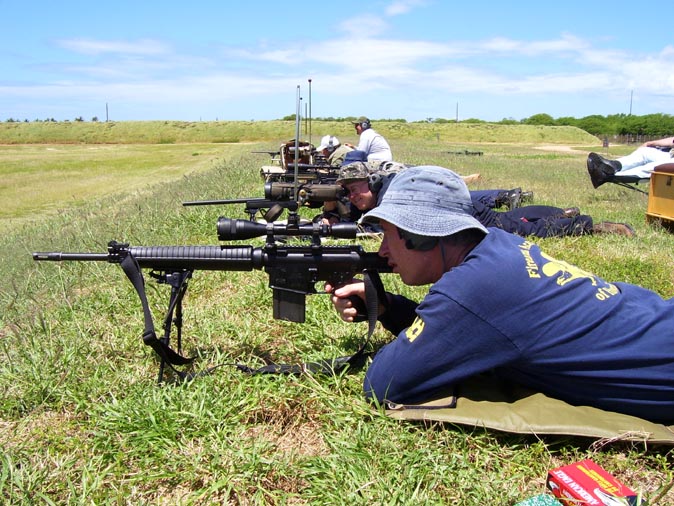
Fast paced drill involved running from 200 to 50 yards toward several steel targets, firing from various
field positions at different distance intervals. Solid ability of students' firearm handling is mandatory.
Those with red dot optics on their rifles were hitting the 16" steel targets faster than with iron sights.
While I always challenged myself with the 'make it tougher' exclusive use of iron sights, this running
drill was a glaring reminder of "use technology to help you make hits faster". - link: optics on AKs -
Full-speed team drills like these are invigorating and highly recommended for training experiences.
Adding physical exertion and stress should be mandatory for genuine training. Anything less gives
false confidence to the individual and never prepares one for anything except rapid firing at targets.
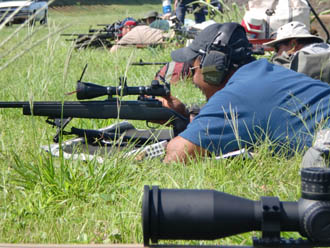
Long range ability at 300 yards with iron sights is always a welcome confirmation for shooting skill.
Working in teams, spotting for each other's open sight hits on 16" steel plates was an excellent drill.

This course was the perfect precursor to the Guerrilla Sniper course to follow.
There is no limit to what one learns and experiences in courses as these.
Build your skills and integration with a cross-section of capable, serious firearms practitioners
across the country and be sure to attend Suarez classes now, not later - before it gets limiting.
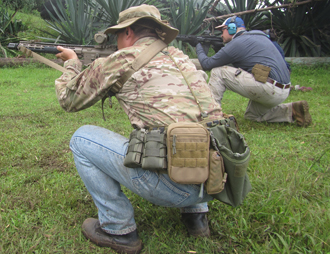
Guerrilla Sniper 1
by Gabe Suarez of Suarez International
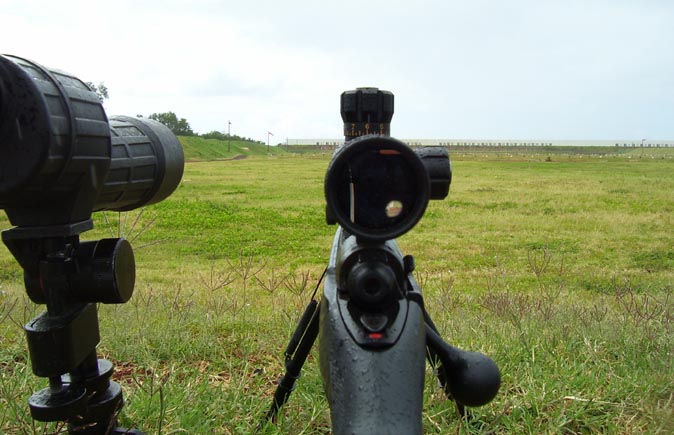
Important preliminary for any rifle course (especially scoped applications for distances): sight it in!!
Some may be amazed to see students show up for courses without knowing where their rifle hits.
It is crucial for the good of the entire class for attendees to have basic 100 yard zeros at minimum.
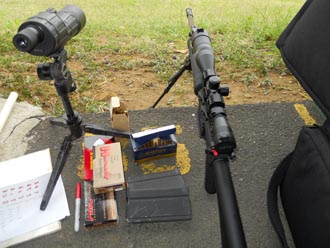
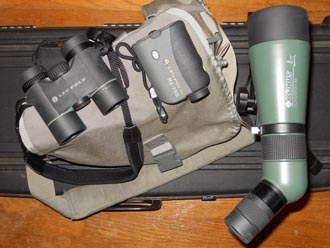
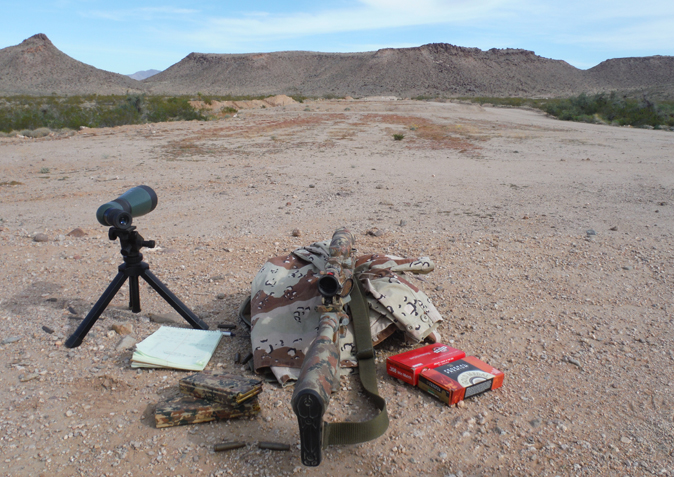
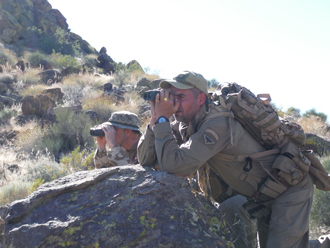
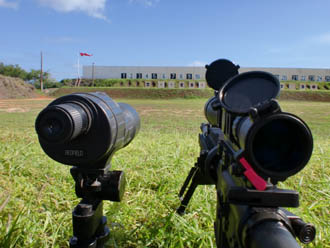
Have quality binoculars, laser rangefinder and perhaps a spotting scope - most helpful for 300+yds.

Rifles for realistic marksmanship demands should be capable of firing many brands consistently.
.308 (7.62x51) caliber semiauto military type rifles should be expected to perform well in training
endeavors like this and should not be limited to consistent accuracy by handloads or one brand.
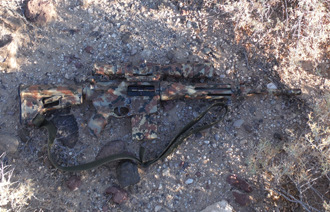
This rifle rig fired an assortment of ammunition consistently throughout the course's 600 yards.
Armalite AR-10 .308 utilized for course (10TCBNF) had a 16" barrel and average match trigger.
Sticking to the simplicity and purity of 'take it off the shelf and run it' mindset, it was kept stock
except to change A2 grip to Magpul MIAD with .308 grip wedge then adding Troy+YHM sights.
Optic? Median priced Leupold 4-12x40AO MK2 in American Defense throw lever scope mount.
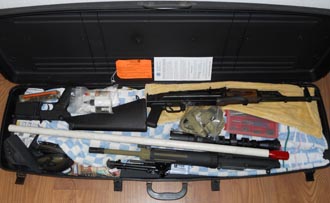 
Packing equipment for TSA approved travel - plan well and you'd be amazed how efficient it can be.
You can remove the foam from a hard case and put in two layers of equipment separated by cloth.
Info on TSA requirements with their links are here -flying with firearms- On to the course report...
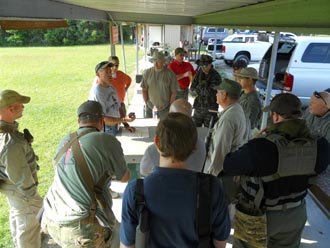
Gabe Suarez covers an overview of guerrilla / insurgent history, tactics, thinking. Quick review of
rifles, calibers, pertinent and efficient equipment, then it's dry firing and review of field positions.
Note: participants often omitted use of shooting glasses. Not a concern; ultimately their decision.
In practical reality, would one have them in hunting or emergency uses in unthinkable situations?
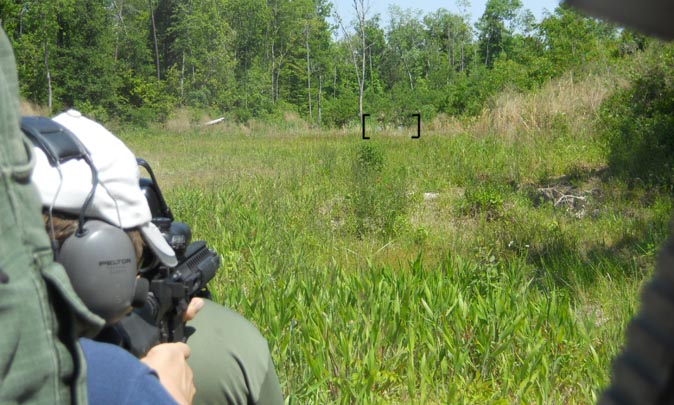
After standard 100 yard shooting on paper to confirm rifle's zero, it was on to the start of variables.
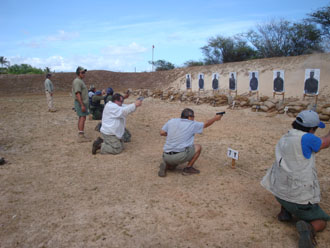
Approx 200 yards away, partially obscured by scrub and grass, were three 16"x19" steel plates.
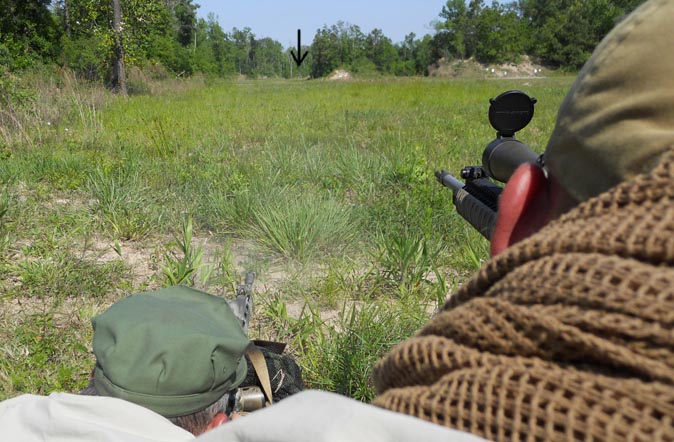
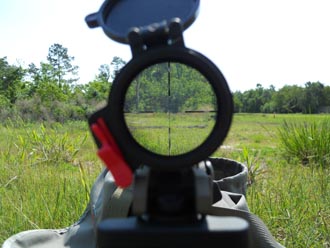
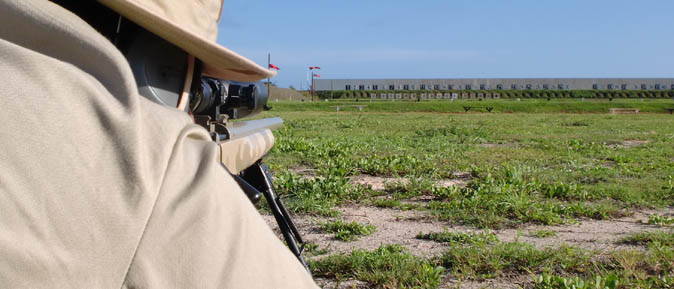
Standing and kneeling firing positions were conducted first. Extremely fun firing thru vegetation.
Caliber of choice predominantly .308 (7.62x51). Clearly the most sensible and proven cartridge
considering its availability, cost, ballistics, recoil management and firearm operational efficiency.
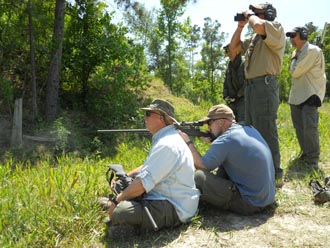 
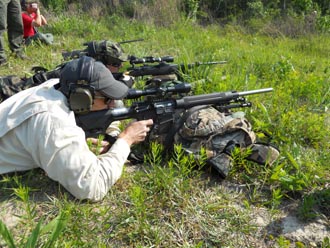
An answer to more stability and working with partner to ensure hits on obscure targets...
Muzzle blast is not bad at all. If rifle has a flash hider or sound suppressor, even better...
If rest partner (or teammates on immediate sides) spots with binoculars, hits are easily confirmed.
Any hit resulting in audible impact on steel equals an effective hit in the realm of the course subject.
Then 300 yards, plus/minus a few depending on angle off centerline one chose to take the steel.
Working again in pairs, coordinating hold, breathing and timing for the shot - everyone shot well.
Those steel plates begin to get rather small at this distance. We used them as targets to 600 yards.
Approximately 400 yards from the three steel plates - and having to deal with terrain features.
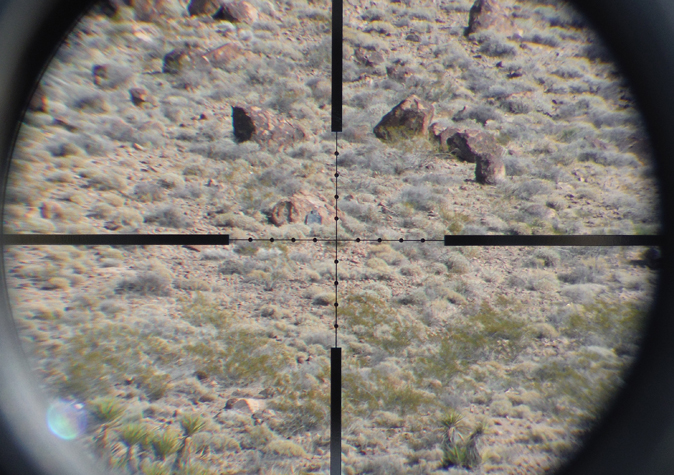
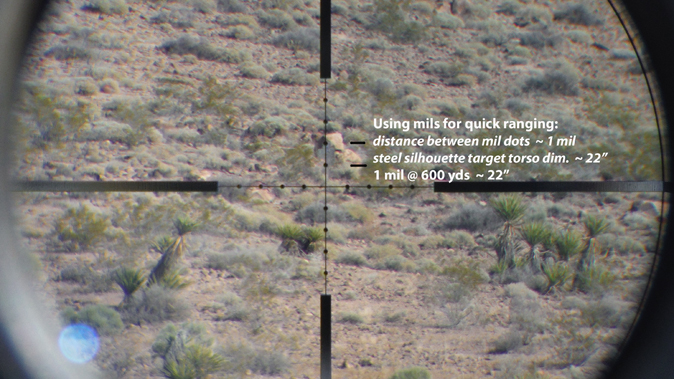
With more tips and reminders for the 'quick use of mil-dots in scope' to keep it simple and hit fast,
it was now time for 480 to 500 yards. Guerrilla/insurgent concepts brought on streamlined thinking.
Much harder to hit at 500 yards, yet everyone managed their share of slamming the steel.
For some, even with a high percentage of hits, there's the challenge of wind and 'stuff in the way'.
 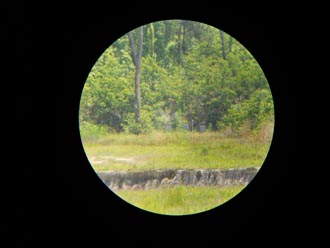
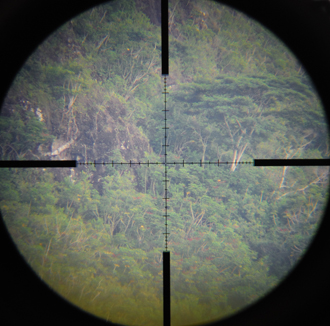
View thru a 12x setting on rifle scope and 40x spotting scope. At 600 yards, 16"x19" steel is small!
Again; with uneven ground, obscure line-of-sight of targets, variable winds - all add to building skill.
Making solid hits at this distance with all the wind conditions was the most fun in my opinion.
Why shoot without challenges? True training needs to be tough and progress in difficulty - always!
Very practical drills included 200 yard shooting at 8" steel - under timed competitive-spirit pressure.
Other drills involved shooting as pairs, trios or quads under coordinated fire and firing on countdown.
Some drills included: working together to shoot thru barriers & hitting multiple targets simultaneously.
The more one experiences in the world of aggressive training, the better one truly becomes.
There is much more course content; take the Suarez Guerrilla Sniper class and see for yourself.
- learn more in what you can do with your rifle, build up your abilities and experiences -
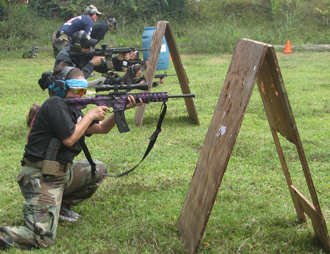
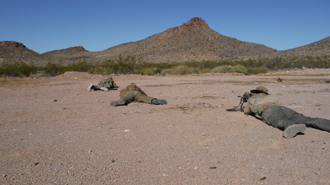
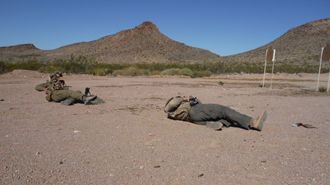
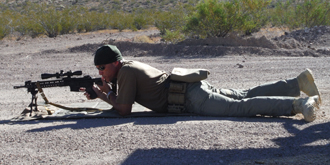
Guerrilla Sniper 2
by Gabe Suarez of Suarez International
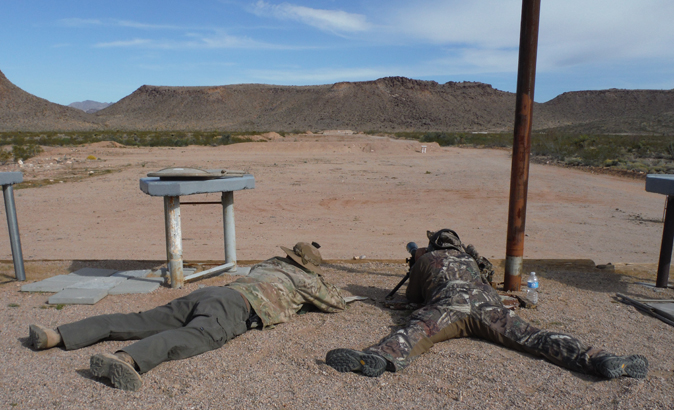
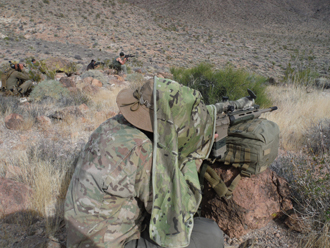
Arizona desert: hot, wide expanses of open yet uneven terrain,
plenty of challenges - just like the content of Guerrilla Sniper 2.
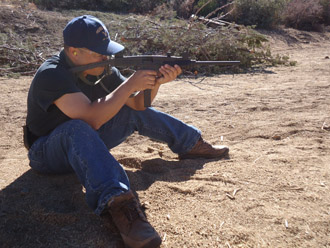
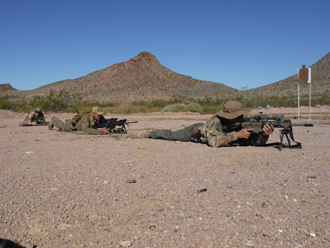
Course began with varied field positions from 200~250 yards.
Performing field positions other than 'too-common' prone (and prone under perfect range cover)
were exercised with high importance as terrain features will often block line of sight.
Hitting 200~250 yard targets from varied and impromptu positions is tough but a lot of fun work!
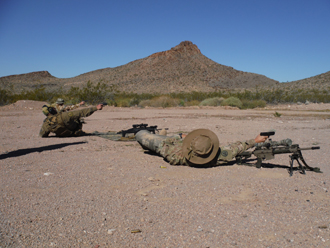
Being sure of a clear flight path from muzzle to target is crucial when encountering obstacles.
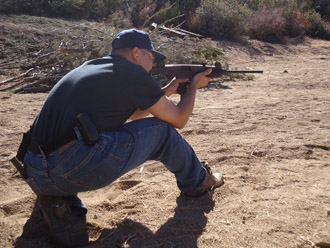
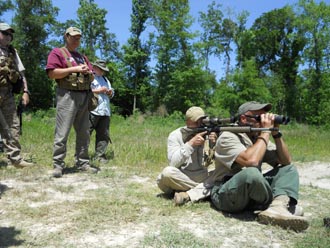
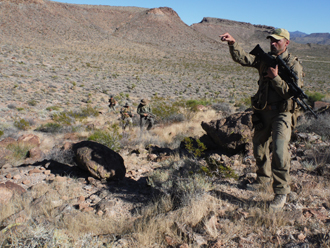
When a stable position presents itself, use it to your advantage.
Demonstrated above is an effective use of sling with a support from a standing position.
Emergency proximity threat drills right, left and rear were covered.
The majority of 'sniper' courses out there omit these valuable concepts.
Thigh and hip exterior holsters with flaps may be the answer for situations often encountered
in this category of sidearm usage. Limiting the ingress of dirt, brush and debris is important.
 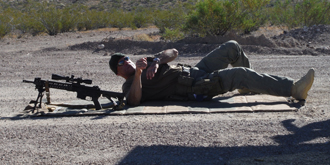
Conducted with empty rifles and live handguns, these drills demand high caliber individuals.
Response rear required the utmost control upon presenting handguns and firing live at targets.
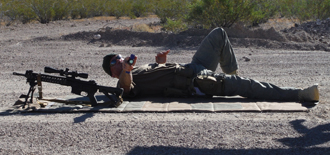
These valuable emergency drills lead to another often avoided or addressed too lightly.
What about being upright, scanning or patrolling - and there is contact front!
On top of that, you don't have your lightweight carbine - it's a heavier scoped long distance rifle!
Snap shooting 10, 15, 20, 25 yards was conducted to cover that issue. With increasing distances
and the need to maintain center hits at brisk pace, it was much tougher than anyone can imagine.
Snap shots are delivered at speeds proportional to these 10~25 yard distances, and most simple
aiming technique (more like a life-saving necessity) is to use the scope's occular as a reference
against opponent. Attempts to peer thru scope itself on lowest power or to expect a perfect sight
picture with top or side angle-mounted dot optics will cause you to be too slow. Perfect cheekweld
or shoulder pocket buttstock index isn't necessary. Center hits with .308 = absolutely dead threats.
Whether goals were head or body hits at respective distances, the reality and sensibility of utilizing semiautos over bolt action rifles really shone through here. Semiauto .308s are the obvious choice
involving a modern and technologically evolving world in an accurate description of guerrilla sniping.
Then for a tougher challenge; snap shooting at 100 yards. Delivering confident shots required trigger control as always but the ability to dial scopes to lower power (and what is your scope's low-to-high
magnification range?) and practicing at varying distances is mandatory for this category of shooting.
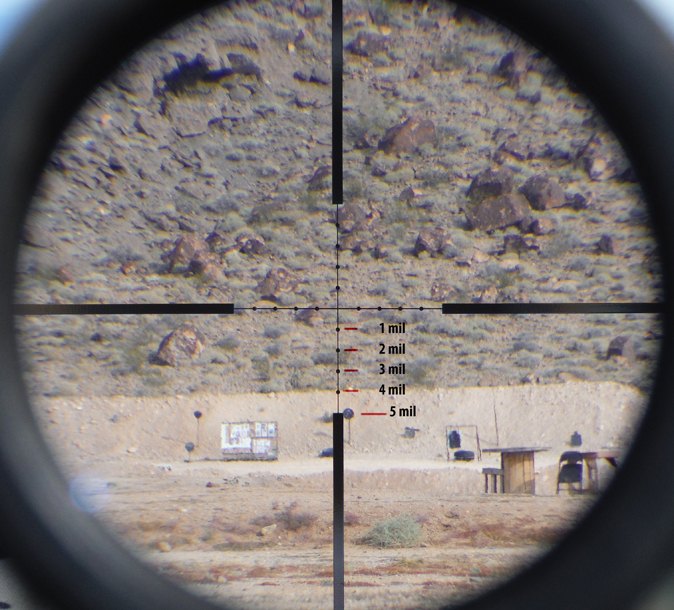
Some steel targets for visual reference. Torso targets ~ 30" high. Circle targets 16 ~18" diameter.
Target recognition, calling out specifics and spotter/shooter communication are crucial skills.
Ability to deliver proper hits (on correct specified targets!) were tested at 200 yards.
Much harder than most would experience in ideal conditions at a local public range.
On to distance shooting: 400, 500, 600 yards and beyond.
At 700 yards, real difficulties begin. .308 trajectory is dropping significantly after 600 yards.
Many .308 rifles with commonly encountered 100 yard zero will have a 90+ inch drop at 600.
Then it's a 140+ inch bullet drop at 700 yards, and 200+ inch bullet drop at 800 yards.
It is crucial to actually train and log what your rifle can do with all types of variables.
16" .308 AR-10 with Leupold's MK2 4-12x40 (mildot, 1/2 MOA click) & American Defense Recon
0 MOA base throw lever mount. (same setup from Guerrilla Sniper 1, now w/ adj. stock, camo)
For this "attainable-for-many-budgets" rig, I could use fast and repeatable mildot holdovers up
to 600 yards. From 700 to 1000 yards, 24 clicks up on elevation (almost maxing this scope's
internal limit) and subsequent mildot holdovers allowed good hits on 1000 yard circle plates.
800 yards: most optics mounted in 0 MOA bases (bases without 10~20 MOA elevation built in)
will have to use the click values plus mil holdovers if employing quick mil dot references to hit
targets swiftly in the guerilla sniper concept. Diligently clicking elevation is fine for demanding
hits on eyeballs to 300 yards and head shots at 500 but making an effective body shot NOW is
the goal when dealing with target variables, lack of calculators or calm brain function in stress
and most of all, taking shots that are truly far. Shooting half-inch groups on paper at 100 yards
every week does not create an accomplished marksman. Pushing yourself to demanding and challenging training (actually looking forward to tough experiences) is where skills are gained.
This Leupold MK2 4-12x40 having a 1/2 MOA click value works very well amidst most people's
instant thoughts that 1/4 MOA would be "more precise". Once again, what's the realistic goal?
Get on target, hit fast, move. There's no time for tedious calculations or time for zipping your
elevation dials (worse yet, counting and losing reference count of incredible number of clicks
required to get scope dialed in to 600 yards or further; whatever it may be). 1/2 MOA lets you
click less & get dialed in quick - at rapidly changing distances. This isn't benchrest shooting.
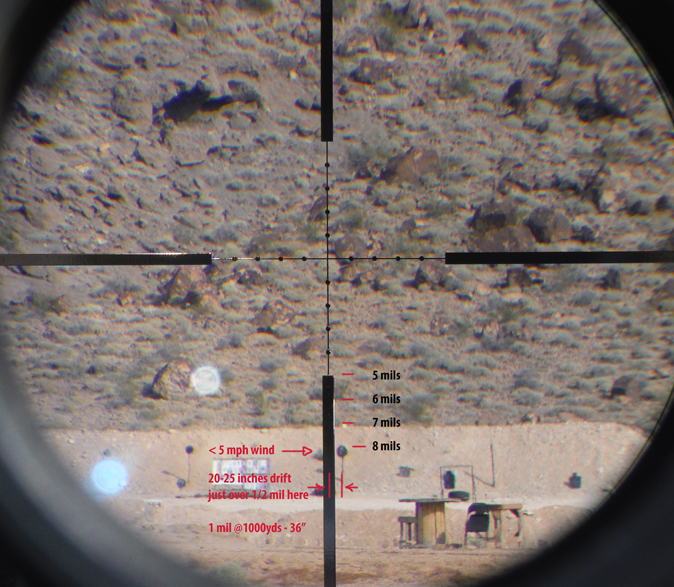
900 yards - .308 bullet drop is around 300 inches. Varying amount of drop at all distances will
mostly be due to bullet velocity (which is a factor of load, barrel length, temperature, etc.)
With my elevation up 24 clicks, this is where I had to hold: at 5 mils on the top of thick vertical,
and just slightly left of the steel circle due to weak but existent 5mph wind blowing left to right.
1000 yard line. Bullet drop of .308 is insane. 400+ inches for rifles with 100 yard zero.
1000 yards: View at 12x through a 4-12x40 Leupold MK2 with most common mildot reticle.
Situation review: Scope mounted in a 0 MOA base on an AR-10 in .308 with 16" barrel.
Quick holdover shots using the mildots were possible up to 600 yards but after that,
it had to be dialed up near the limit of the MK2's internal elevation due to 1" tube,
requiring a tough estimated holdover past the standarized 5 mil reticle reference.
(Image depicts no ARD in use, so downrange is clearer but there's some sun flare*)
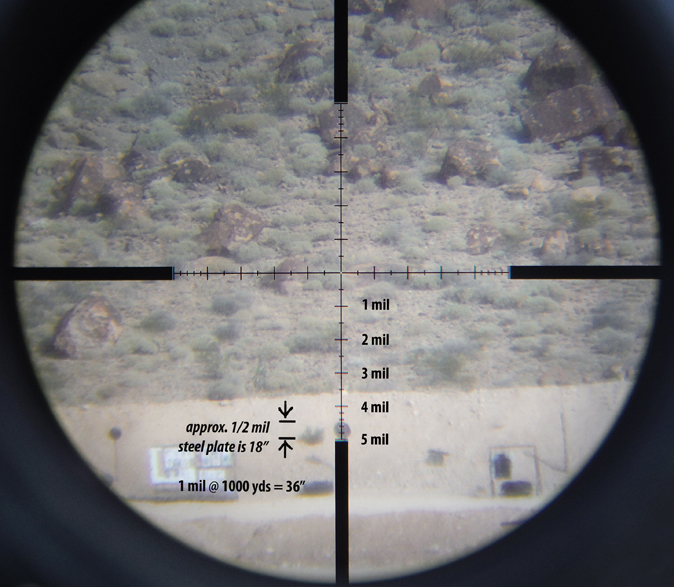
1000 yard position: View at 20x through a 6.5-20x Leupold MK4 with Tactical Milling Reticle (TMR).
Even when mounted in a 0 MOA base, this scope had enough internal elevation clicks possible
due to MK4's larger 30mm tube, on a similar AR-10 rifle in .308 with 16" barrel. (ARD image*)
 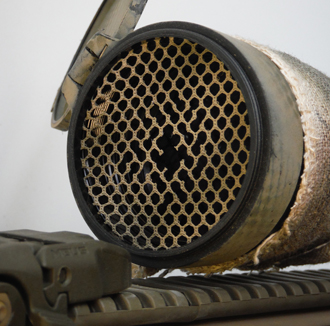
Unlabeled view thru a 6.5-20 MK4 TMR scope. *Simple netting as AntiReflectionDevice (ARD).
Allows finer range estimation and holdovers. ARDs will darken images through any optic.
From 600 yards, it was imperative to utilize optics that magnify 10 power and higher.
At 700, 800, 900, etc: Quality of scope, magnification and reticle type made all the difference.
30mm scope tubes do have more elevation possible over 1" tubes and 10~20 MOA bases
would be best if considering lots of shooting past 600. TMR and several other companies'
"fine-line" mil reticles would be far better in distance shooting over standard mildot reticles.
Front focal plane (FFP) scopes also an important consideration to keep mil references same
proportion when viewed thru the scope's magnification settings. Without FFP, mil references
do not maintain the same proportion and then range estimations / holdovers won't work out.
Those aspiring to pursue true long range shooting (600+ yards) should seriously consider the
phrase "buy quality and the right package the first time". Also known as "buy once, cry once".
Trying to budget and skimp on any one or combination of: rifle, bases, rings, scope, ammo -
only takes longer for accelerated skill building and requires continual equipment upgrades.
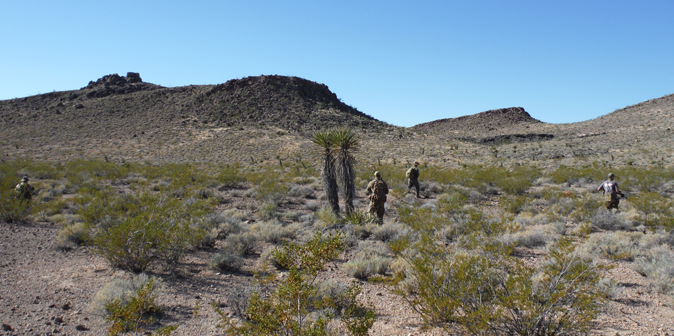
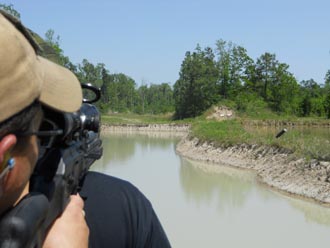
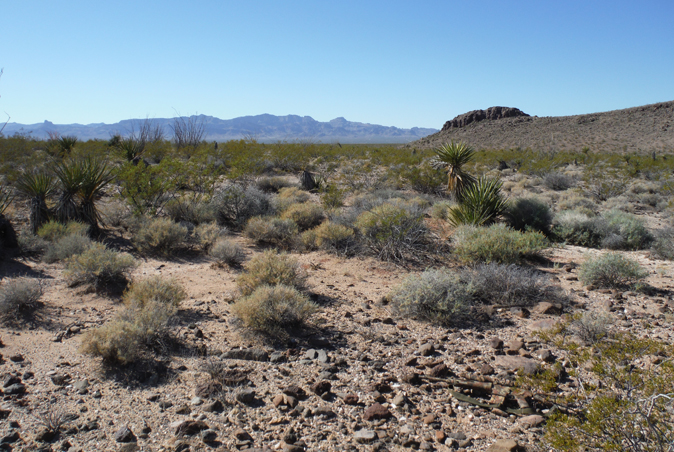
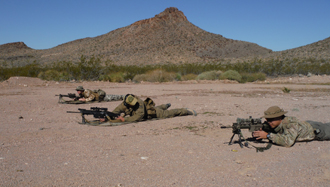
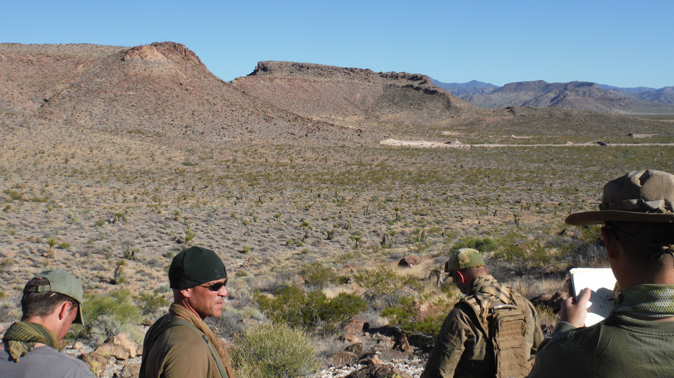
Patrolling and team movements were also covered in Guerrilla Sniper 2.

Covering distances across open terrain revealed how easy it was to spot persons and items
(especially in black). Natural earth tone colors such as browns and olive drabs worked well.
How many people can you spot in the picture above? You should be able to see four.
Selecting specific earth colors and patterns can optimize camouflage depending on location.
No single pattern can cover all situations perfectly, but for solid color, olive drab did amazingly well.
Even in concrete and urban environments, tans/browns/greens do much better than black.
Range cards were created before a final exercise. These range cards depicted landmarks,
notable terrain features and various distances checked with spotting scopes and rangefinders.
 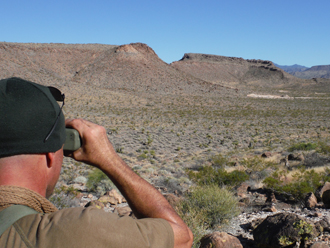
Final exercise required finding several steel silhouette targets at various distances and scoring successful hits. Very tough in the desert sun and repetitive terrain / lack of outstanding features.
Imagine trying to find (steel) targets among all the scrub and rock clusters with just the naked eye. Scopes help, but good communication with spotter and use of prepared range cards bring success.
Is the guerilla sniper really concerned about precise head shots at these distances?
Or rather, make solid body hit(s) on target(s) and disappear, demoralizing or silencing opponents?
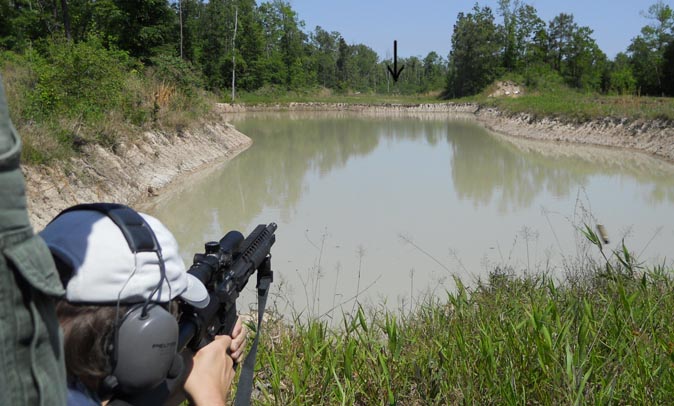
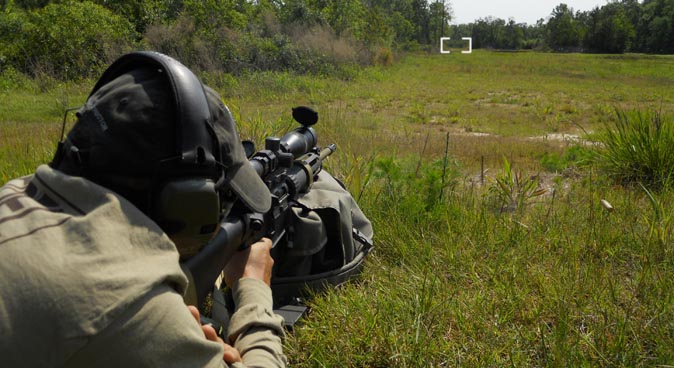
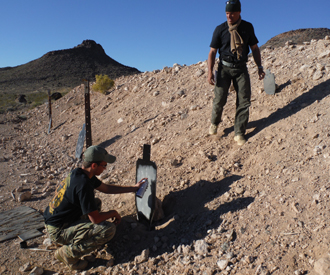
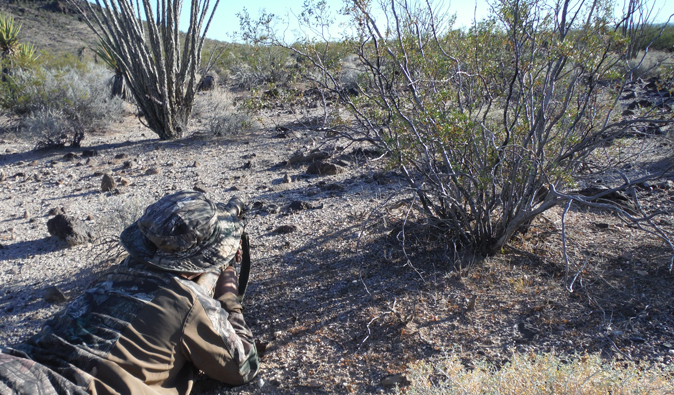
Next level of difficulty spotting a silhouette - 'hidden in plain sight'. It was harder for some to see
this target under the harsh sun depending on the viewing angle they had. The steel could appear
yellow or silver-gray or gray-black. Shifting firing position was necessary to identify target and fire.
Field ARD: Some dry grass utilized for AntiReflectionDevice; it can darken image like mfg's ARD.
It just might need to be pressed into use if attempting to prevent detection by sun's reflection.
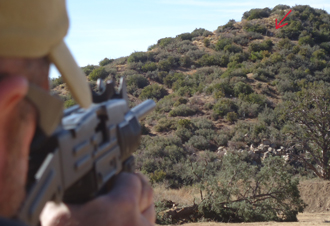
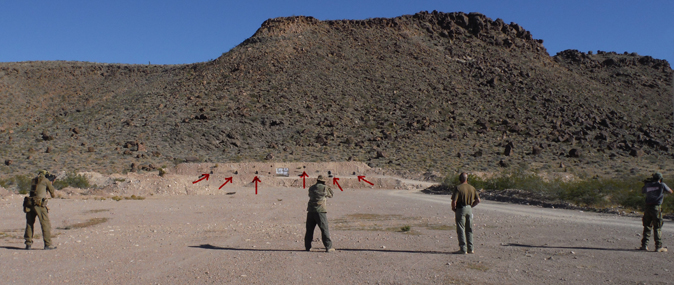
Can you find the steel silhouette target in the picture above? Arrow gives a major hint.
Imagine glassing acres of expansive terrain to find such a hidden target.
Unless a threat target made noticable movement, created unnatural reflections or
exposed their location by muzzle flash, you simply would never find the opponent.
Training in a class such as Guerrilla Sniper 2 definitely makes one a better shooter,
builds advanced techniques for attendees and gives invaluable experience with their equipment.
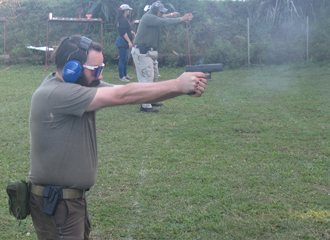
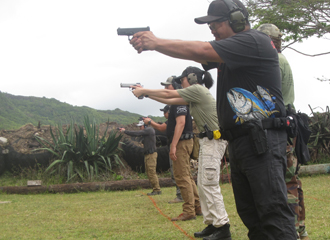
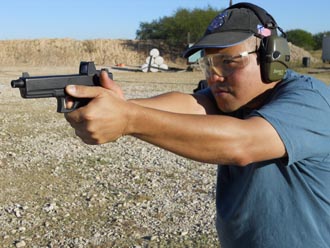
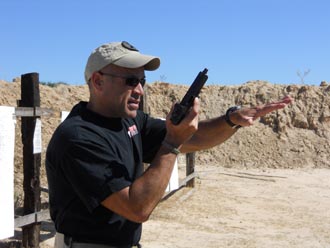
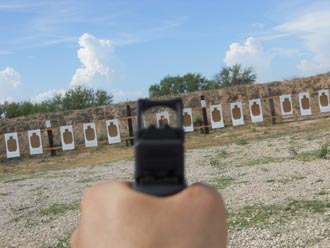
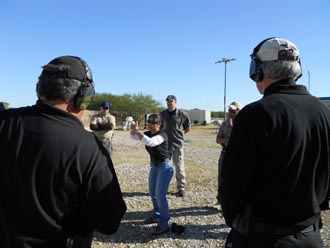
Combat Pistol Instructor Course
by Gabe Suarez of Suarez International
A specialized three-day course for those currently in or planning to pursue the field of firearms instruction.
Gabe Suarez presented a wealth of information that was unmatched by any shooting school or organization-
teaching what works for all levels of instruction, basic to advanced, with teachings based on reality- not
cliches, gimmicks or teaching techniques based on convenience/laziness that many schools conduct today.
Flying up to Texas and taking this course was a mandatory requirement to myself. Those who are in any
instructional capacity for firearms should constantly be learning more and always fine-tune their teaching.
In addition to building skills with teaching ability, one should constantly learn varied teaching concepts -
never be satisfied with just what you know. Some equipment can be of assistance for certain situations:
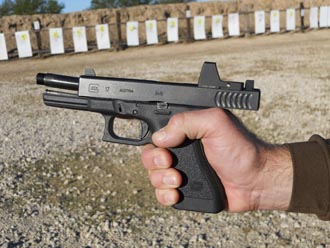
Trijicon RMR sight low-mounted directly to slide. Here are pictures of this awesome optic on Glocks.
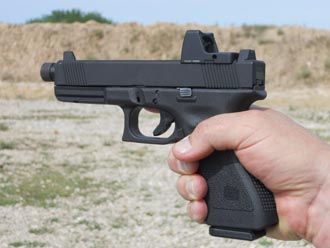 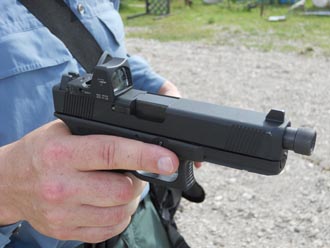
Side views of Lone Wolf slide and threaded barrel (with thread protector) and taller suppressor sights for
this particular Glock. Addition of the Trijicon RMR non-magnifying sight is a benefit for eyes and speed.
Co-witnessing not required with these taller sight heights; just need to dial in desired dot impact for sight-in.
Even if dot and fixed sights do not match up, the phenomenon 'just use the dot' still works without parallax.
 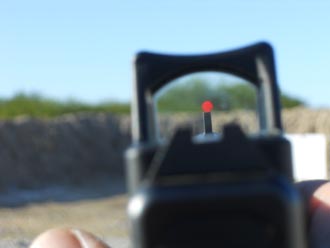
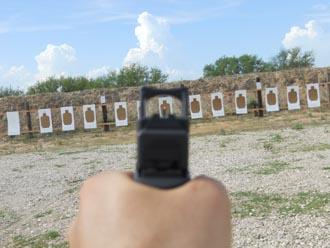
Trijicon RMR mounted to Glock factory slide. Typical sight picture that seemed to shoot well on this gun.
Biggest advantages: having only one aiming point, not needing to line up front and rear sights, defined dot.
This RMR has self-adjusting intensity based on ambient light and does not need separate rheostat control.
All extremely important when presenting holstered handgun, exploding off X and making decisive hits fast.
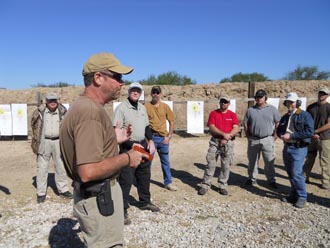 
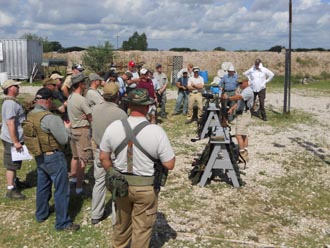
Everyone had opportunities to teach on the firing line and in the classroom. Three days of quality learning.
Gabe evaluated and noted areas of improvement per instructor. Numerous teaching tips given and practiced.
Instructors refined their teaching skills in an accelerated manner. Giving instruction, demonstrating a drill,
conducting a firing drill, getting critiqued by Gabe Suarez and fellow instructors continued for three days.
Giving instruction in a clear and concise manner takes honest experience. Experience will show.
Running a firing line thru an advancing-and-firing drill is conducted smoothly by experienced instructors.
While basic and simple, such a drill needs to be understood completely by the instructor directing it and
the instructor must be capable of demonstrating the drill perfectly before expecting others to perform it.
Ah, and some viewing above will get all bent out of shape if a shooter is one or two steps behind others
in the advancing line. Oh, how those nitpickers have not been involved enough in aggressive training.
And, how sheltered they have been (or choose to be) in what they perceive as 'reality based fighting'.
Demonstrating a drill: should be done with students close, not far - be able to see demonstration clearly.
All can see exactly what is being asked of them so when drill is conducted, everyone knows what to do.
There are those who will gasp at pictures above where others in the class are viewing the firing drill demo
'too close' or 'are in front of the muzzle'. Those who freak out are the ones who haven't graduated to a
higher level; an aggressively advanced level that certainly is a hallmark of Suarez International courses.
Conducting the rehearsal drills to Move Off the X - in Zero to Five Feet and Close Range Gunfighting,
drills w/airsoft guns proves explosive and decisive. This just about invalidates all square range training -
what most shooting schools & overly cautious cirriculum lock into - thus preventing true fighting ability.
Running the drill live fire is only half the picture - gunfighting truth is discovered painfully, realistically
when airsoft is involved in properly administered sessions or courses - human against human. Humbling.
Being eloquent, detailed, projecting one's voice, administering proper instruction, directing the firing line,
taking the improvement advice and critique, and having loads of serious instructor fun describes this course.
There is no substitute for aggressive, accelerated training; absolutely no time to waste in building skills
that can rapidly, positively improve your ability and help you become a more efficient teacher to others.
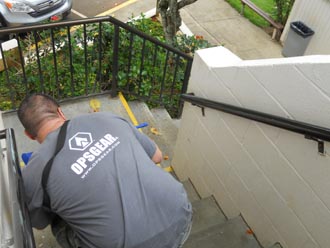
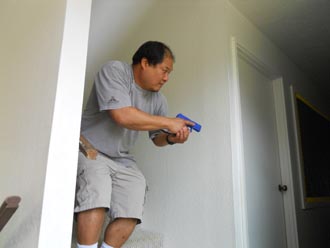
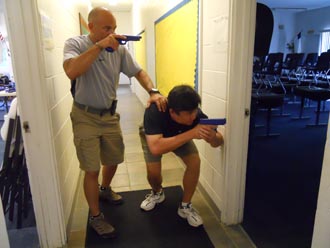
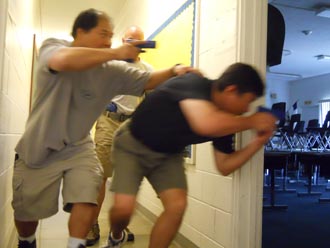
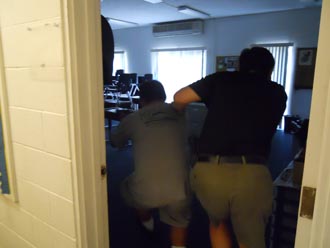
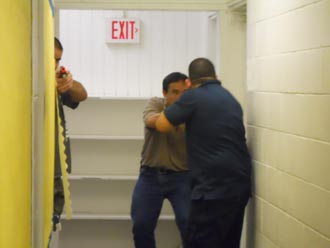
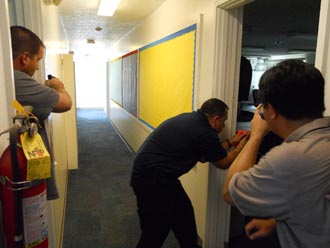
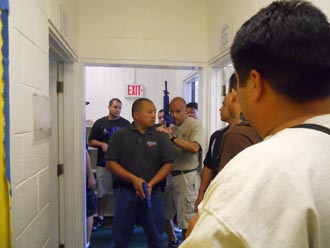
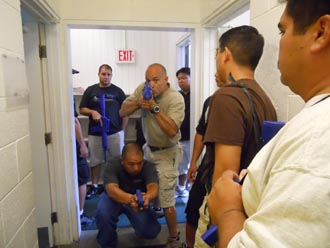
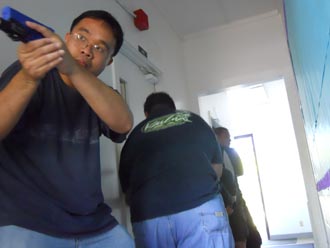
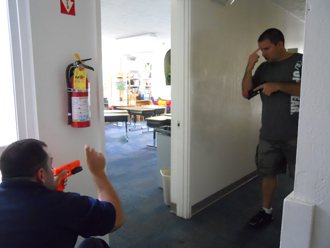
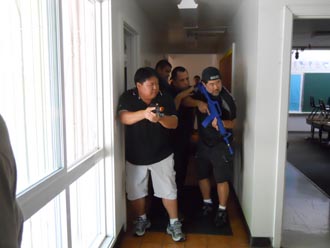
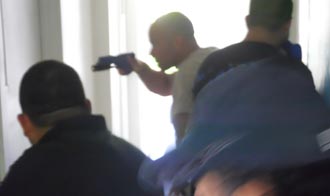
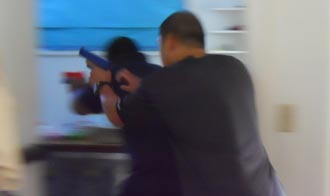
Defending and Fighting in Structures: CQB in Buildings
presented by guest instructor GABE SUAREZ of SUAREZ INTERNATIONAL
A non-firing course that fully pushed the envelope in serious tactics and every aspect
of movement and security inside structures, including low-light or no-light situations.
Gabe discusses the history of close quarters combat, covering immense information on techniques and tactics.
Very effective progression throughout the course was building skills using one, two, up to six person elements.
CQ fighting knowledge, training; continuously developing CQB skills may prove to be increasingly valuable
for all who wish to prevail in unforseeable or unthinkable situations in the realities of these times we live in.
Reality: most will find themselves having to deal with situations alone. Reality: most will never train for it.
Every single angle, movement technique, knowledge of firearm differences and ballistics need consideration.
Merely thinking about possible techniques (and the infinite ways the situation can turn worse) is not enough.
Get into bonafide courses and training environments with varieties of people and surroundings.
 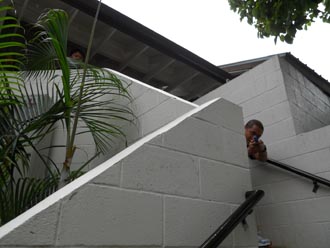
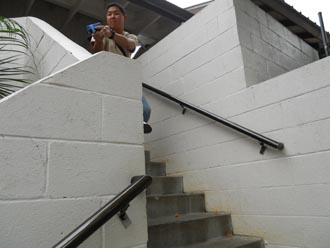
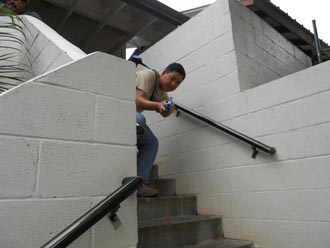
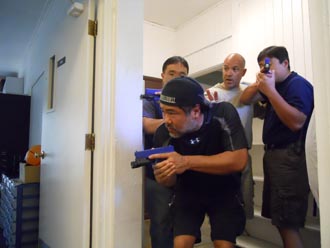
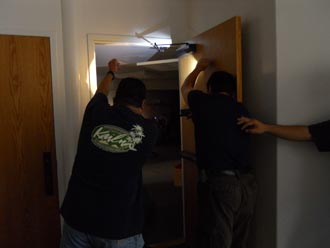
It is tactically easier to clear areas heading up stairs. More control revealing body parts, yet rapidly tiring.
It is physically easier to clear areas going down stairs. Only initially, gravity helps. Control foot placement.
Anything can give you away. A shoe, elbow, cap, brushing against walls, heavy footsteps, stressed breathing.
Careful on glass reflections / use it to your advantage. Extreme caution with windows. Be attentive and think!
There are those who may be too familiar with team tactics and its benefits. Everyone must realize it gets much
tougher on your own, and the reality of that is much more possible with anyone's home defense plans.
Do not forget that once anything goes wrong, the best-laid plans are done with and survivability chances
can be directly related to just how much your brain computer and physical body has tried and experienced.
If you have two working together, getting two guns into an area as simultaneously as possible is important.
Training gives opportunities to see what works for you. One high, one low covers more area quicker than one.
There is no need to be all fast and dynamic 100% of the time. Listen, observe, then move accordingly.
Once again, if its just you or only two to manuever, far better to use all your senses than charge everywhere.
If there is no serious importance to get to, don't go. Many will fall victim to the hard charger syndrome.
Close quarter battle can be described as 50% hunting, 50% not being hunted. It gets worse if you are hunted.
Naturally, three working together is even better! Move briskly when you need to. Watch arms and elbows!
Guns, gear, clothing, parts of body, talking - any noise made reveals information to your opponent.
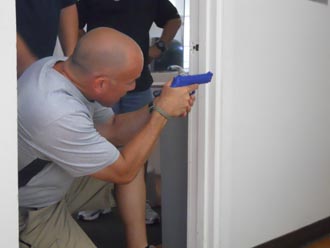 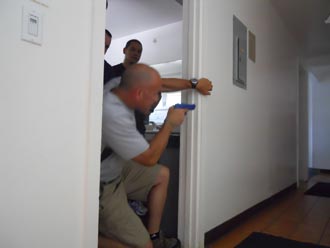
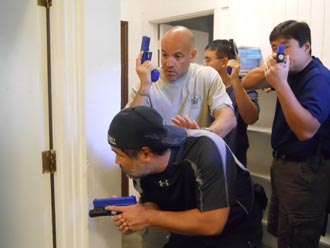
Covering areas while recessed deep in doorways increases survivability. Obvious, but often forgotten.
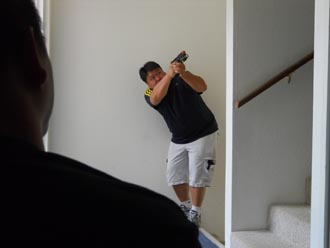
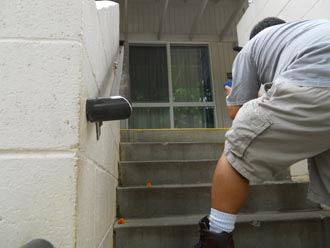
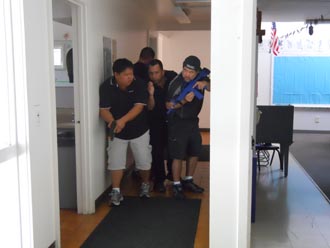
Imagine how difficult it becomes with rifles or shotguns. Don't be a slave to conventional grip of firearm.
For manueuverability, having your longgun muzzle up and bringing it into action toward threat is the better
advantage; the only sensible answer instead of the over-emphasised low readies that have been the cliche.
Imagine having any firearm down at low ready and others end up blocking your ability to get guns on target.
It is also a given that rifles and shotguns are simply longer and require more room and strength to work with.
 
 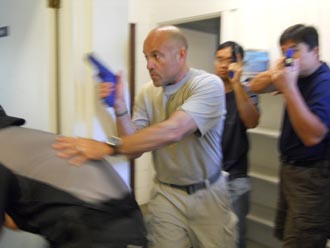
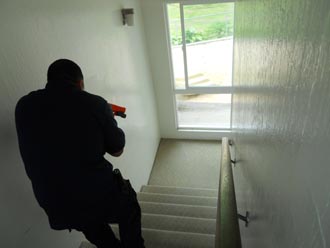
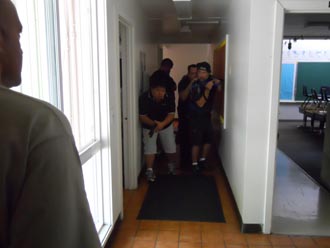
Just as pictures in sequence reveal, look and listen before charging in. Much more information is discovered
when seeing complete situation before speaking or acting too quickly. Handguns quicker to action muzzle up.
While more guns mean more coverage, more people equal even more emphasis on trigger finger discipline.
True, more on your team means less areas of responsibility per person. Reality for home defense: it's all on you.
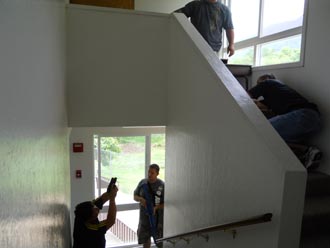
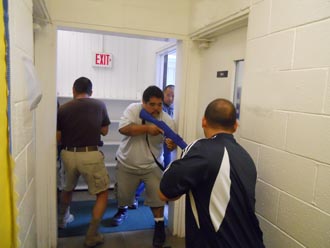
Notice how many danger areas depicted in above hallways pictures. If only you, imagine how tough it would be.
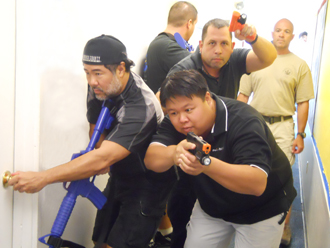 
Whether you have two, three, four or more with you - knowing how to move and deal with possible situations
if it was all on you was the basic foundation of the course, and simply understanding corners and angles.
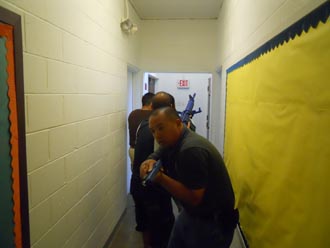 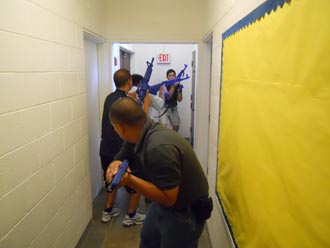
When you're in it, you're in it. Above, they are getting ready to go up a stairwell. Handguns would be easier.
Reminder: don't just charge into a bad situation. Think, use all your senses, work the corners and angles.
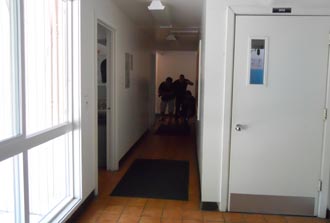 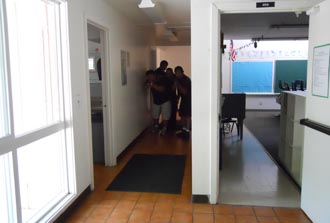
Progress down a hallway evaluated by Gabe Suarez. How things change if just one door was closed or open.
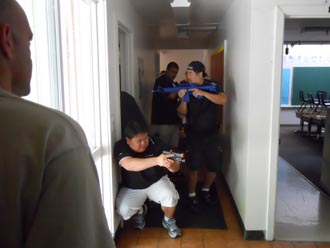
It is impossible to guarantee no muzzling of body parts in realities of CQB. Strive for muzzle discipline as well as
the best safeguard - everyone's trigger finger discipline. Wait till lights are out. That proves trigger finger discipline.
When time to move, MOVE. Amazing how so many think target range situations carry over to home defense.
If you aren't training outside of range situations, one cannot possibly consider themselves prepared for variables.
Be able to use: handguns left and right handed, longguns from left or right shoulder, unconventional firing postitions.
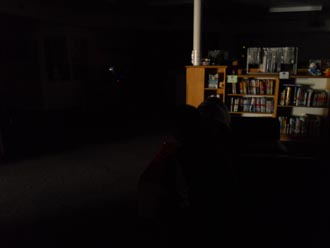 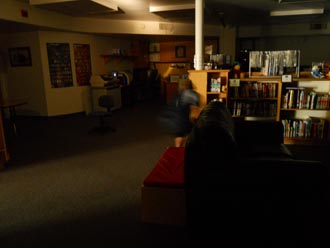
Sunlight streaming in from the left. Just one cone of light reflected off ceiling lights entire back end of the room.
That confuses hiding opponents and can illuminate situation more efficiently than scanning some areas directly.
 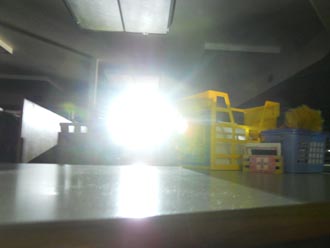
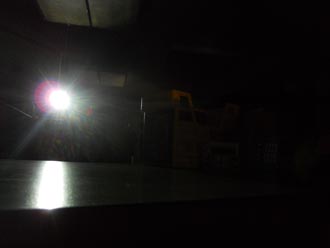 
Examples of light angles: from the perspective of hiding behind a desk. Whether direct in the eyes or not, both
sets of pictures reveal quite a bit of information. Use lights sparingly. Shine handheld lights direct and reflected.
 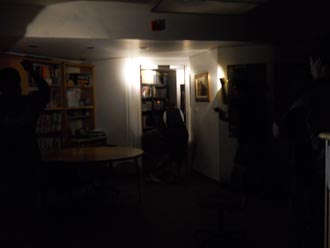
Be ready to use lights in unconventional angles and don't rely solely on dedicated gun-mounted lights. Have both.
Notice cones of light and information they can give on your position and proximity if viewed by a hiding opponent.
For dedicated handgun lights, Surefire's X300 series with activation switches for one-handed use proved superior.
Experiences learned in this course gave all the proof needed on how vital it is to train and use quality equipment.
Combat Rifle Instructor Course
by Gabe Suarez of Suarez International
A specialized three-day course for those currently in or planning to pursue the field of firearms instruction.
Gabe Suarez presented a wealth of information that was unmatched by any shooting school or organization-
teaching what works for all levels of instruction, basic to advanced, with teachings based on reality- not
cliches, gimmicks or teaching techniques based on convenience/laziness that many schools conduct today.
Yes, short barrelled rifles (SBRs) can be had. States that allow them require ATF paperwork and $200 tax.
Many portions of course reminded "simplicity is best". Where support hand naturally goes in prone with
magazine-fed military rifles: one can fixate on vertical grips but stress/brisk use changes all range habits.
Addressing often-forgotten points/issues with rifles; how important it is to know both AK and AR systems.
Avoid adding much gadgetry to your rifle. As an instructor/shooter, what you overdo, then get spoiled by,
will be distractions to students or others; will prove to cost more, encumber, & confuse in stressed use.
Be flexible in where you grip rifles and any associated additions. What often works best in varied situations
isn't necessarily going to be the latest add-on item heavily marketed by capitalist US accessory companies.
Teachbacks by every single person attending this course were tests and good challenges for many.
Being able to perform on demand - whether it was explaining a disassembly, firing position, shooting
concept or being called out to demonstrate fire live at a moment's notice - is a must for any instructor.
Being evaluated on shooting techniques and making order out of chaos was an element I thrived on.
 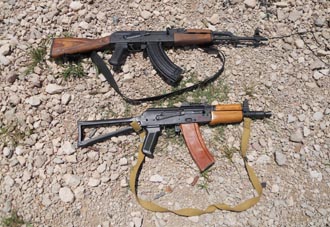
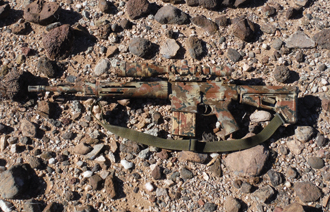
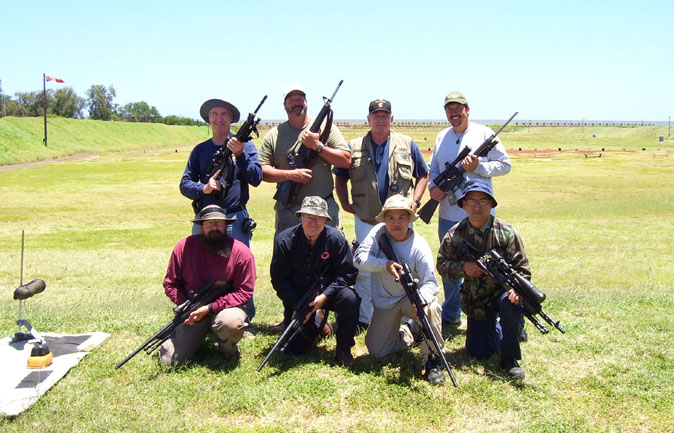
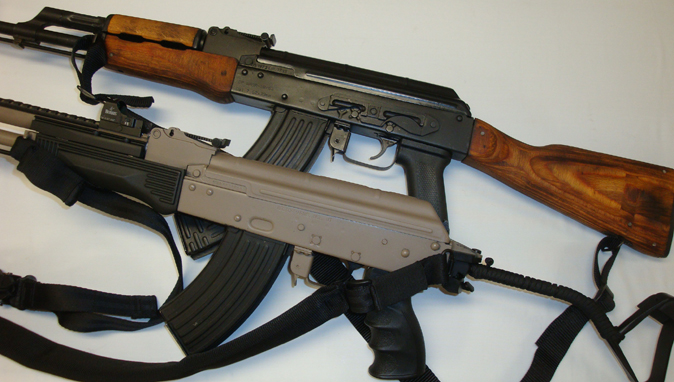
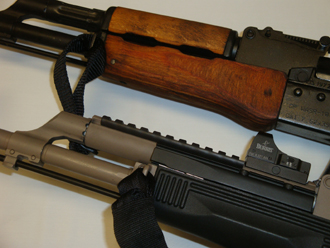
How wonderful SBRs are. (I utilized a very plain Romanian AK for the course. No surprise, it delivered.)
5.45x39 'Krinkov' below it belonged to one of the course attendees. It too was very basic and effective.
Everyone was put on the spot to continually build ability, confidence and eloquence in public speaking.
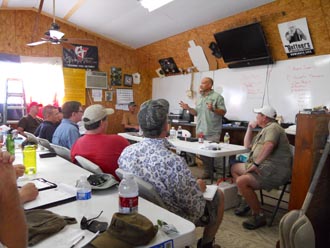
Gabe Suarez addressed many teaching concerns and gave solid tips for instructors in classroom segments.
Caliber of people, caliber of class. Constantly striving for more knowledge, improvement, skill.
That's what all shooters, gun owners, and yes, instructors - need to pursue. That's how we move forward.
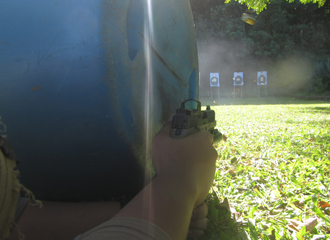
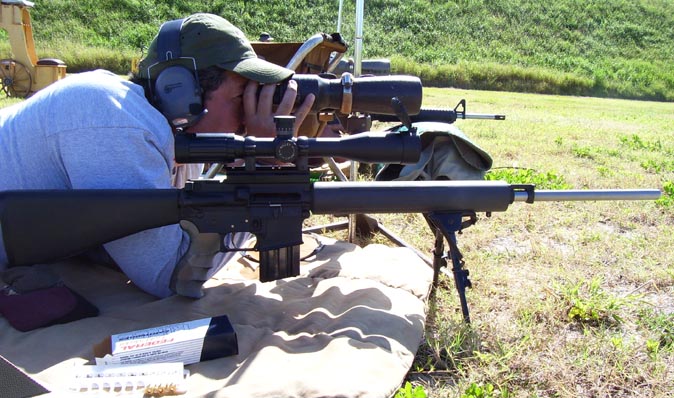
Precision Rifle Course II
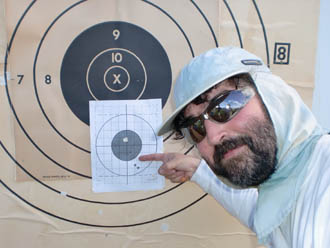
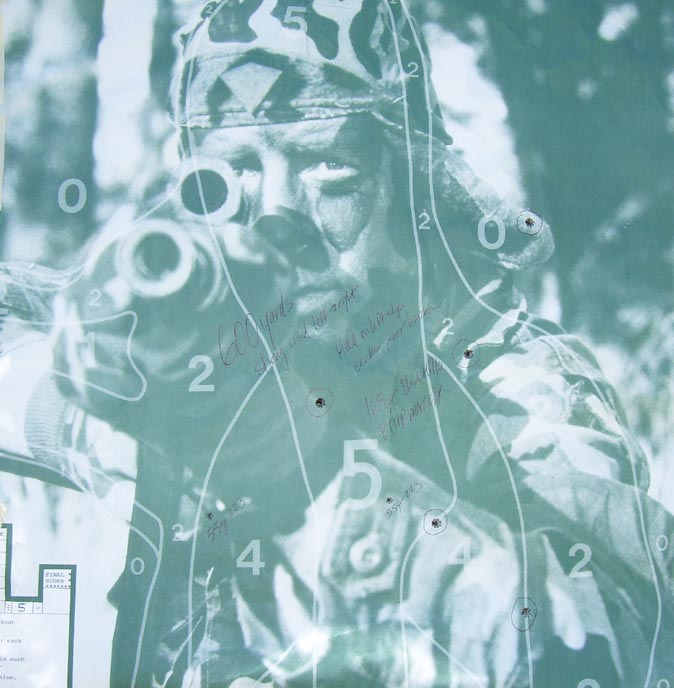
by Chuck Taylor of American Small Arms Academy
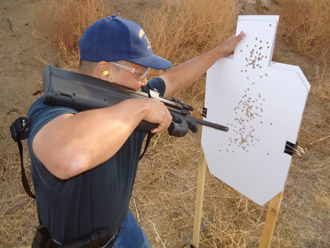
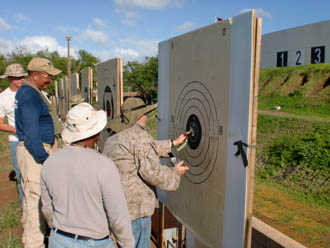
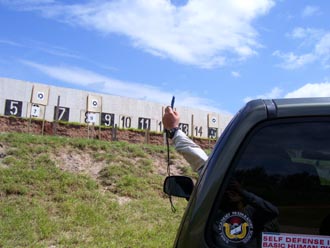
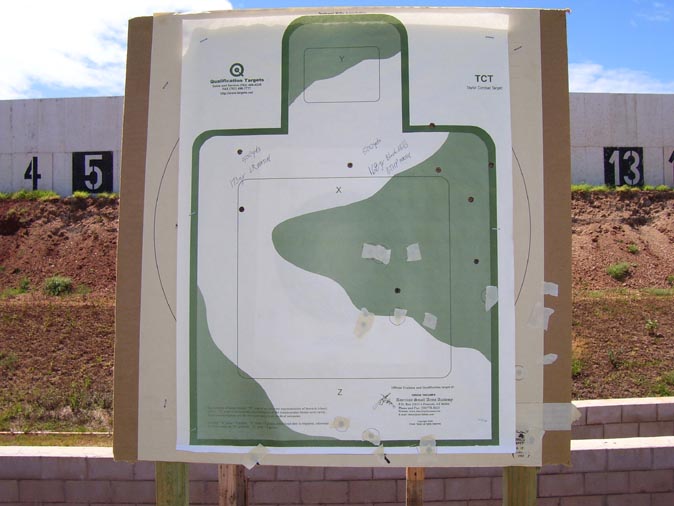
400 yards . . . large pull-down target faces are seen easily - actual targets to hit and score
for various distances were smaller and more difficult (with numerous timed stress drills for
some closer yardages 200 / 150 / 100 yards in). This course for 2009 had an appreciable
amount of tougher stress drills than a previous Precision Rifle Course - Daniel Oshima

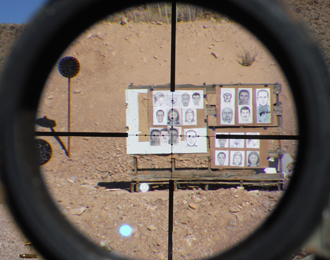
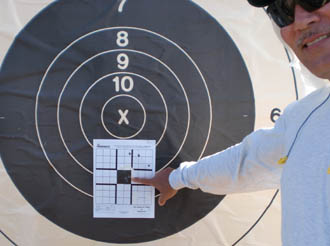
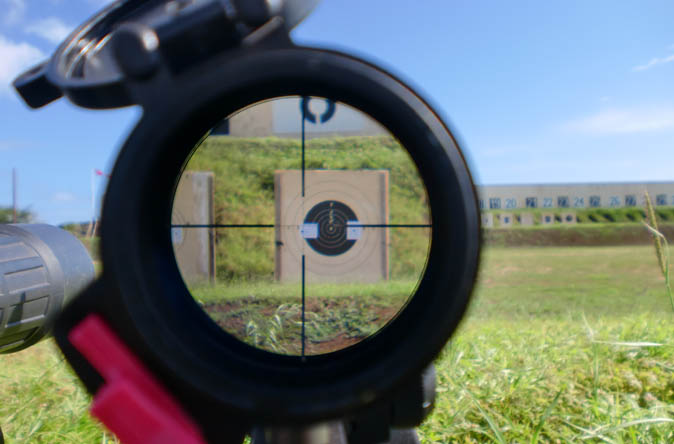
200 yards, at 9 power setting on a scope. Target is a 3" circle. Fire 3 round groups...
Image used for 8.5x11" paper size reference - of course actual aiming is conducted with
proper elevation clicks per calculated distance and crosshairs centered for actual target.
L: Rem 700 w/ handloads... R: Springfield 1903 with modern scope w/ M2 Ball ammo!
L: There are three clustered in the black square. Harder to see hits when on dark center.
R: One hit is in circle, 5 o'clock. The other two for the 3-round group easily seen in white.
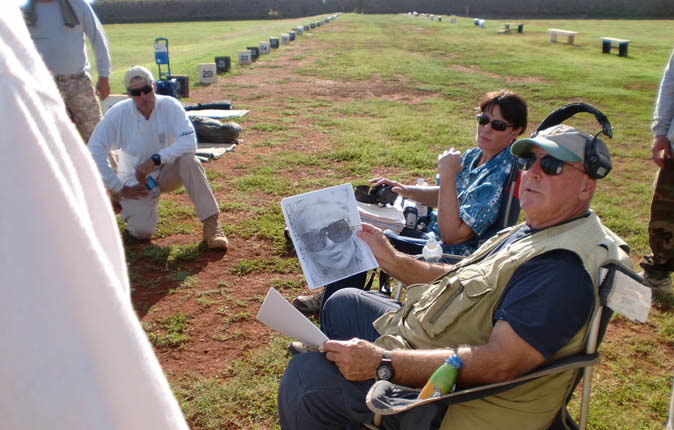
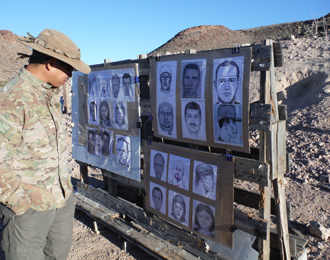
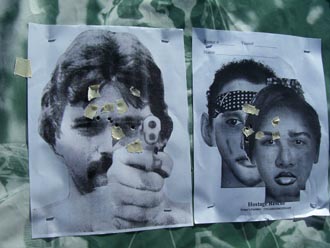
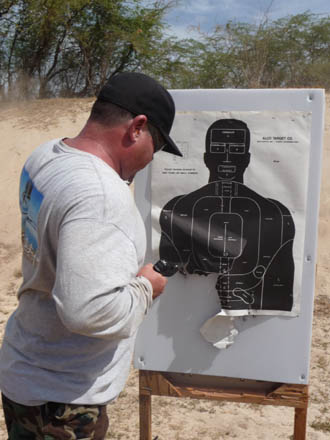
A multitude of drills for 200 yard distance included photo targets.
Oh, how so many (even in the shooting community) do not understand the training aspect...
Drills involved being set in position, round chambered, safety engaged.
Whistle blown for the go, safety off, take the shot. Photo targets got tougher in
shot opportunity (innocents, vital/ideal shot location, angles and direction of faces).
Limit of shot time allowed got progressively shorter; 5 seconds, 4, 3, and 2 seconds.
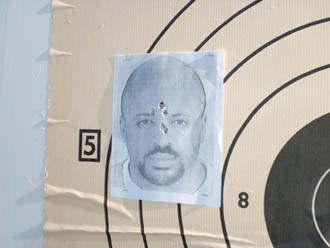 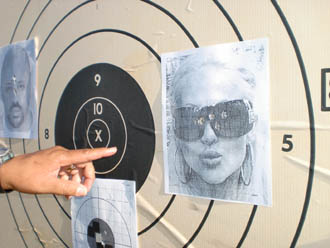
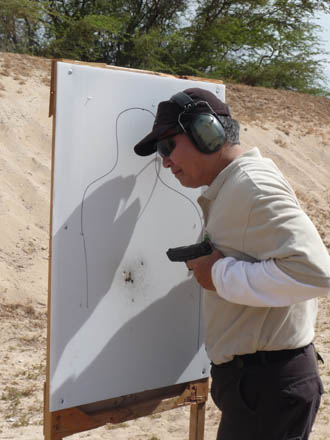
Good cranio-occular shot locations. So many in their self-righteous and lack of understanding
in training sectors (even those who agree fundamental gun ownership rights) will not like these
images. And there are those who have difficulties recognizing that continuous development in
shooting skill requires many variables - including the use of different targets such as pictures...
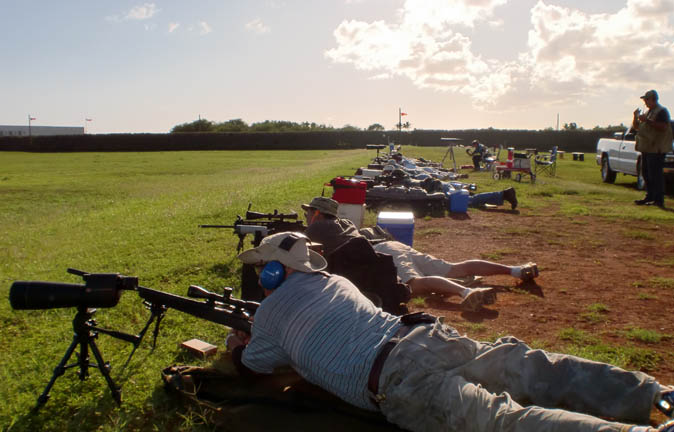
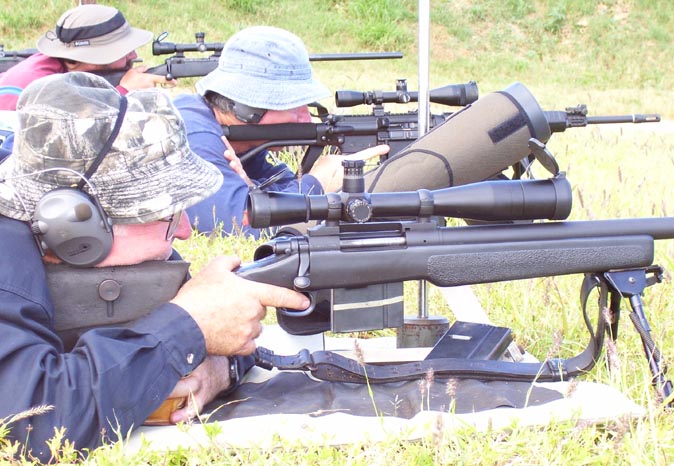
Some darn good shooting from 300 yards...
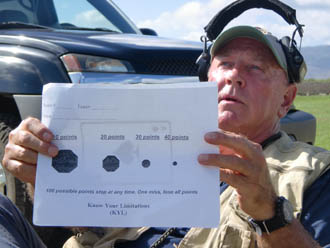 
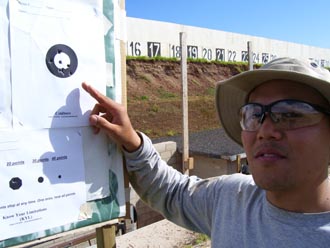
100 yard drill; notice how the red wind flags are too often horizontal in these pictures...
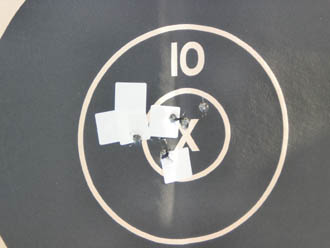
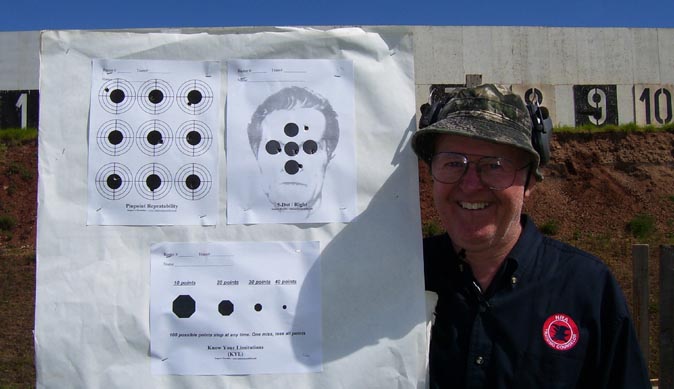
'Know Your Limitations' is absolutely right for this 100y drill. Higher power scopes make sense.
 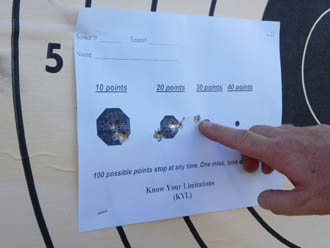
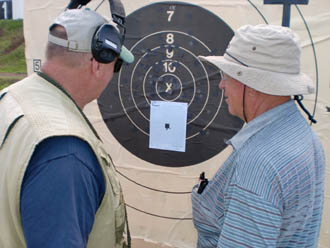
Analyzing targets - here is where you find out how good you really are (for that day!)
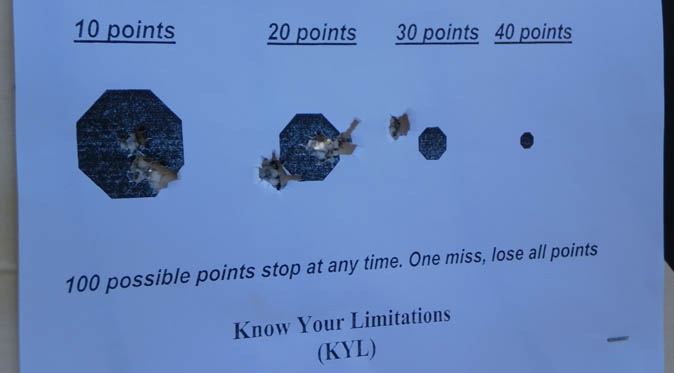
Above: 10x3=30, 20x3=60, and a clear miss from attempt at 3rd dot = total score of 0.
* * * * * * * * * * * * * * *
Precision Rifle Course I
by Chuck Taylor of American Small Arms Academy
Chuck Taylor's Precision Rifle Course is where one truly begins to understand their rifle and capabilities.
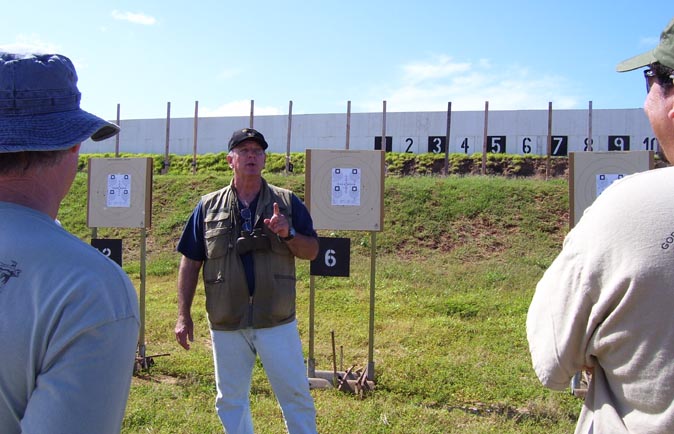
Chuck Taylor makes some points on the initial calibration of the riflescope. The first sight-in and zeroing is crucial for the long-range shooting and 'clicks' for elevation adjustments soon to be performed.
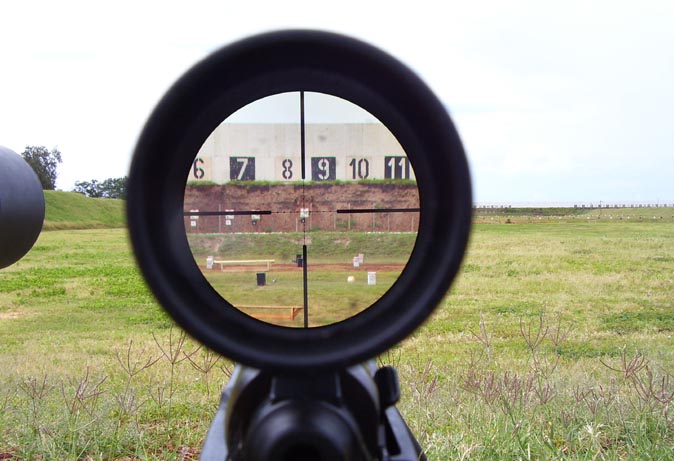
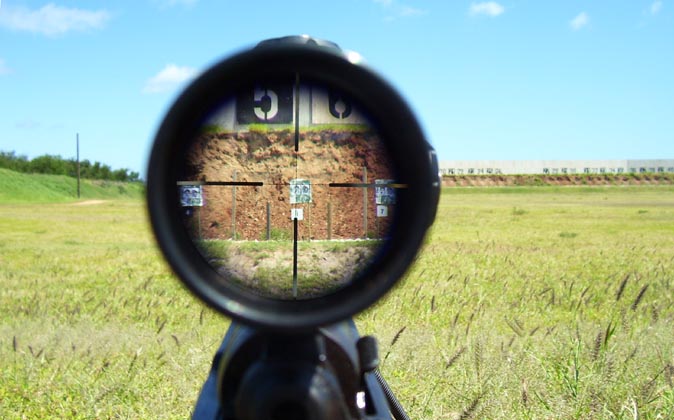
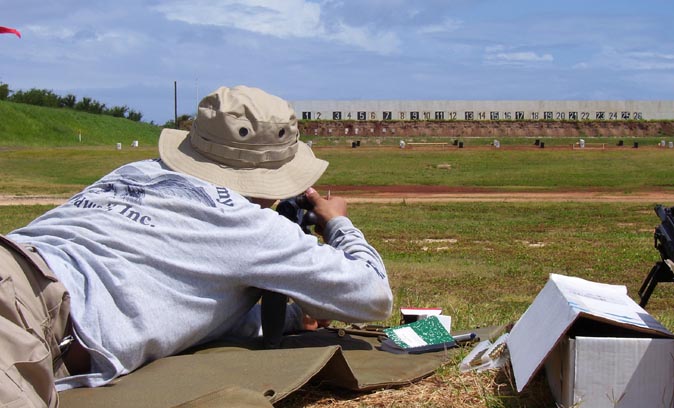
View thru the same optic at the 100 yard target for some firing drills. Drills were also timed!
"Holy crap that's far . . ." was the accurate comment. Throughout this course we used the same small target stands.
None of the typical 3-yard-wide bullseye high power rifle competition pull-down targets, just 19" wide Taylor targets.
100 yards on paper from the bench? 300 or 400yds on generous-sized steel targets? Bah, that's kindergarten level!
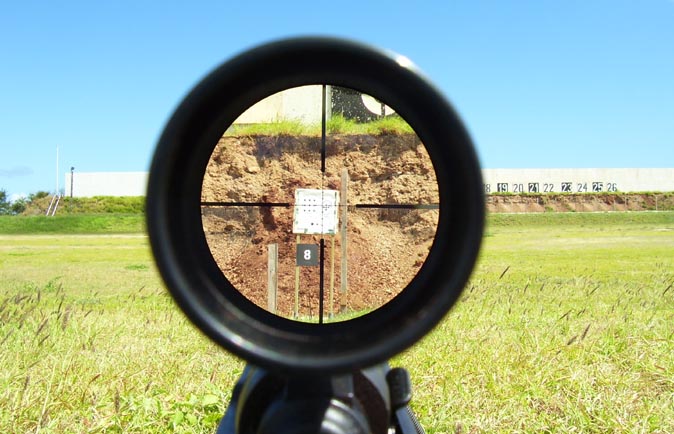
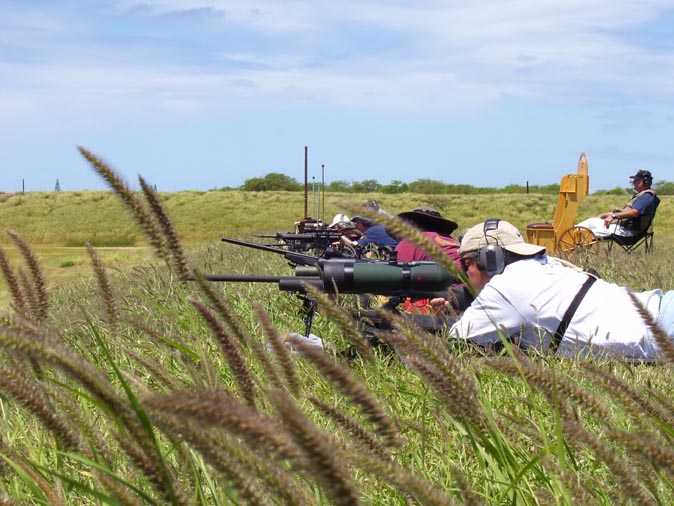
View of 400 yard firing position, from the prone. Note how tiny the actual targets are (dots of white) just to the left of the base of elevation (top) turret of scope. These dots are just visible below the base of the white wall downrange.

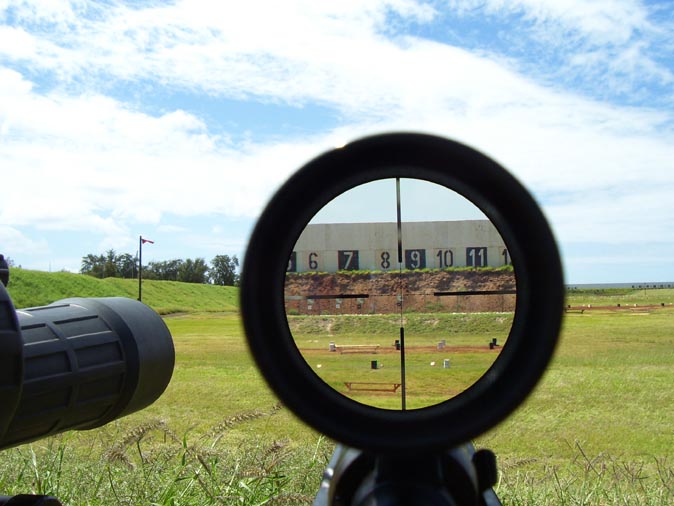
View thru a 10 power optic at that 400 yard distance. Taylor Combat Targets are small! Now you're truly shooting!
This view thru scope depicts an example of holding the crosshairs slightly up and to the left of the target.
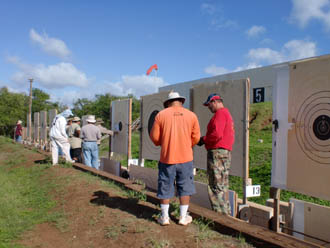
After firing 5 to 10 carefully calculated rounds for group, we would drive up to check and paste targets.
After 300 yards, it becomes tougher to confirm bullet hole grouping even with the best of the spotting scopes.
That's a Kestrel windspeed meter being held out the truck window. That device proved many wind estimates wrong.
The opening in the berm (center of pic) is where strong winds had a pronounced effect across the target line.
Left pic: Four rounds at the 400; the calculated click adjustments for elevation came out alright.
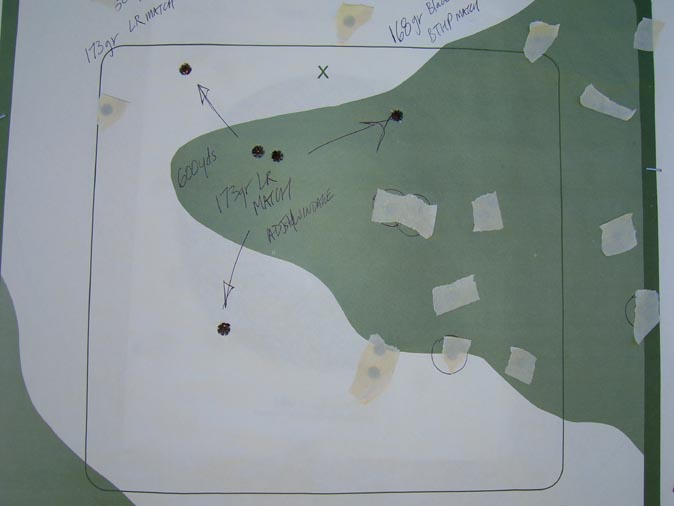
Right: At 500, gusting winds really made it a challenge. Hold a bit more to the left, and a bit more up on the clicks.
Next string of fire at 500 yards with elevation correction, slight wind correction, under time pressure.
2 rounds on upper left is 173gr long range match, 7 rounds center and right is 168gr boat-tail hollow point match.
I held the slightest more over to the left for the two 173 grainers. Refer to the scope image - we're talking very slight.
It must be emphasized again, this is at 500 yards!! VIew thru a 10x Bushnell Elite on a Savage model 10 .308.
From the 600 yard firing line, and we had timed drills from this distance as well!
View thru 10 power scope at the targets 600 yards away - Chuck Taylor's standard combat silhouette target.
The smallest error in pressing the trigger can result in crosshair movement off the target, resulting in a miss.
A fine result of calculated and refined shooting - from 600 yards, accounting for elevation drop and strong wind drift!
Back to the 600 yard line to fire another group
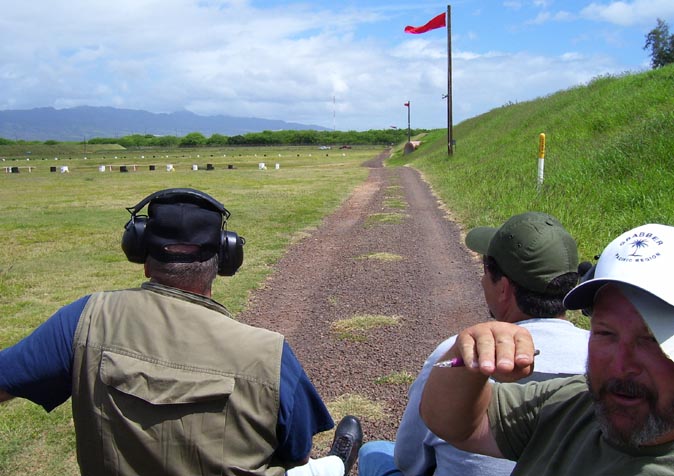
Then its time to go downrange to verify targets
"Did you get 'em?"
600 yards!! Five rounds 168gr BTHP .308 circled and two of five rounds 55gr FMJ .223 (landed in the center!)
The other three of the .223 went just right of the target, called and spotted by the help of another shooter.
Thanks to the spotting, I could correct the fire and hold the slightest more left to land those two.
Stress drill #1
At the 200 yard line, we had a whole new concept of threat-hostage targets.
This is the view of the targets at 200 yards through a 10 power scope. Note that while a 20 power scope sounds good, it will magnify that much more all the heartbeats and muscle tremors of the shooter.
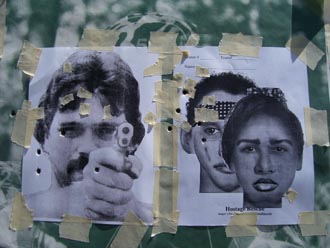 
The results of holding a bit too left for the wind, and "playing it safe" on the hostage target. The right pic shows how it should look. For bullet hole recognition, the left pic is .308 and the right is .223. The drills for these targets were:
(1) Start with rifle chambered, safety on. On the whistle, 5 seconds to take safety off and fire 1 round. Repeat 5 X.
(2) Start rifle chambered, safety on. On the whistle, 5 sec to take safety off and fire 1 round at hostage target, 5 X.
(3) Rifle chambered, two rounds safety on. On whistle, 7 seconds to take safety off and fire 1 round each at hostage target and threat target. Remember, this is at 200 yards and there is wind to contend with along with the time stress.
Stress drill #2
Concentration and consistency are requirements of precision shooting, much more so when dealing with timed drills.
100 yard head target on right had a required 5 rounds total (1 in each dot) in 1 minute. Max gets 4 out of 5 in the drill.
This is Sunday day 2 near the end of the hot afternoon, very good considering the time limit and exhaustion.
Stress drill #3
There were also several demanding drills based on increased heart rate and timed fire. The 10 round, 10 sec drill:
Rifles are loaded and round chambered, safeties on. Shooter starts from standing, start whistle is blown,
and you have 10 seconds to get down to prone position and make the shot.
Repeat for 10 rounds. All shots must land in three inch circle. Successful results in pic above: I went for the gusto and used two different loads in the drill: 5 rounds of Federal 150gr FMJ and 5 rounds of Black Hills 168gr BTHP.
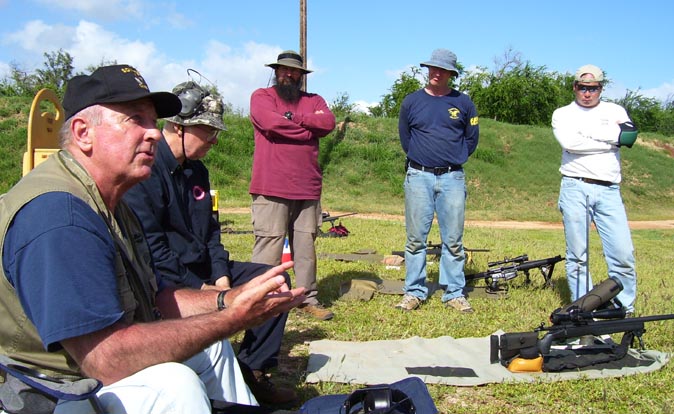
In debriefing, Chuck Taylor summed up the crucial points of the course and reinforced what really matters in precision rifle shooting and the equipment for it (and no surprise here) along with the proper mindset.
Equipment for the course: I used a Savage 10 FP straight out of the box, Ken Farrell one piece scope base,
Weaver scope rings, Bushnell Elite 3200 series 10x40 fixed power scope, and Harris 9-13" tilt leg notch bipod.
This course was a condensed shooting portion of the 7-day course from ASAA, firing from 100-600 yards.
This was a super opportunity to shoot long distance and see how one does with their long range rig!
Synopsis of the 7-day full version of the course is:
http://www.chucktaylorasaa.com/rifle.html
* * * * * * * * * * * *
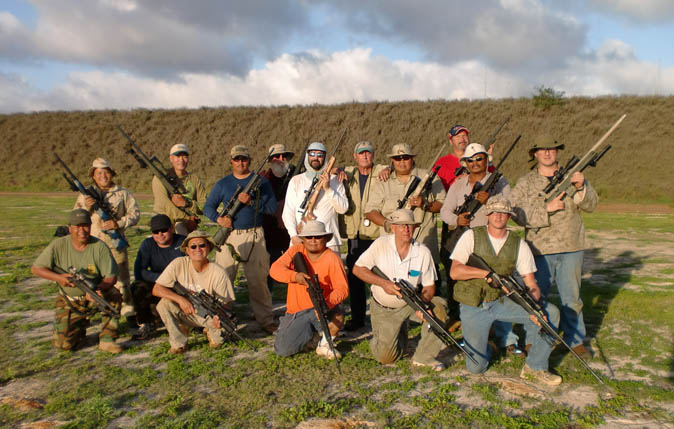
Advanced Kalashnikov Rifle Gunfighting
conducted by guest instructor GABE SUAREZ of SUAREZ INTERNATIONAL
Highlights from two hot days of genuine training and skill-building with your AK or other military rifle:
Any semiauto military style magazine-fed rifle is welcome! Train and learn with what you have!
Gabe Suarez addresses recommended (sensible) equipment, the nature of the course,
and how simple guns and gear are best due to the unlimited unknown possibilities per situation.
Here's where so many have a near heart attack on absolutely real-world use of such firearms...
Being able to maneuver rifle, change direction and altitude quick to respond to any possible threat
with others in a group or team is important. EVERYONE claiming to have any skill with any firearm needs to be capable of such maneuvers. It is a given that the rifles and magazines were checked
and confirmed empty. It is given that utmost discipline of trigger finger was performed. What many
still do not understand is how one just needs to be careful and not careless with muzzle discipline.
For those that do not understand (or refuse to) - then they just may never understand team tactics.
Many will not like these images, yet if one isn't doing this and being accustomed to such situations,
how can they say they would trust others, their friends, etc in a real crisis?!? Being able to instantly
change direction and height of firing position is extremely important, esp. while working with partners.
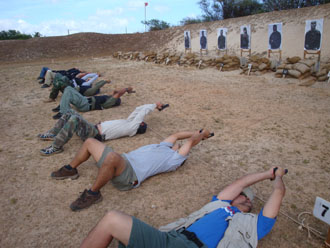
Work thru all firing possibilities; on ground, from back, various prone, kneeling, etc - both sides!
Upon a directional sound or command, everyone snaps into another position and a different height.
Lateral movement while covering an area and alternating firing from two or more team members -
- not the typical "standard shooting school material" or "standard course content"...
If not experienced, practiced and immensely familiar, that's when people suffer negligent discharges!
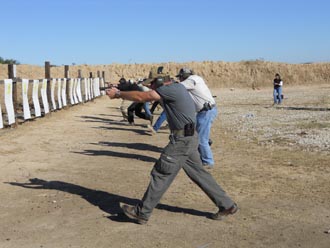
Work aggressive forward angles movement as well - both sides - to the 1 o'clock and 11 o'clock!
And drills with fire-and-maneuver movements to the rear; while covering for each other.
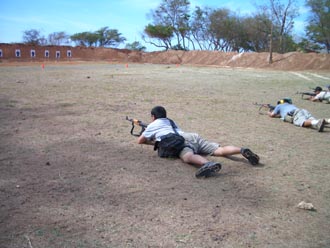
Following is sequence for a final drill in working as a pair in advancing forward: fire-and-maneuver...
Team movements, working as a pair from 100 yards up to 25 yard position.
Starting point 100 yards from targets...
At the sound of shots fired, move to positions and suppress opponents for each other.
Recognizing realistic distances to sprint to and cover for each other is important.
Communicating movement / reloading / covering for each other is vital.
Brisk movement to new position is done only when partner has confirmed they are covering you!

Movement up the hill and the sloped sides was the best part of the run!
Shouting out communication "covering!" "moving!" etc was a motivator...
Dusty, dirty, and absolutely charged up could be a few descriptives from the two grueling days!
This is where training and great fun really begins!
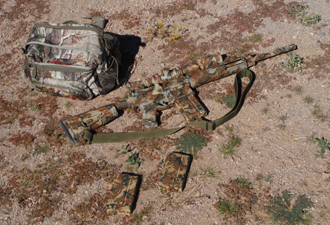
Basic gear (simple is best!) that was utilized in the class:
 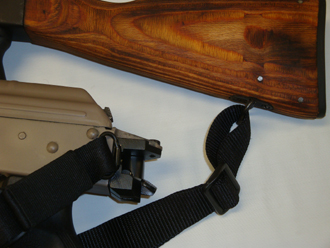
A standard two-point sling is perfectly ok, and in many situations will prove to be more than adequate.
Simply thread a $5 nylon sling (or as pricey variant that you want) thru front and rear sling mount points.
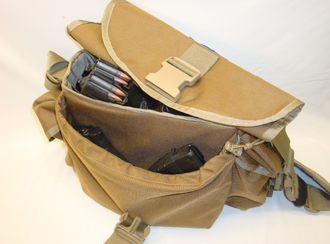 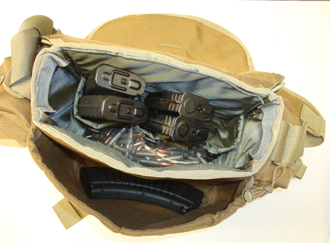
A discreet Sneaky Bag ("6-mag version" shown) holds six mags and ammo inside main compartment,
and empty mags go in the outer dump compartment. Side pouches, nondescript appearance = practical.
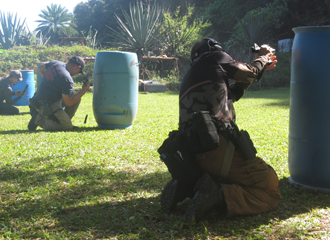
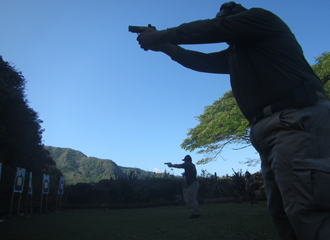
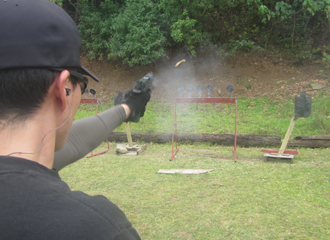
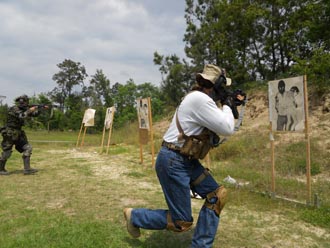
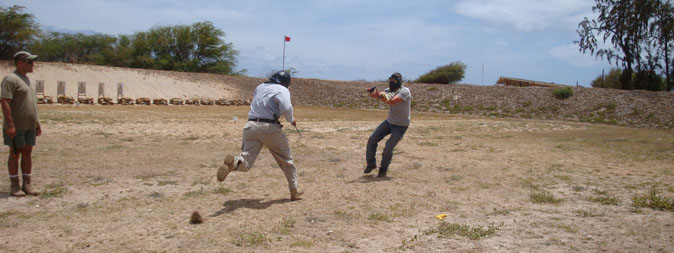
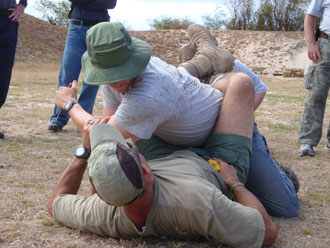
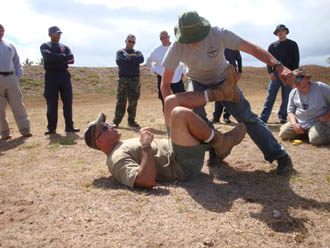
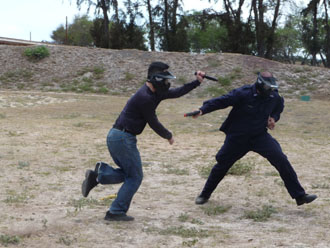
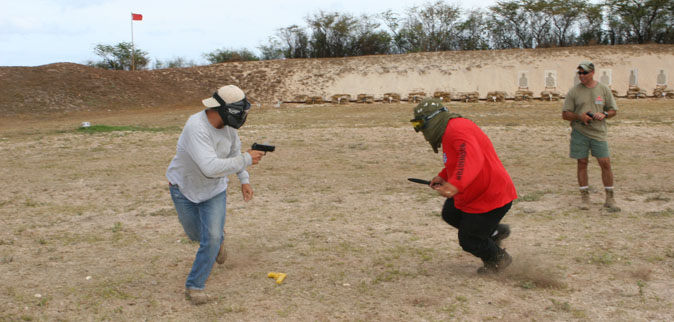
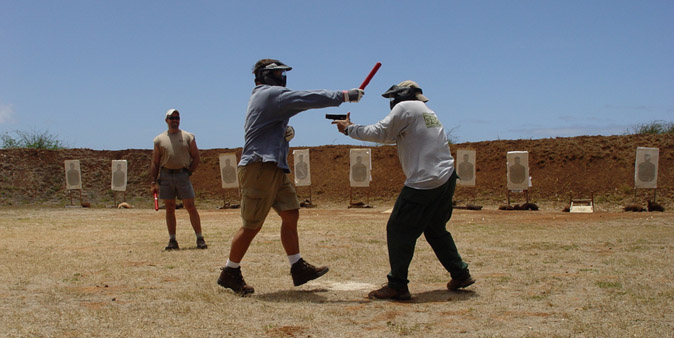
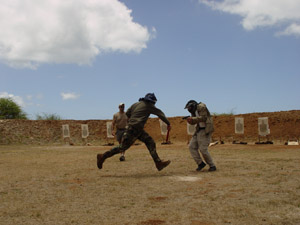
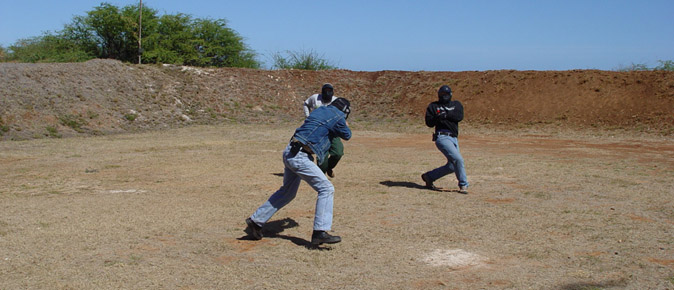
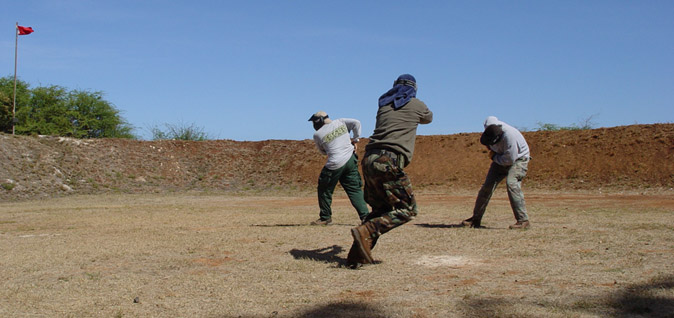
Extreme Close Range Gunfighting
by Gabe Suarez of Suarez International
What would you do in these situations? If your training doesn't include force-on-force experiences,
you may not survive an attack! Be honest with yourself and your training. How many continue believing
that conventional square range training and drills will suffice - for such varied predicaments like these?
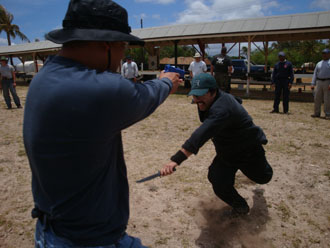 
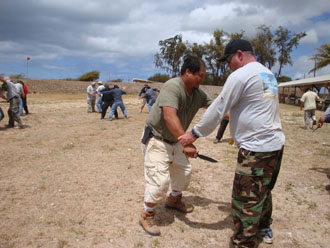
Knives at center of both photos above. Extremely different predicaments; same deadly possibility.
 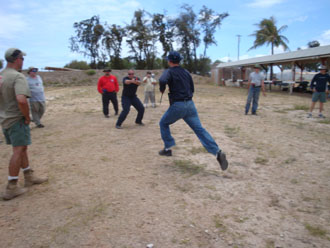
Very bad situations. What could you do if faced with the above? Opponents aren't paper targets!
Pictures tell half the tale - be here in the thick of it and truly experience what too many will never learn -
and then it is too late. How so many in America can claim to know such content as this is beyond belief.
Gabe Suarez began teaching Force-On-Force many years ago; and very few nationwide have heard of it.
Airsoft guns become a valuable training tool above and beyond the gaming or replica product they are.
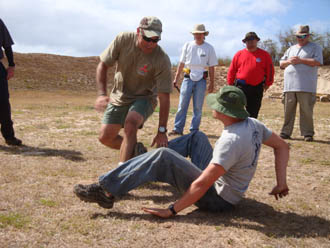
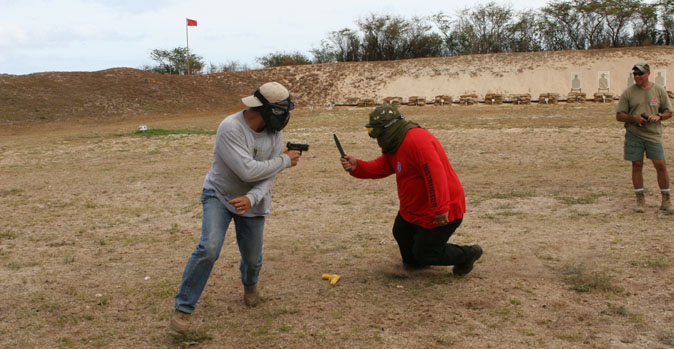
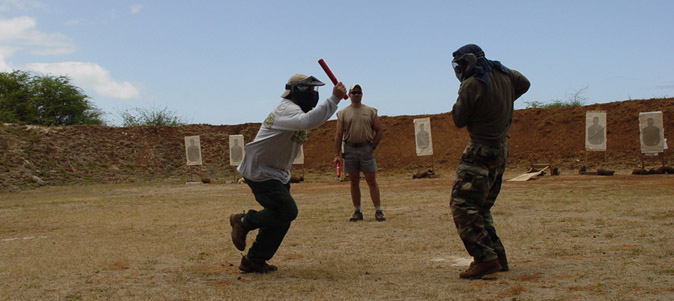
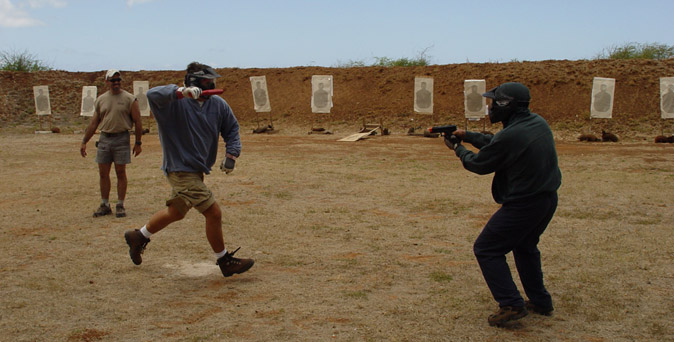
Moving quick off the line of attack is the only way to survive a rush from an assailant with knife.
Standing in the same spot or only taking a few steps offline will not be good enough!
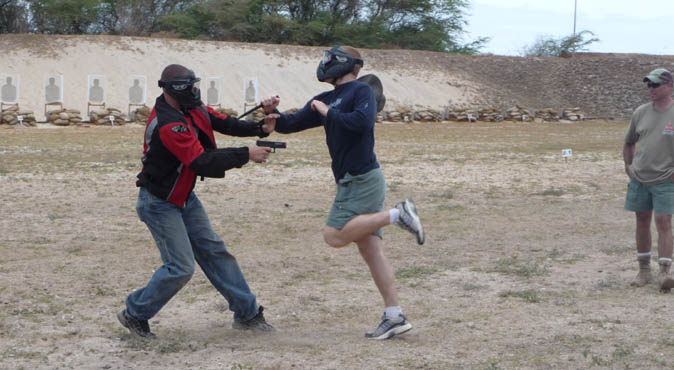
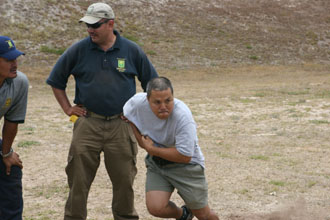
Most in the course presented their handguns from concealment upon the attack, not from range holsters.
Defendant had to move quick. Otherwise, you could find yourself on the ground, in a worse predicament.
Amazing how many 'top tier' shooting schools never cover this vast arena of dangerous possibilities...
... and how many are in denial of getting enrolled in such valuable down-and-dirty training.
"you won't need to know such material - just be fast..." some will say. In force-on-force, try it and see.

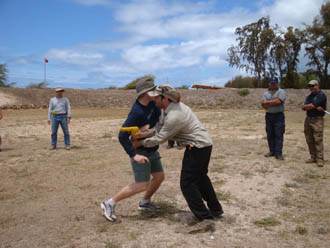
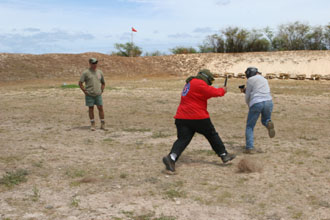
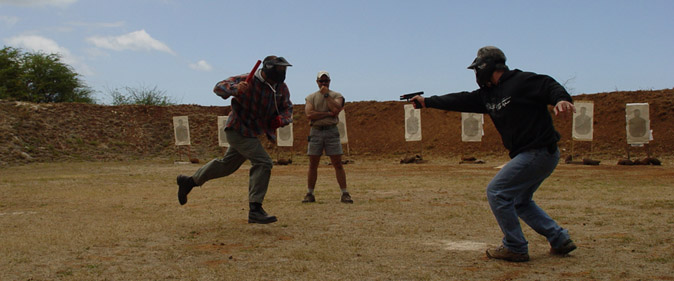
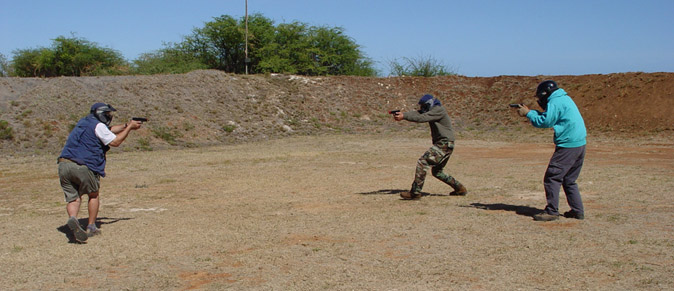
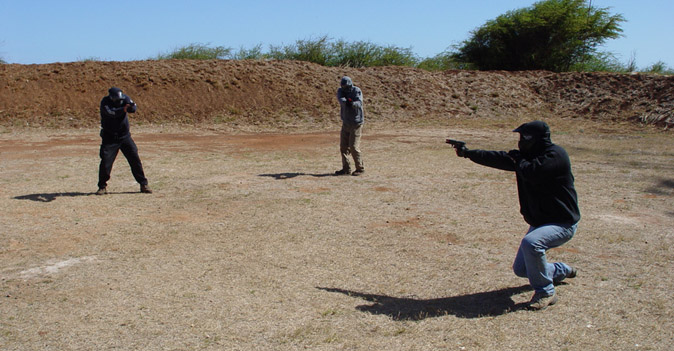
Above: defendant (white shirt) facing camera, assailant here has back to camera.
Upon assailant's presentation of handgun, defendant MOVES QUICK, drawing and firing simultaneously.

Your fighting chance improves when you get off the line of attack!
Staying in one spot, sidestepping, back peddling or turning 180 and fleeing are not good options.

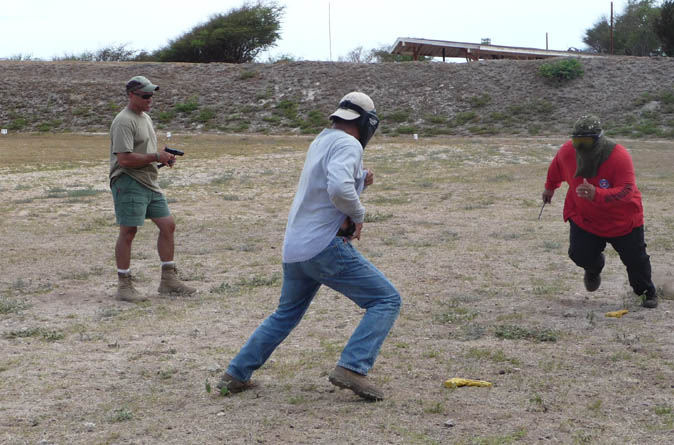
Above: this time, defendant (blue shirt) back to camera, explodes off the X to make the hits on assailant.
Everyone begins to realize how fast situations go bad, and how important it is to move - aggressively!
 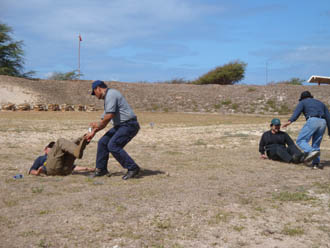
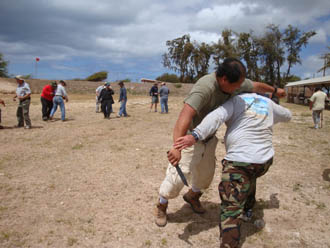
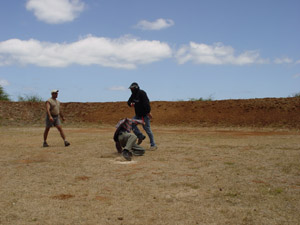
Being mobile and capable on ground is important. If you find yourself knocked down how will you react?
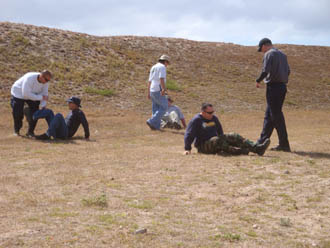 
Accessing your defensive firearm is also another story, and what if opponent has a blade or firearm?
Rehearsing techniques dry, then running them live brings the stark reminder that anything can happen.
Consider how many in the carry world have not even done these drills once, or do them regularly.
Now that is scary. Without force on force drills and difficult firing positions being regularly practiced,
how can people claim to be "good enough" or ready for everyday carry?!? Raise your standards higher!
Conducting different, challenging drills with serious purpose is a welcome departure from typical shooting.
Close retention firing and other up-close-and in-your-face techniques were experienced.
Fighting your way up from the ground may involve firing from different positions.
 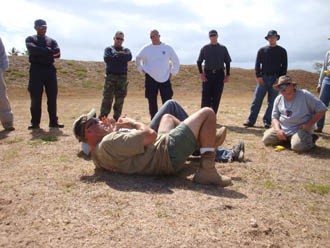
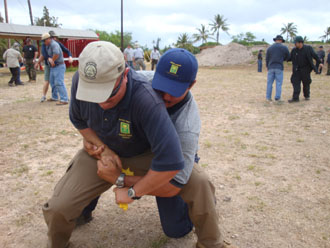
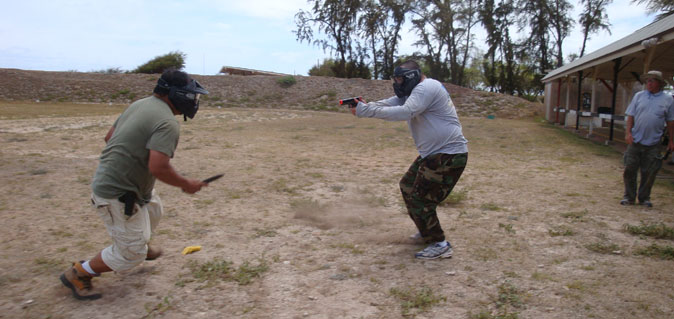
Here is a situation... so attacker with knife is brought down - but if defendant only tries to turn away,
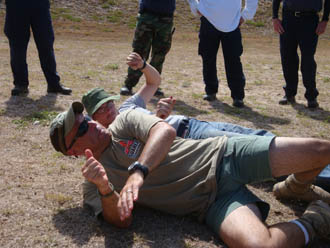 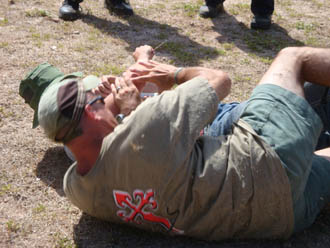
a stab may be the only guarantee. Better to close distance, trap that knife arm and use your handgun.
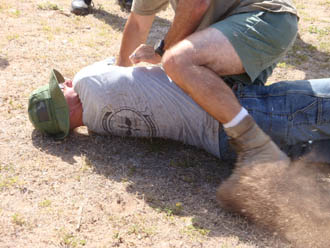 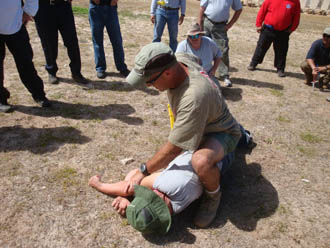
Ground fighting changes considerably when a blade is introduced to the picture.
It's not just stopping the attack, but employing your defensive handgun - and still attempt to avoid the blade!
Yellow guns on ground are markers for defendant and aggressor's start positions...
Look at how quick the situation develops... and how quick the distance gets covered...
If defendant stood ground and only performed step-back or speed rock, it would be a bad outcome.
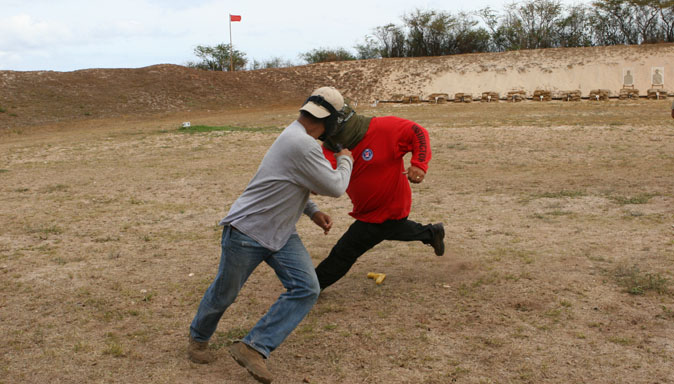
Move off line while presenting defensive handgun and get shots into the opponent!
What a truly great course, with good company and the most fun building serious skill!
Smith TKD Kickboxing
Train at Smith Taekwondo in Kickboxing, build valuable cardio and experience physical exertion!
Kickboxing Mon / Wed / Fri nights 7-8pm
Check Smith Taekwondo website and Facebook for updates.
For those who want to advance their effective abilities; attend consistently, every week.
 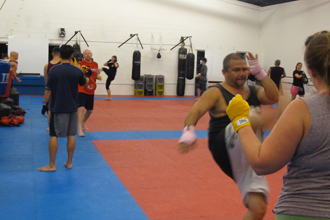
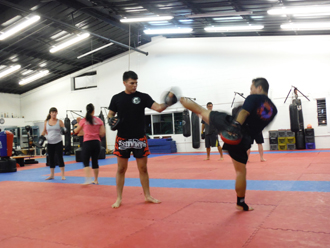 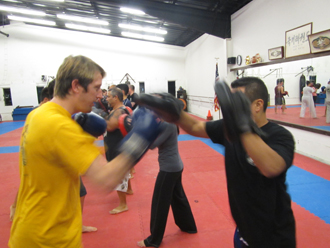
Build up technique and put in the work! Welcome physical exertion and cardio!
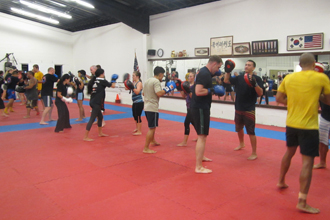 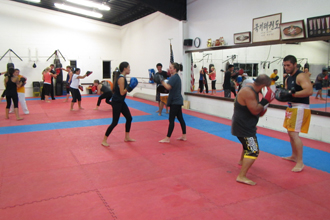
 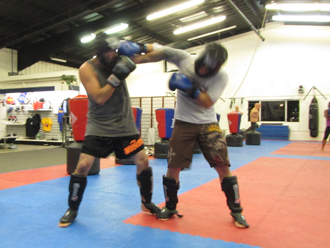
What can offense/defense follow up with? Invaluable experience is gained in sparring!
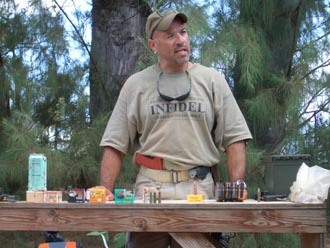
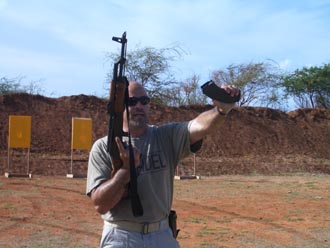
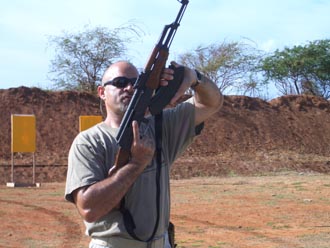
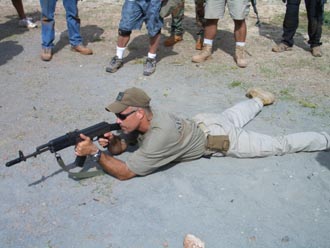
Kalashnikov Rifle Gunfighting
by Gabe Suarez of Suarez International
 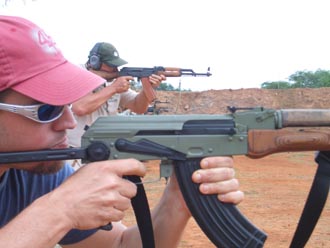
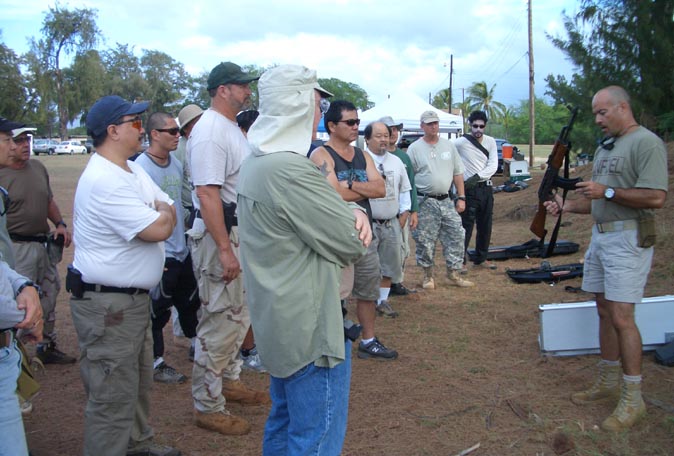
After safety brief and course introduction, Gabe Suarez addresses the overview and characteristics of the AK.
Throughout this course (which compressed five-day course content into 2 fast-paced days) many accelerated
concepts were introduced and practiced. When dynamic movement (some 360 manoevers and using the AK
as a defensive tool in striking opponents) was drilled, thorough mag/chamber checks were always performed.
 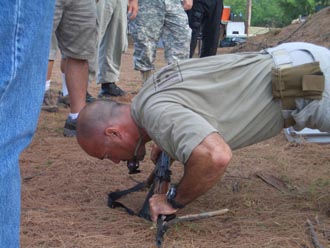
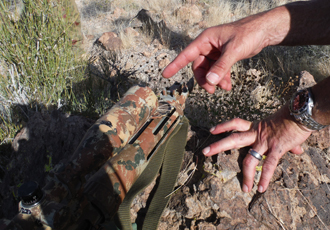
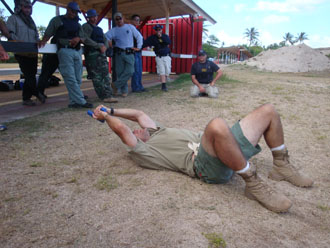
He also references real situational usage of the AK, including what proved to be a great confidence and stamina
builder for this course - performing pushups with the AK, balancing on the magazine. More on that in pics later.
ASP training redgun is at appendix carry on his belt; Gabe also presented some good ideas for appendix carry.
Conventional shooting involves focusing on front sight. Stress fire concept within closer ranges aligns front sight
assembly on threat target to allow speed and still results in effective centered hits even if threat is now the focus.
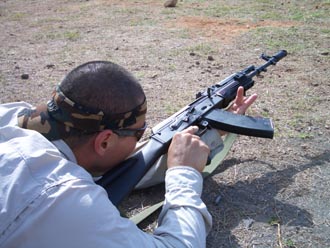
Even loading the AK has a 'best answer': holding and indexing the mag with support hand, strong hand on grip,
 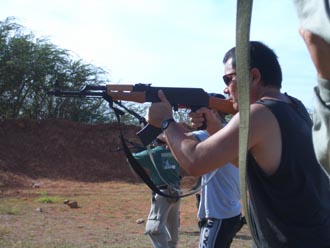
insert mag, turn rifle ejection port towards right side, run bolt to rear and release, aquire sights and the target.
Sight-to-bore difference (similar to AR-15/M-16 rifles) reminder: approx 2 inches between sight line and bore.
What you wanted to hit or what you aimed at may well be some distance from where the bullets actually land.
 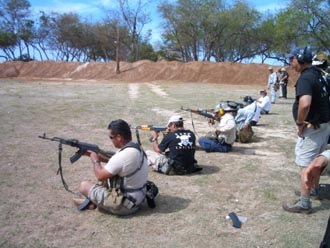
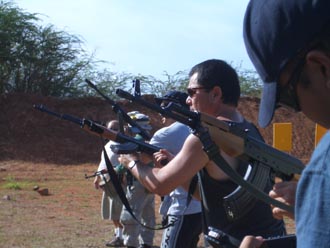
Prone, sitting, squat, and standing position drills. All performed from both left and right shoulders.

What a great day!! Good company, actual training (not benched shooting!), and constant development of skills.
This is just 50 yards; add movement, firing from both left and right shoulders, and top it off with a reality check
(what if the targets were actual threats) - and now the truth of needing to hit accurately becomes very apparent.
Getting off the X and moving immediately was the standard for all drills after initial sight-in check at distance.
Transfering rifle right and left shoulder while moving was drilled. Dynamics of balance and physical conditioning
is very much a forgotten goal in firearm courses, Gabe made everyone aware of it - and it is fun, believe me!
That was a subtle reminder of just how strong the AK rifle and magazine system is. Try that with other rifles....
Discussions on the AK system, magazines and ammunition produced very good ideas as to what is necessary.
Spare magazine load concept for this course was simply "carry what you need and realistically what you can"
and consider the tight spots you may be in (loads of mag change drills were done in some tough positions).
It is quickly discovered that bulging thigh or chest rigs for mags can get in the way during rough situations.
On the line, get into the position, - and more AK pushups . . .
 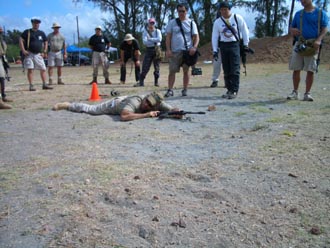
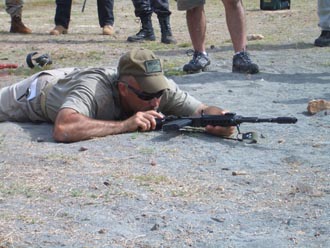 
Getting very close to ground may be necessary; how about loading from this position? Reload drills were also
conducted in kneeling, down on your stomach, on your back, with rifle indexed from right and left shoulders.
Working in pairs, advancing from one covered position to the next, strict muzzle discipline and paying attention
to proper verbal communication had everyone stressed yet elated on this drill. Controlled cover fire was a must.
Training with a purpose!
* * * * * * * * *
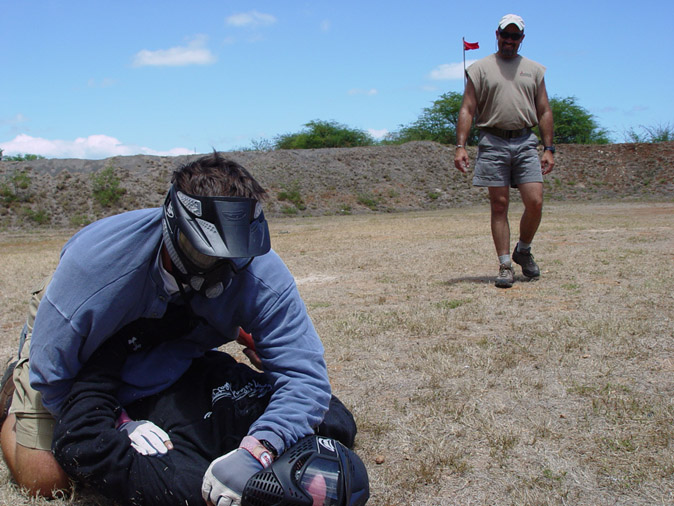
Force-On-Force Gunfighting
by Gabe Suarez of Suarez International
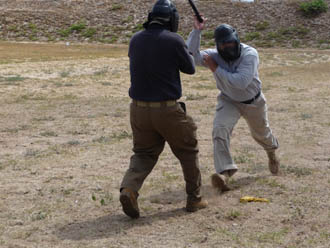
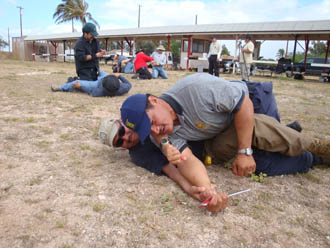
Force-On-Force with Airsoft pistols and Trainer knives / Soft Sticks are the final culmination of serious training.
This brings it full circle and only ensures that there is always more room to learn and improve on. These images from the course are the most serious reality check - the aggressor must be dealt with and this is where it just might be the applicable answer of "be generous with the contents of your magazine". Sure, often quoted is the customary "two to the body", assess, "one to the head"- yet that may not be enough or in time to save you.
As Suarez looks on, this is definitely not a desirable outcome. Shots fired at this point will not stop the attacker's knife as it continues downward slash across your neck and arm; blood will flow from you and most likely you will
not make it to any hospital to survive this attack. It wouldn't matter if you did hit your threat!
Totally undesirable also. Do you think the attacker's momentum will be stopped?
Do you think the defendant will even get his concealed handgun out in time? Obvious answer is: NO
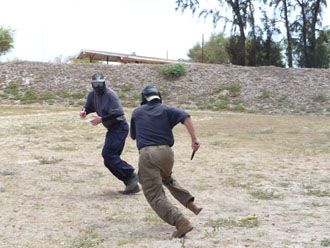
Starting to look better; the defender has got to move out of the way, and keep firing and hit the threat.
This is much smoother to accomplish now, as the previous day put emphasis on movement firing drills.

Here is a great image of the defendant moving off the line of attack. He was able to send four shots to the threat.
Mr. Suarez is smiling as the attacker yells something humorous. Who says hard core training can't be fun?
Absolutely bad news. Guns, knives, whatever - you'd rather not be cut/shot/etc AND end up on the ground.
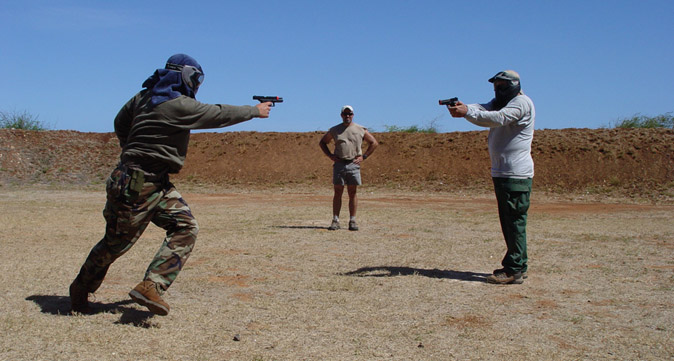
Great training yet very grim at the same time. Remember, presentation of defendant's gun is from concealment!
And, being fast 'on the draw' is not enough; you'd have to HIT the threat AND MOVE off line as well!
Here is the start of real nightmares: TWO aggressors.
Even when beginning with one aggressor making the first move, and then the second joins in, it is real tough.
You MUST move - otherwise you will end up being hit.
More at www.suarezinternational.com
|
Kaneohe
Gun Shop
45-1117 Kamehameha Hwy.
Kaneohe, HI 96744
Ph: 808.247.3036
|
|